Blog

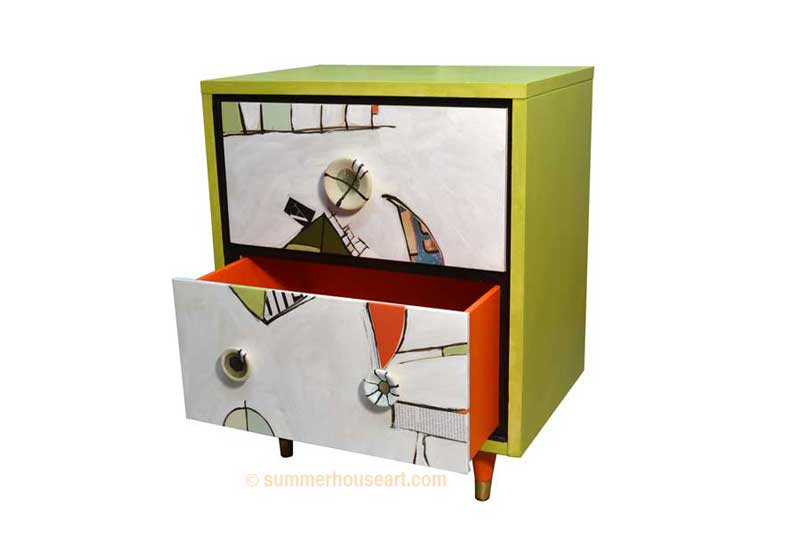
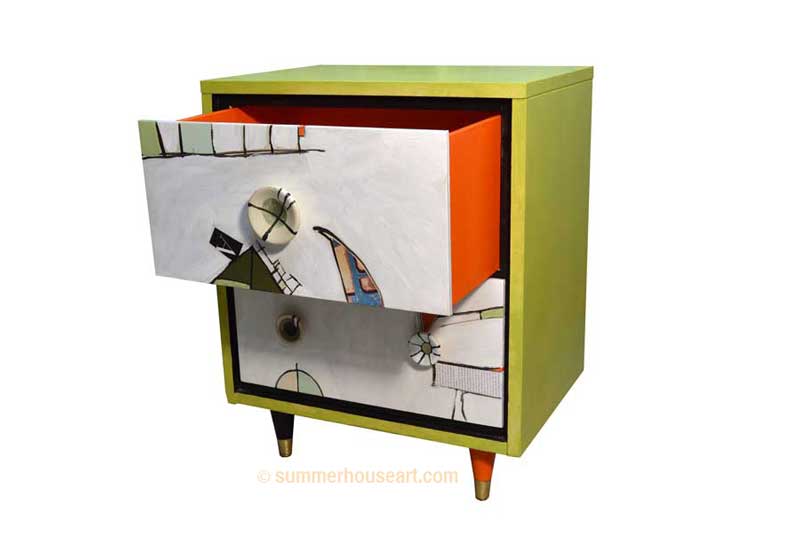
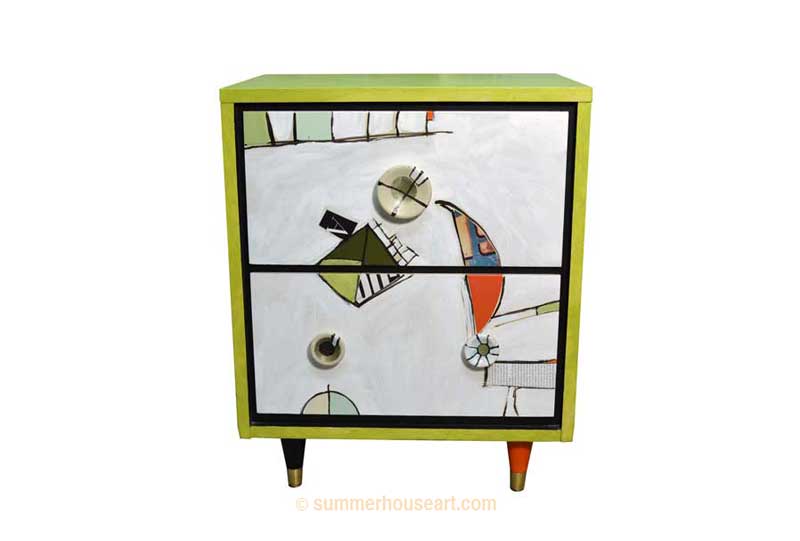
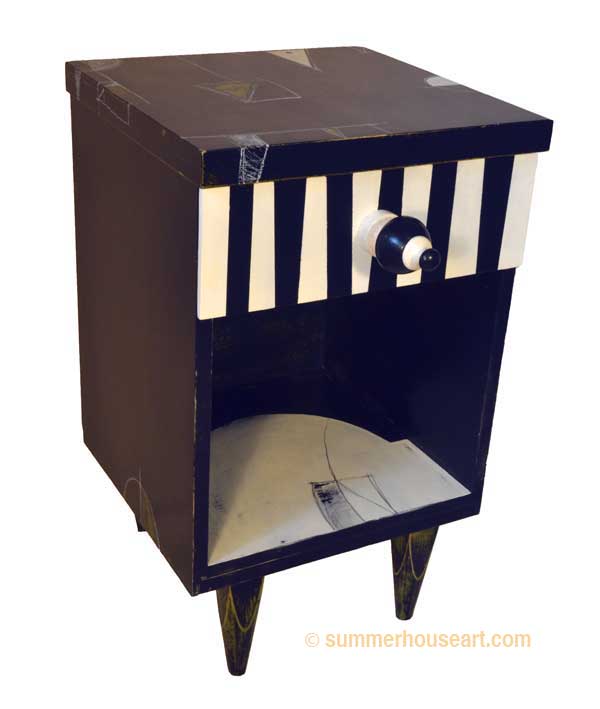
A Bedside Table, appropriately titled, “Night Flyer”

This little night table is next in our series of upcycled furniture pieces. As we’ve gone on our Saturday garage sailing travels this summer we’ve found some lovely bits of furniture.

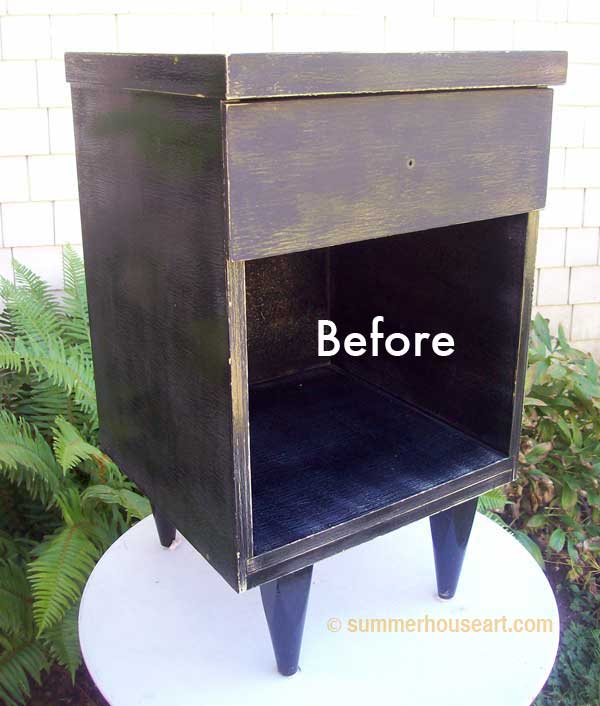
Bits that we are slowly and carefully applying our version of artistry to. This little night table started out as a rather plain black night table.

Black side Table Before

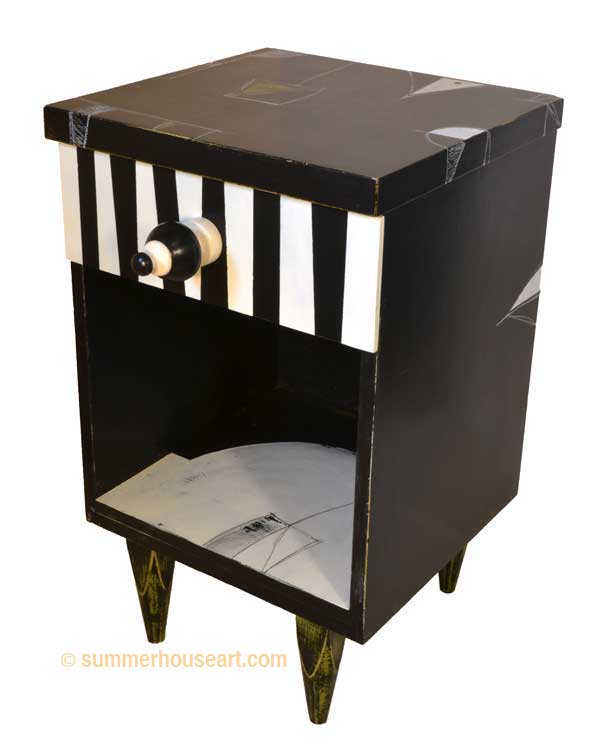
Black side table transformed
Will wandered around it for some time, waiting to find out what to do with it, or as he said, what the table told him it wanted. Finally, he decided that it wanted to be black and white. So the stripes on the drawer appeared.

Black side striped drawer
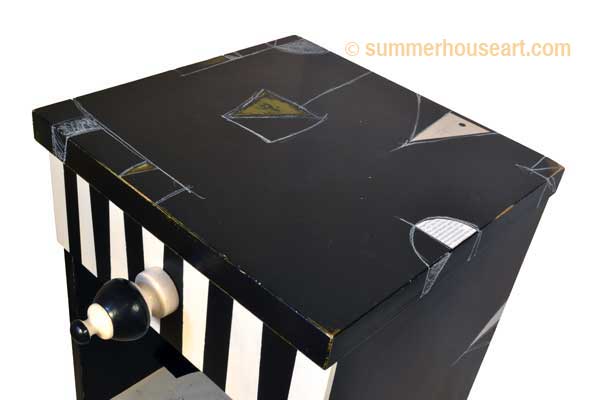
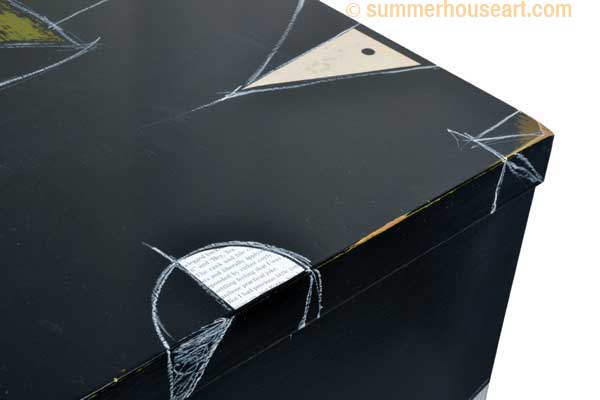
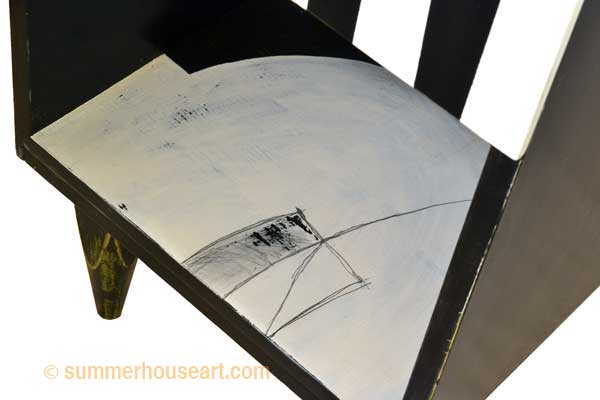
From that point on, it became a 3D painting. And not just on the drawer front as on the Green Night Table. The whole table became a painting where collaged bits appeared, and sanding down to the old colors to bring out it’s history and a bit of texture too.

Black side table painted top

Black side table painted interior

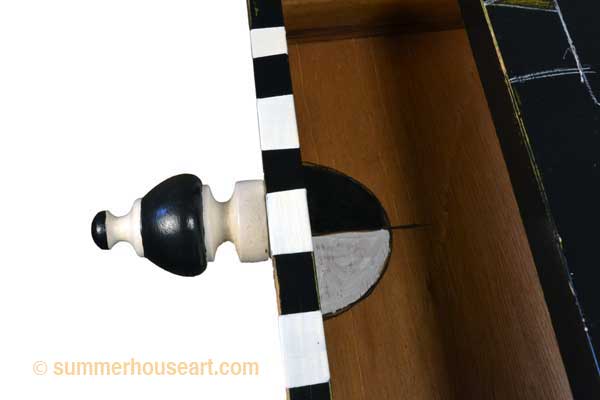
I rather like what sanding brought out in the legs, myself. The final flourish was the black and white drawer pull, oversized but with a definite sense of humour.

Night Flyer Table drawer pull

And yes, it does have a title, also after long deliberation. It’s called “Night Flyer”. Appropriate, don’t you think, for a night table?  This table, along with other art furniture we’ve made is now listed for sale on Diggit, a local online sales site.

"Night Flyer" Table By Will Bushell
“Night Flyer” Table By Will Bushell


Share

How I arted up a Garden Gnome

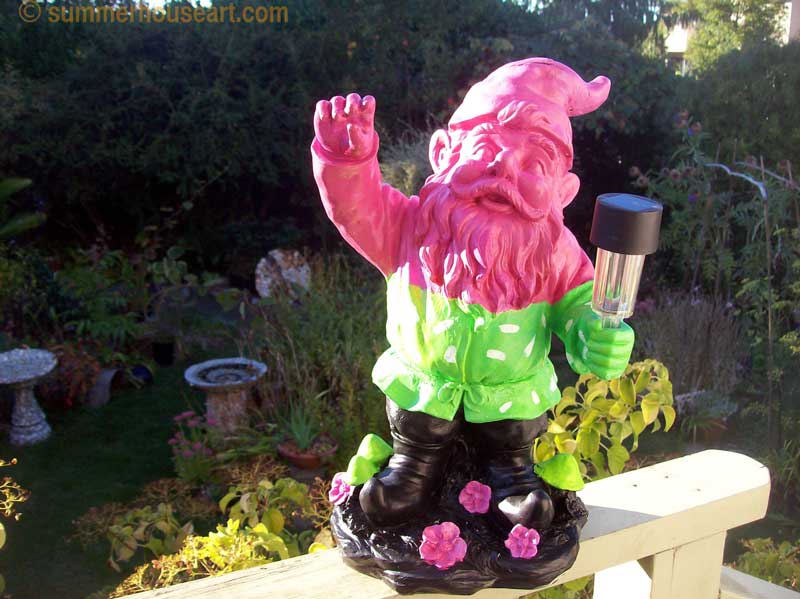
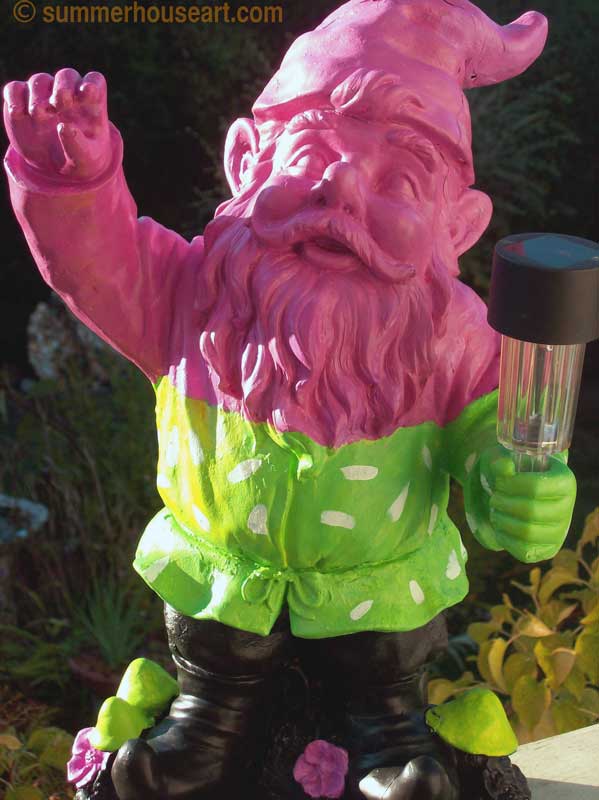
Ok, I admit it.  I bought a garden gnome at a garage sale last summer.  Will shook his head, he could not believe I actually paid for it and brought it home.  It was, I must also admit, really awful.  Made out of resin which had cracked, the paint job on it was an attempt to repair a fading mess.  It was dirty and covered in pine needles.  And then it sat on our deck all winter because, although I meant to repaint, it I hadn’t decided quite how….yet.    Until today, when it all clicked, out of the blue or pink as you can see.

gnome-landscape

OK, I also admit that this inspired paint job was not without a bit of inspiration from another artist.    One in Italy, of all places, with a web site called The Good Machinery,  that I happened to see and of course, Pin, on Pinterest.  And what this artist did with little plastic toys was, I thought, pure genius.   Well I thought so…..

So here it is,  my garden gnome, inspired by,  but after all, totally reinvented and refurbished by me.  And it was fun too.  He did need something to hold and in another inspired moment, I fitted him with a solar garden light.  I think he’s going to fit right in.

gnome-close-up


Share

The Rescue of the Little Magazine Stand

I wish I had a “before” photo of this little magazine stand. Somehow, when I decided to start on it, taking photos was not on my mind. The table started out as a piece of furniture found at a garage sale, one of those projects people start, don’t finish and want to get out site.


The sides that held the magazines were missing, the table itself was stripped, badly. And there it sat, sort of forlorn really, almost waiting for a new start. We talk these days about “rescue dogs”, but that day I felt like I needed to rescue this little table. So I brought it home.

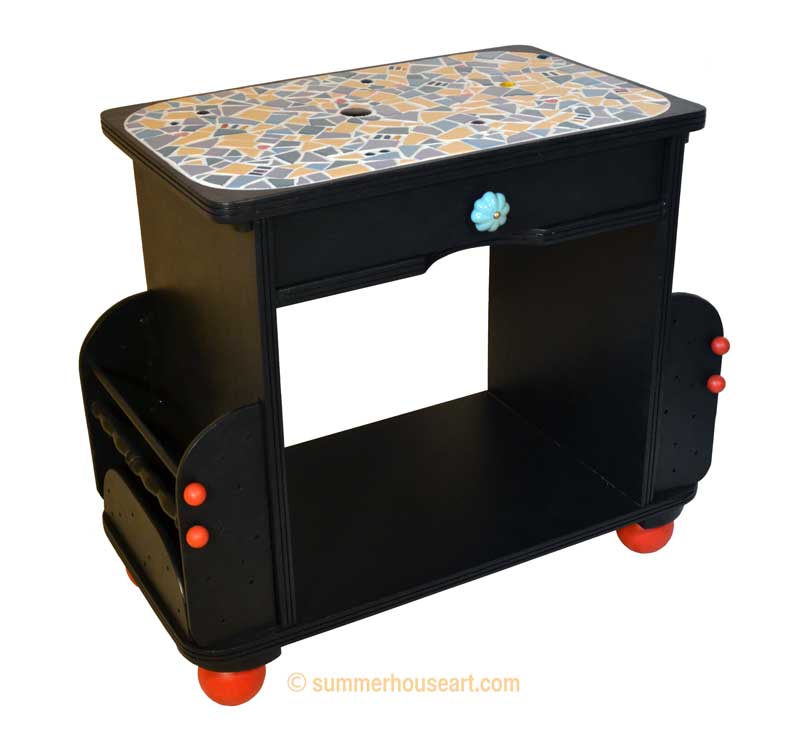
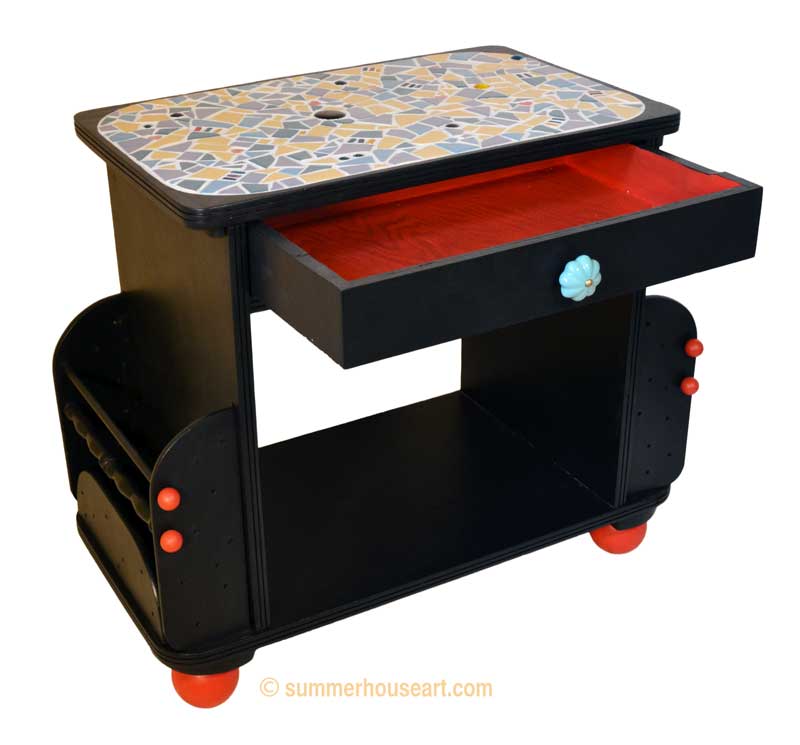
Magazine Table with mosaic top

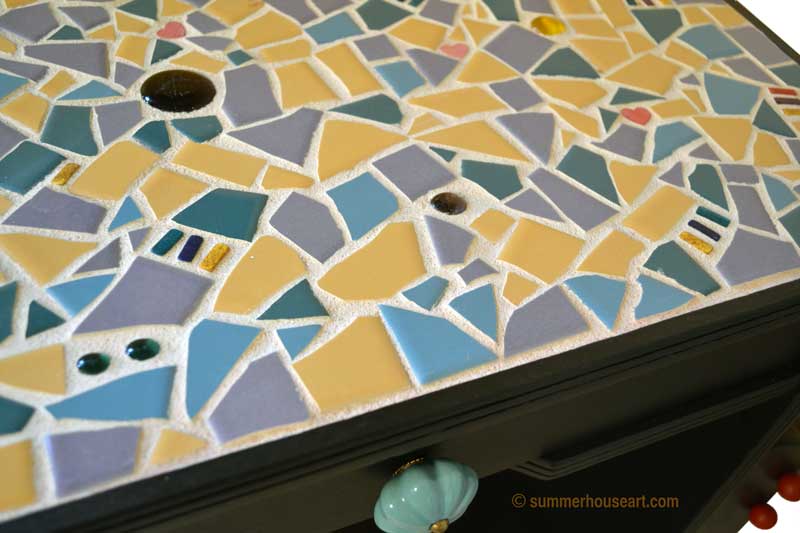
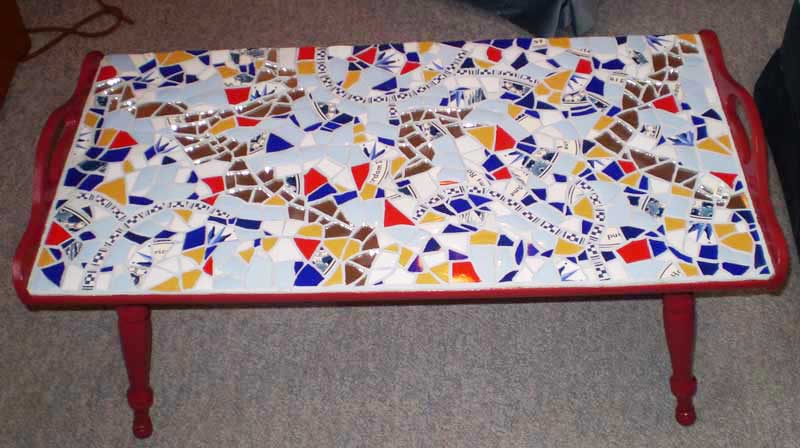
The first thing I decided it needed was a mosaic on the top.  And luckily, Will made it so easy by routing out most of top to create an area to put mosaic in, so that it would be flush with the top.  I chose happy colors for the mosaic. 

Mosaic top detail

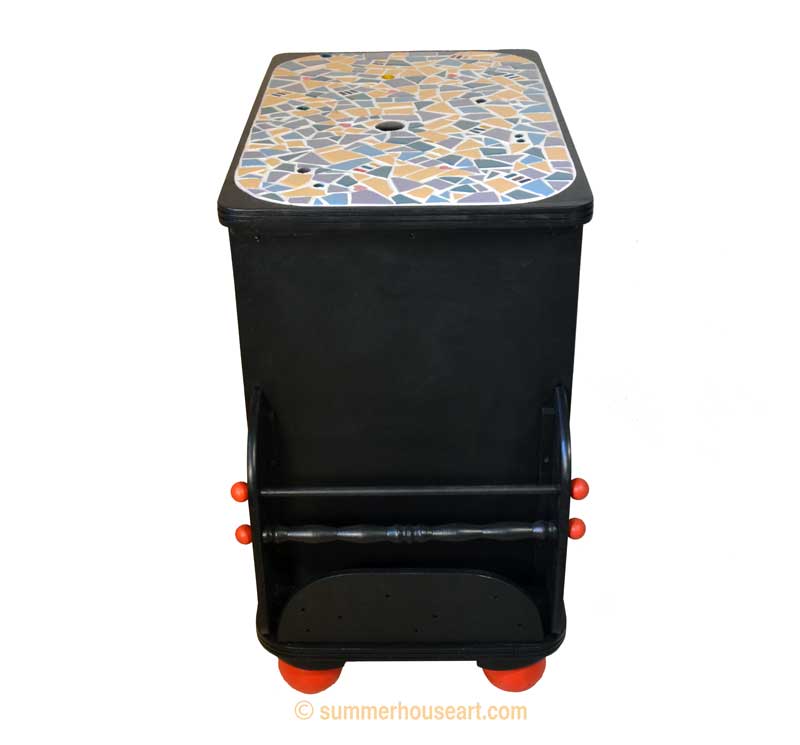
The next problem was to create new sides for holding the magazines. We looked up the styles, we pondered, we threw some ideas around, but none seemed to work.     Then one day I just happened to notice an old wall display shelf, one of those odd ones with little turned spindles between the shelves and we basically cut in half and created two whole new sides for the little table.

Side view

In fact the holes that the spindles went through originally, were added to, to become a design element of circles which we carried on with the round wooden feet, made from wooden balls found at a lumber store.

mosaic table with red drawer

Then it was just a matter of choosing colors. Black with punchy little red round feet just struck me as the answer. Which led to the little red balls on the ends of the new spindles to carry on the theme.

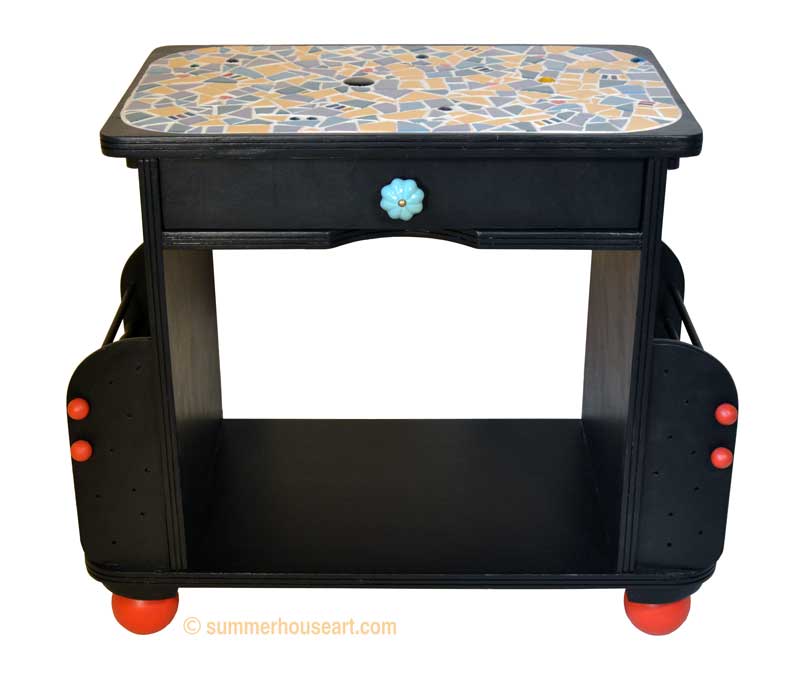
All in all, it has been rescued, reborn and re-created. It looks so much happier than that forlorn little table in the driveway. It almost needs a name. Will says, “How about CoCo? That’s sort of a round and happy name.” So CoCo it is. Now that it’s been rescued, it really needs a new home.  It’s now on our new shop on Diggit.

mosaic table front view


Share

The Story of the Little Green Night Table

Almost everything creative that we do has some connection to recycling. My mosaics are made from recycled or as Will likes to say “upcycled” dishes and ornaments.

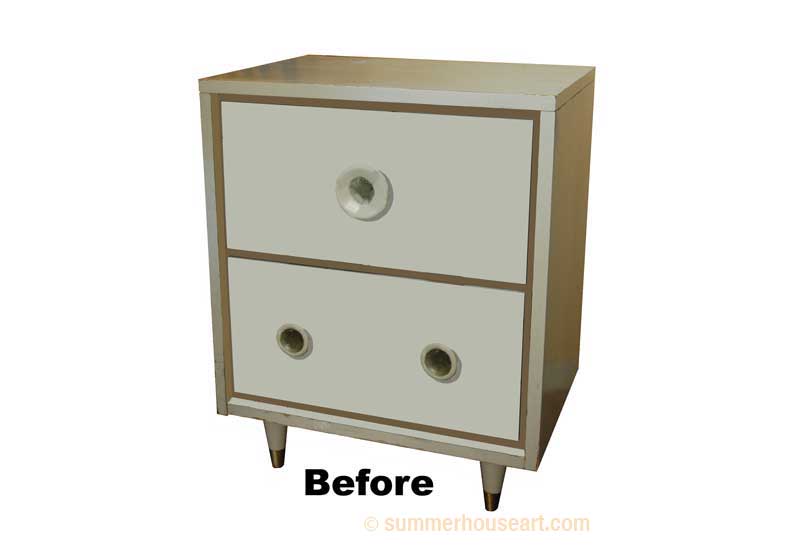
Will uses a lot of collage in his work using all sorts of found ephemera from old photos to just bits and pieces. We live this great life of searching for good used “stuff” to re-use, for our art, for our home and almost everything else. And now we are doing something with furniture. Such was the case with this little night table, found ages ago, waiting for an idea, a vision, of what it was to become.

I happened to say to Will, sort of offhandedly actually, “Why don’t you paint something on the front?” and walked away.

green-cabinet-beforewm

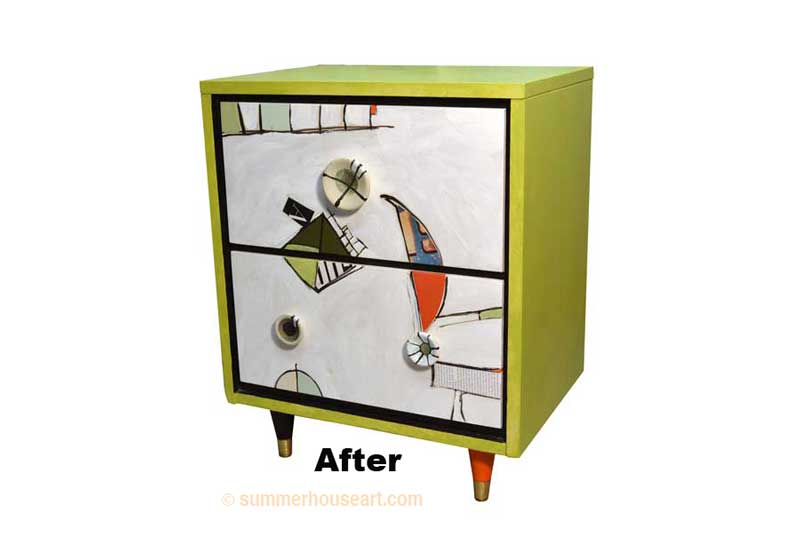
When I came back this is the abstract that he’d painted. We both loved it and then I sort of picked up the colors and finished it off.  

green-cabinet-2afterwm

It’s a little different, with a more contemporary feel.   I like the fact that the inside of the drawer is this lovely bright orange. The painting is done in such a way that it’ll gradually age and get that shabby artsy look.


green-cabinet-3wmgreen-cabinet-4wmgreen-cabinet-1wm

This little table got us excited about doing lots more…. and somehow we started to find more and more bits and pieces of old furniture to work on. We’ve actually been stockpiling it I’m afraid to say. And as we can get to each piece, we’ve been having some creative fun renewing them.

Share

Revisiting the Mosaic in Our Old Kitchen

We recently went on a short trip back to Calgary for a big family get together and while we were there, we did what no one should do. We drove by the old house.

Well, you know you shouldn’t do it, you know that the house will not be the same lovely house you worked on for years. You know, from past experience, that the person who bought it, will not take care of it like you did. And you know what? They really didn’t. It looked wrecked.

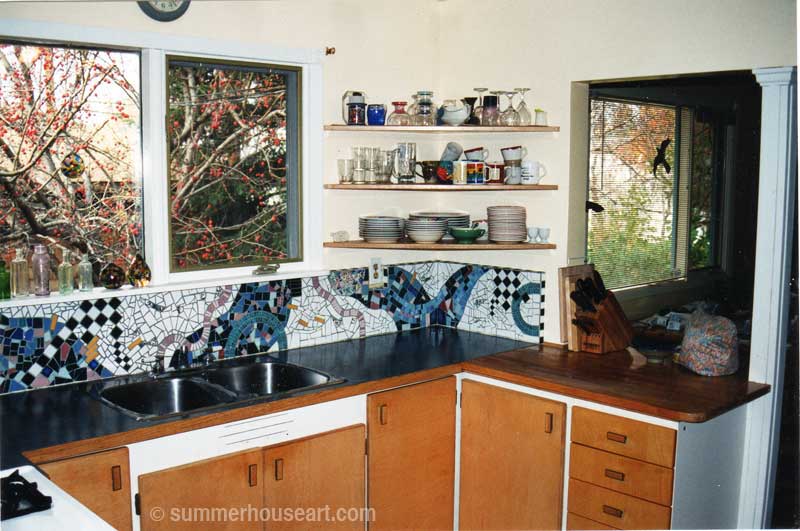
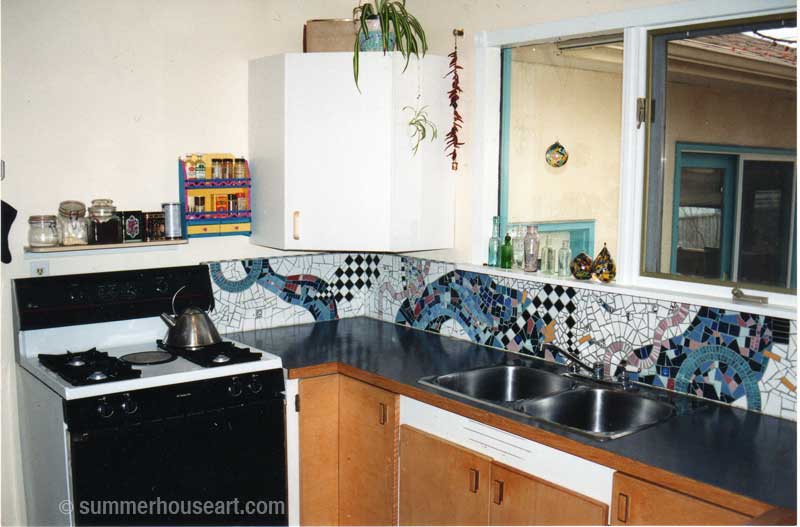
Which left me wondering about the kitchen and the mosaic backsplash we made there. Was it still up? What it destroyed by someone who didn’t appreciate the work I put into it? Well better not to know eh?


Kitchen back splash mosaic, Helen Bushell, summerhouseart.com

But it made me find the old photos of the backsplash. Taken back in the pre-digital camera days. Should have taken so many more photos, but in those days you worried about wasting film. How I love digital now!

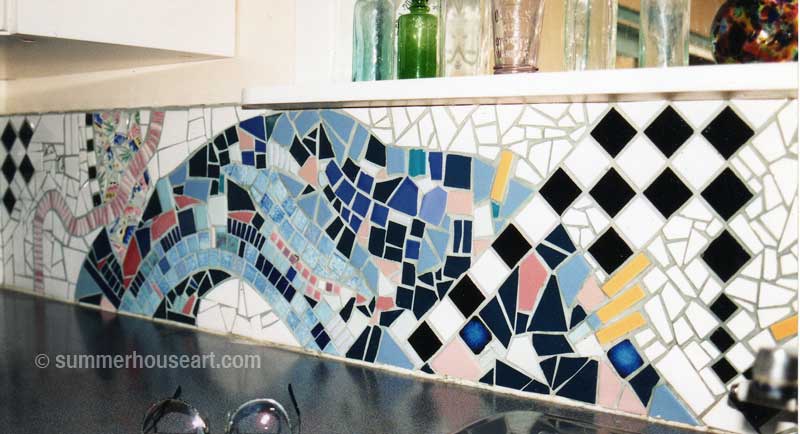
Kitchen back splash mosaic, Helen Bushell, summerhouseart.com

The backsplash was made in situ, over a long hot Calgary summer. Something I’d never do now. Having to take everything out of the way to cook a few times a day really interrupts the flow of work.

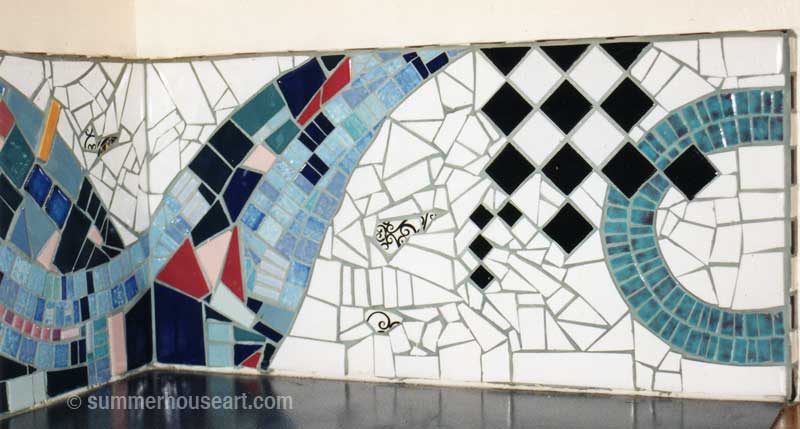
Kitchen back splash mosaic, Helen Bushell, summerhouseart.com

No, now I’d make it in the studio and transfer it into place, glued down on board and screwed onto the wall and then grouted. But I love this mosaic still. If we’d stayed I doubt I would have tired of it.

Kitchen back splash mosaic, Helen Bushell, summerhouseart.com

The design itself was one of those ideas that just strikes you and you must do it. A “river” of blue tile flowing thru an abstract landscape. The tiles were sometimes bits of accidentally broken dishes from the set we used every day so it was what is called a Pique assiette mosaic. The kids never had to worry about breaking a dish, they knew mom would eventually use it in a mosaic.  Hope you enjoy it as much as we did. Oh well, we don’t have that house anymore, which, by the way, had a wonderful studio we built just for us too, now made into another suite by the new owners. And we don’t have the lovely kitchen but we have the photos and the memories. And I’m still very pleased with the design of my very first mosaic back splash.


Share

Another Student Taking Mosaic in Her Own Direction

I never really know where my mosaic classes might take a student. Some only try the medium out on a one time basis, mosaics being one more thing in a series of hobby classes they “taste test”. Some take off with doing more of the Pique Assiette type of mosaics I teach, like Murray Goode, who was featured recently. And some use the class as a jumping off point to other forms of mosaic. Such was the case with a student I had a few years ago, Anne Hauser.

I always try to encourage every student to work on projects of their own design. My classes feature a shopping class where we look for dishes to break and use since that is my focus in mosaics. But the method of mosaic lends itself to other types of tesserae, like glass. It’s always interesting to hear from my former students and see where they have taken the original classes.

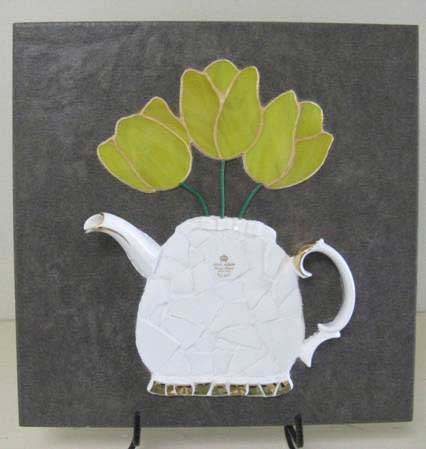
Anne did stay with dishes at first, as shown in this very creative composition she made of a broken teapot. The teapot had been a favourite of a friend and Anne recreated it in a mosaic for her after it had broken. I liked not only the sentiment but the composition was unique too. The pot was the only mosaic on the surface, not surrounded by mosaic in the background. Quite novel.

Anne-Hauser-teapot-mosaic

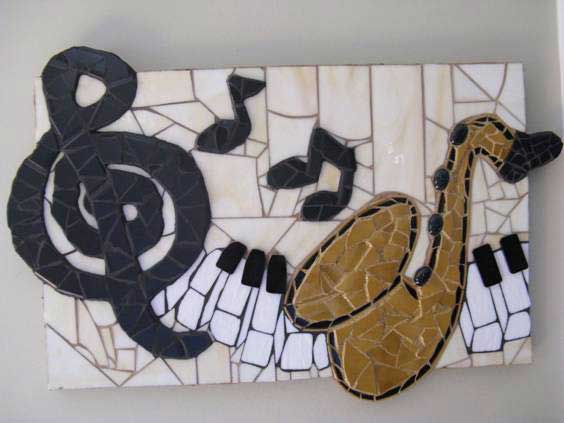
Anne says she hardly ever works with dishes anymore and has switched to using glass now. She created a music themed piece for her husband as a gift where there is a bit of transition to glass. The sax is from a plate and she added gold sprinkles to the grout as it set. The rest of the piece is from glass. Anne-Hauser-note-mosaic

She’s gone on from there to create collages of a sort with mosaic surrounding photos under glass and a mirror frame with glass and rhinestones! As she said recently in an email   “….I seem to have gravitated to glass and tiles along with odds and ends that I find. I’m working on one now that incorporates a pewter sailboat, beach sand and pebbles, some tree leaves I made from putty, and glass.  Not sure how it’s all going to turn out, but interesting”

I really like that she is having fun and sounds quite fearless, really, with not being sure how the piece will look in the end, but being ok with that.  That’s real creativity.

Share

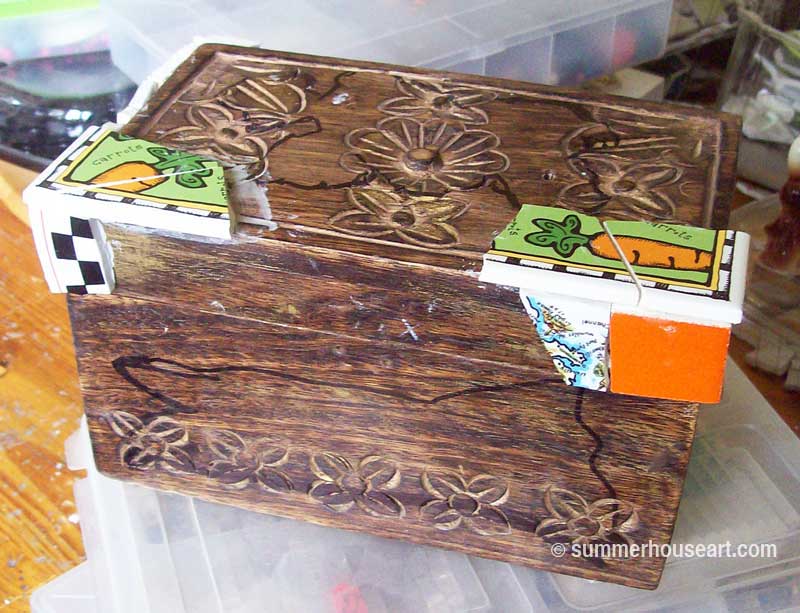
A Little Mosaic Bunny Box


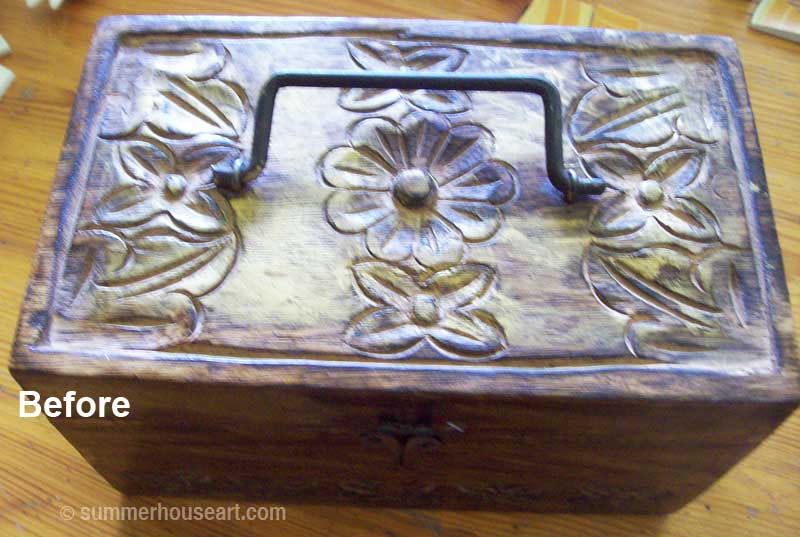
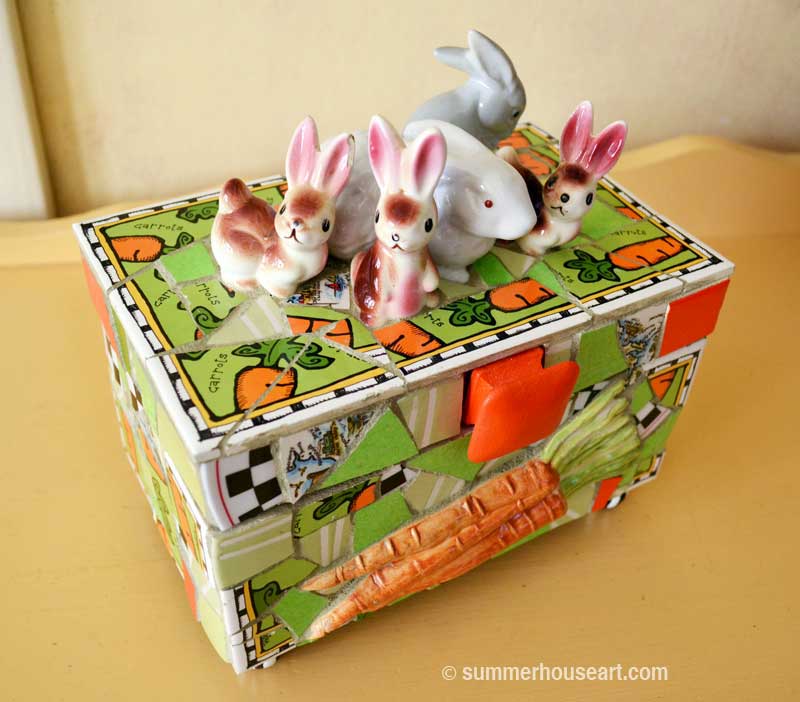
Or how this box became

Before the BunniesThis!

The Bunny Box by Helen Bushell summerhouseart.com

Sometimes, when you teach mosaics, you get an idea from a student. And one of my students this spring, decided to do a mosaic box. A Tea Box complete with little teapot ornaments on top. It’s going to look great. Now, I’ve made shrines, pots, trays and wall pieces but, for some odd reason, I’ve never done a box in mosaic and now seemed a good time to try. For two reasons, one, to try it out and see what problems it would present and two, suddenly I had shelves full of ornaments that could be quite useful in a new way. A little collection of bunnies came into my view which also sparked a memory of some really cool “carrot” tiles I’d been saving for some reason. An ah hah moment if ever.

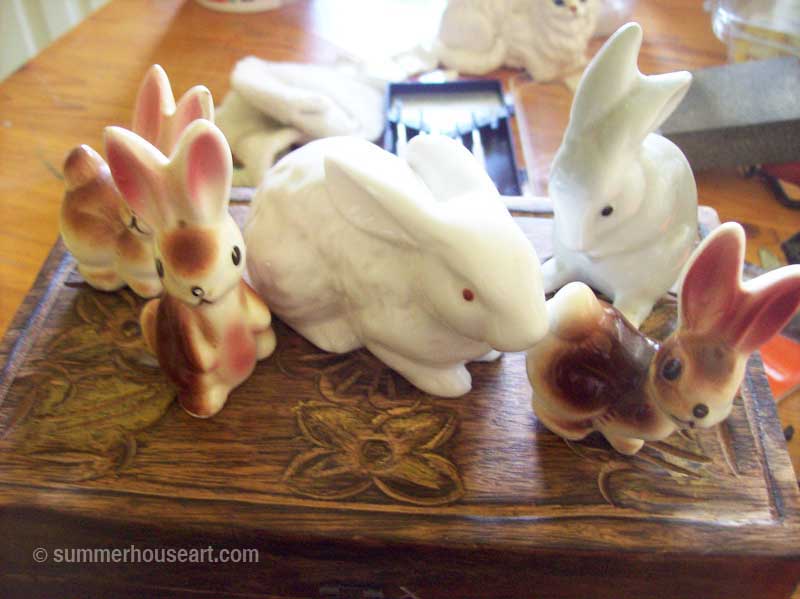
So off to the thrift store for a suitable box. Yes the pic above is blurry, it’s not your eyes. Sorry about that. And then a little playing about with bunnies and placement.

Bunny Placement

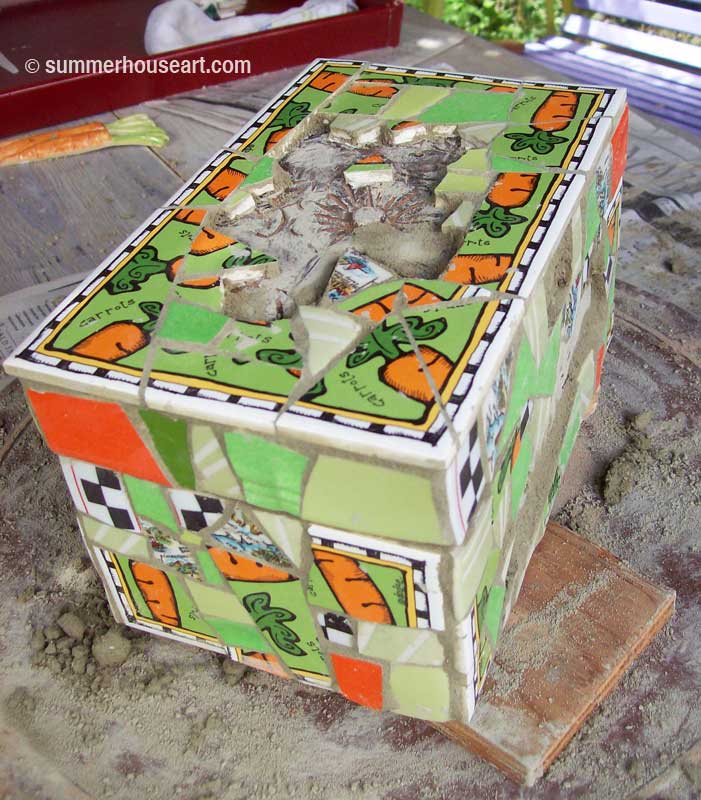
Starting with corners to use the “carrot” tiles. Mapping out the placement of bunnies. And that big patch on the front is for a loverly bunch of ceramic carrots I just happened to have lying around. I just love it when everything comes together.

Mapping out the Box

After many hours of applying bits and pieces of various dishes and tiles, it was time to grout. I left the spaces open to glue on the bunnies and carrots later.  

Grouting

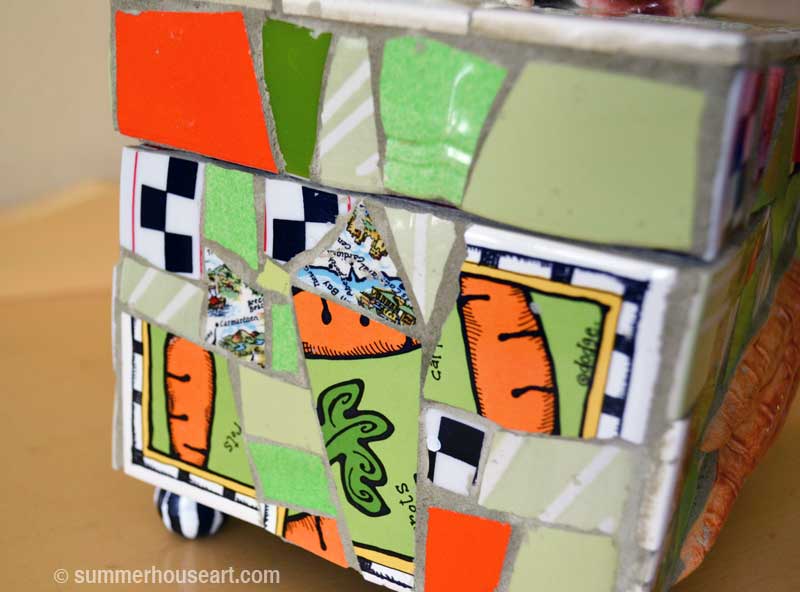
A little close up view of the dishes used. This is a Pique Assiette type of mosaic which in rough translation means “stolen dishes”.  I had one tiny little dish that had a map of Wales on it and the colors and texture just seemed to work well with the other dishes.

Bunny Box closeup

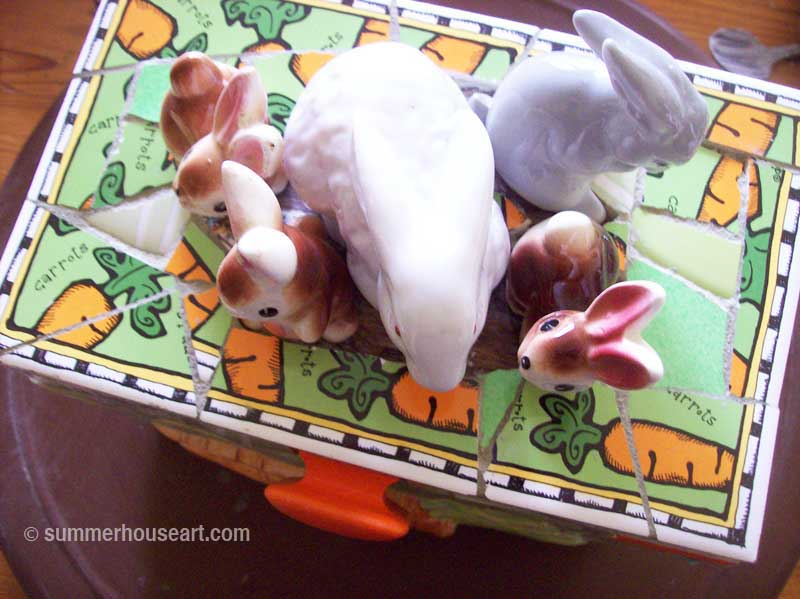
Had to do a bit of adjusting with the bunnies and after gluing them in place, I mixed up a tiny bit of grout and finished the top.

Gluing down ornaments on Bunny Box by Helen Bushell

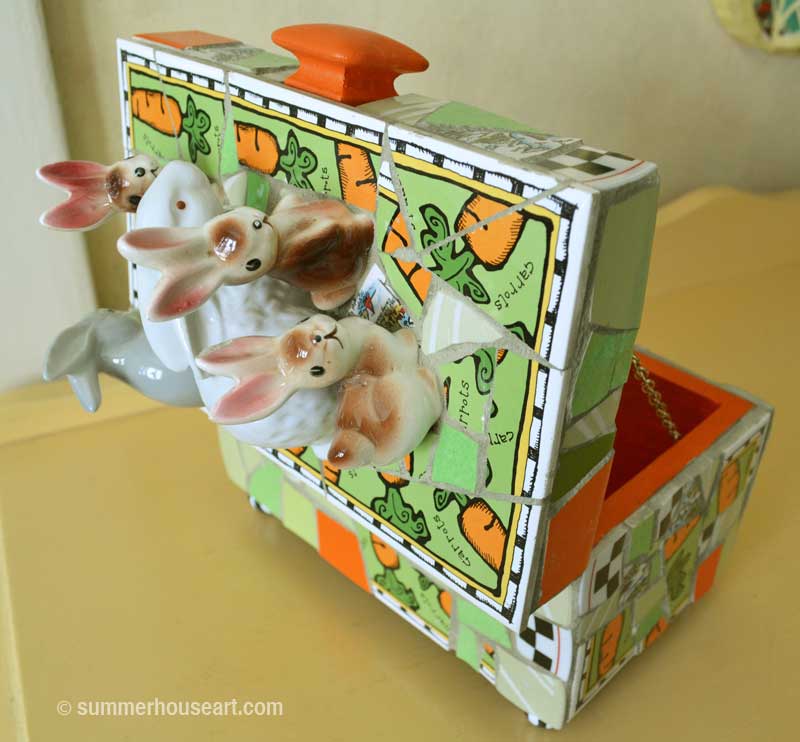
Oh, I also painted the inside a nice “carroty” orange. Just for a little surprise. The bunnies seem a little surprised at being tipped.

Mosaic Bunny Box Open by Helen Bushell summerhouseart.com

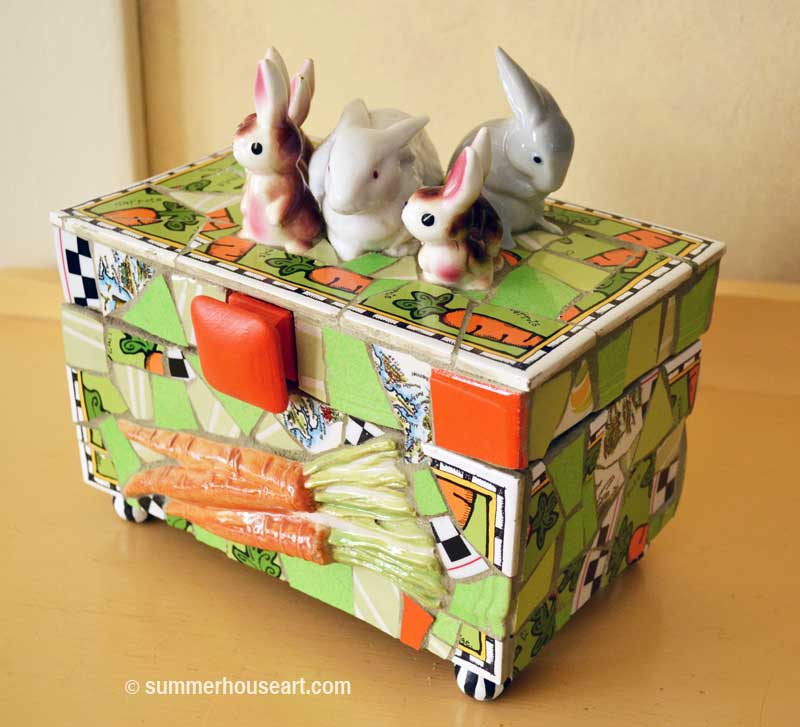
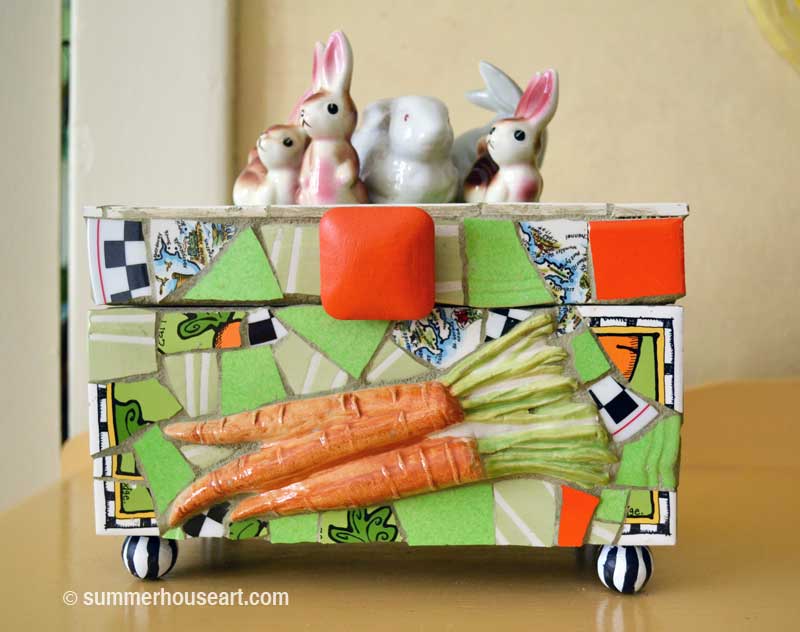
So here they are, all waiting for more carrots.

Bunny Box by Helen Bushell summerhouseart.com


Mosaic Bunny Box


Share

Always Fun When Students Get Hooked on Mosaics


I’ve given classes to a lot of students over the years and I’ve always enjoyed having a chance to help people create their first Pique Assiette mosaics. Some people come to the first class with a project that they’ve been hoping to do for years and bring dishes they’ve saved just for that purpose. Others just want to try it out and we find dishes and perhaps a table to mosaic at the “Shopping Class”. And I always know that making mosaics won’t always click for everyone the same way it did for me.

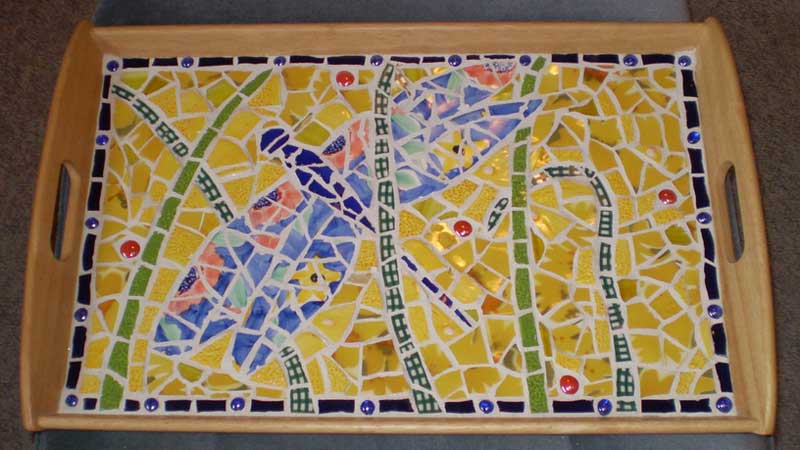
Murray Goode's Dragonfly Tray
Murray Goode’s Dragonfly Tray

It’s always a bonus when some of my students keep in touch and send me emails with mosaic projects that they’ve done since those first classes. It’s so much fun to know that I’ve played a little part in getting someone else “hooked” on making mosaics.

Murray Goode's Mosaic coffee table
Murray Goode’s Mosaic coffee table

Murray Goode is one of those people who just clicked with mosaics. I sensed that he was delighted with the medium right away and I enjoyed getting a few emails later with more of his projects. Murray was still working as a school teacher when I first met him, but now he’s retired and finally has really got the time to indulge in this art form.

Murray Goode's Blue Willow Table
Murray Goode’s Blue Willow Table

We were in touch just recently and I discovered that not only is he still making mosaics, but is exhibiting and has his own website too! He has a few pieces being shown at Cabin 12 Restaurant here in Victoria. I’ve picked just a few pieces today to post, but encourage anyone to go to his website to see the work of someone who is really enjoying himself making mosaics. I know I’ll be following his website from now on, just to see what new mosaics he’s created.


Share

Woo hoo, a new theme look and a new Gallery

I’ve been busy lately.  Well, to be quite honest, Will and I have been busy with the blog lately.  I really need him to keep me from losing patience with software and help with learning how to do things.   We wanted a few changes in the blog.  For one, the look of it.  So we chose a new theme.  We find it a bit cleaner looking than the old theme.

And then I discovered a new (to me, anyway) gallery plug in for WordPress called Catablog. Of course, being me, I had to have it.  I thought that having a gallery of my mosaic posts would make it so much easier to visually navigate the blog if you were looking for mosaics alone. I wanted anyone to be able to search through the pics of mosaics and just click the title to go to the post about it. So after much fussing and fuming on my part, and dogged determination from both of us, we managed to create the aforementioned gallery. You can find it here.  

Or, just click on Mosaic Posts Gallery on the Menu bar above.  Enjoy!

Share

A Recycled Post about Recycling for Earth Day

Today is Earth Day or for many Earth Week.  I like to think that every day is really Earth Day.  In honor of the day, I’ve decided to do a bit of recycling.  The following is a post I wrote way back in 2010, but I think it still works.  I’d like to share a bit about how to recycle in the garden and even how to use recycled dishes to create art in the garden.

Actually, Recycling, could be the main theme of our lives.  Now it’s called thrifting too.  We’re a couple of old Hippie artists, who were there for the start of the recycling movement. For us it’s just a way of life. We buy everything used and we also get a lot of “good stuff” as I like to call it, absolutely free. Best price there is. And as I mentioned in other posts, it’s a pretty abundant lifestyle too.

Of course we compost. Every scrap of banana peel, tea bag, coffee ground and egg shell is collected in these recycled coffee bins that I brought home from a job. The tiles on the backsplash behind them are all recycled. In fact every tile was actually free and found at garage sales or from sample boards thrown out by tile stores.
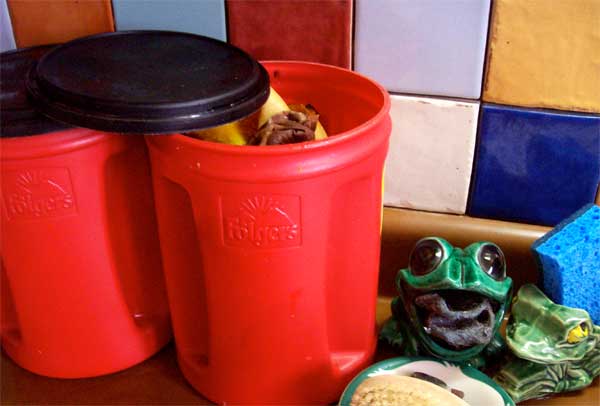
Kitchen Compost saving
The composter the food scraps go into, was also free.  Someone in the neighborhood was tossing it. Our rainbarrel is a recycled drum formerly used for soap.
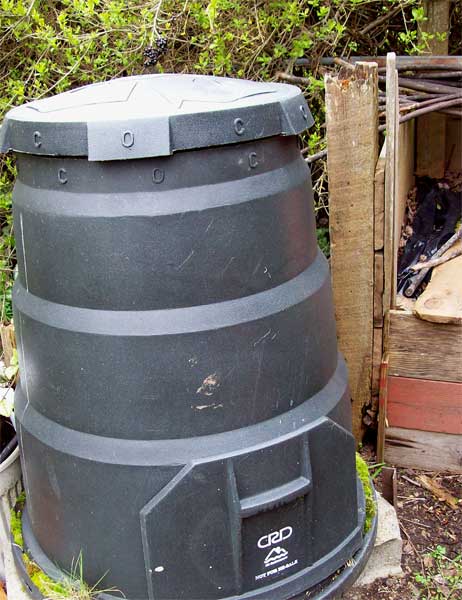
black-composterIn the green house, I recycle too. Every pot from years past is saved to be reused, trays are sometimes taped up to plug leaks but are still put to work. These Black eyed Susan vines are sprouting in cookie packaging.
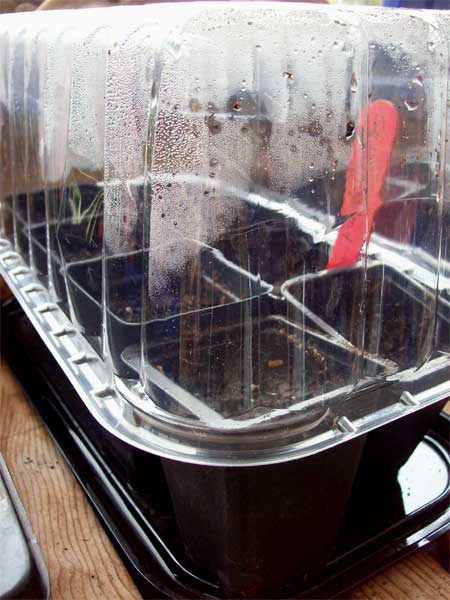
cake-packaging

The seeds for the Purple Cone flower, which I am rather impatiently waiting to see sprout, are planted and living under the protection of packaging, which in its previous life housed a cake bought for my birthday a short while ago.

In it’s next use it may become storage for broken dish shards in my studio, like the many, many salad green containers already put to a second use.
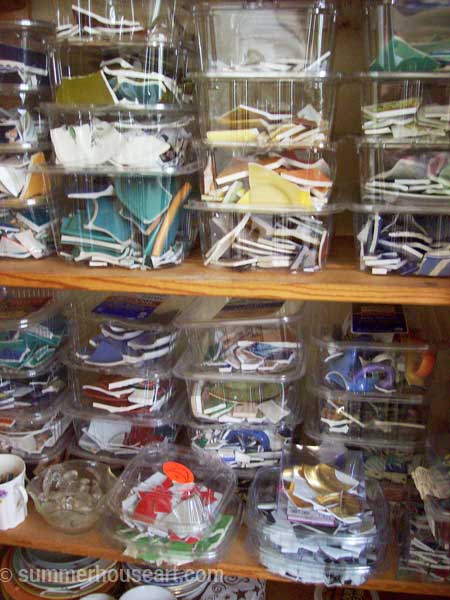
boxes-of-shardswm
Out in the garden we have, now wait a second, I have to mentally count, at least 4 wheelbarrows. Only 3 are shown here.  All free or almost free. All recycled. I have an abundance of wheelbarrows you could say. I think they are kind of beautiful, in a sort of colorful, shabby, knocked about and used, way.
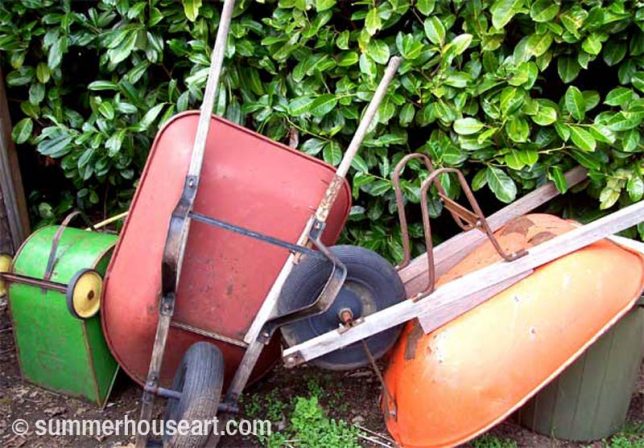
Wheelbarrow collection, summerhouseart.com


Now that I’ve reached the garden with my recycling theme, I’d like to show you a few pieces of our garden art. Now maybe art for the garden is an odd sort of theme for Earth Day but a lot of our art is made from recyled materials. The mosaic in the herb garden is a recycled chimney covered in old dishes and tiles.
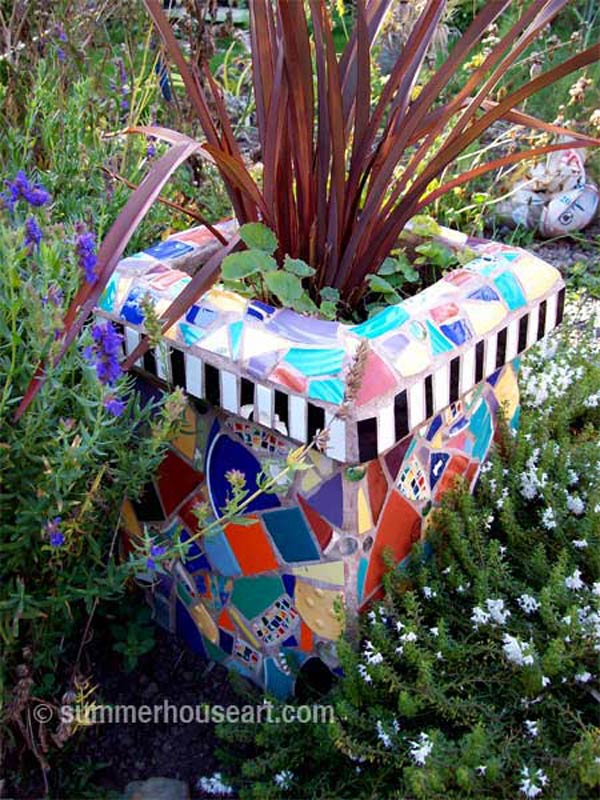
Mosaic Chimney by Helen and Will Bushell, summerhouseart.com

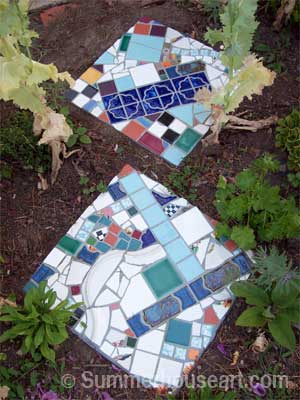
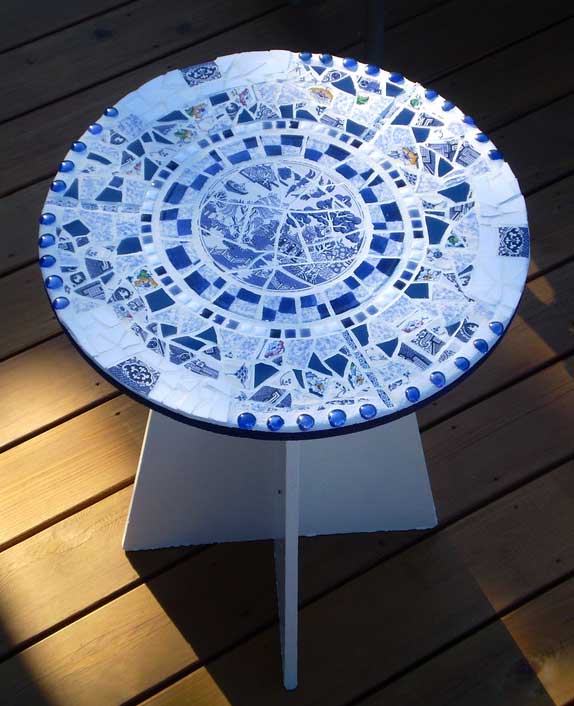
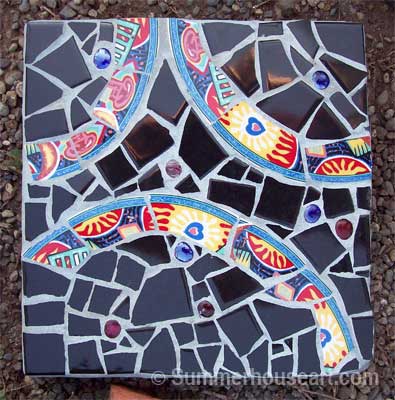
The stepping stones are all made using recycled dishes and tiles, a type of mosaic art called Pique Assiette. In fact, all of my mosaic artwork is made from recycled dishes, tiles and ornaments.  If you would like to see how to make them check my post Creating a Mosaic Stepping Stone Helen’s Way.
Stepping Stone mosaic, by Helen Bushell, summerhouseart.com

Stepping Stones by Will Bushell, summerhouseart.com

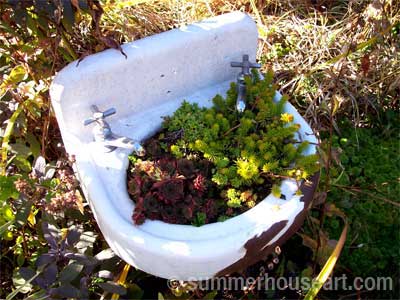
And old sink found in, I must admit, unashamedly, a dumpster dive, is home to our succulents.
Found Basin for the garden, summerhouseart.com


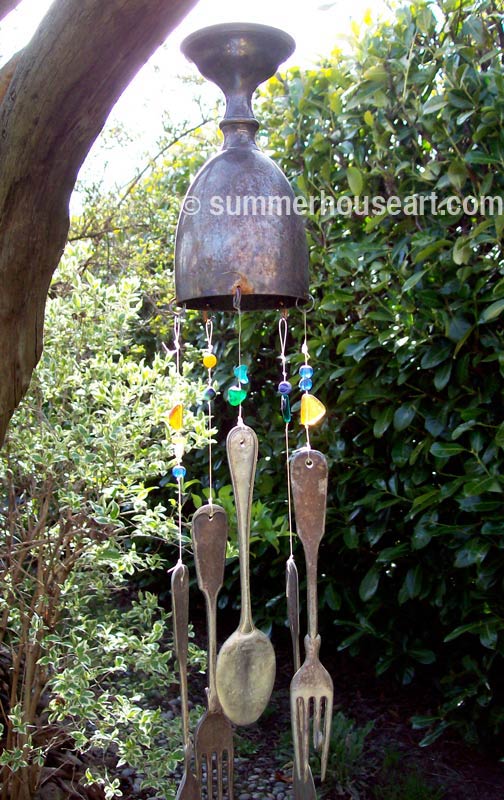
The chime that Bill fashioned out of an old anniversary cup found at a garage sale and hung with flattened silver cutlery is another recycled artwork. There’s much more art to see on one of my previous posts about garden art called Bill’s Driftwood Chair and Other Garden Art Whimsies.
Wind Chime by Will Bushell, summerhouseart.com

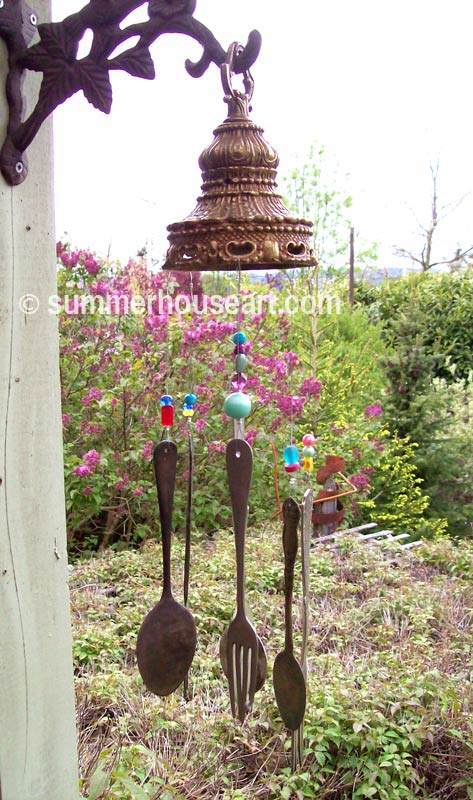
Here is another great little chime that Will made as a gift, with a metal tassel from a chandelier now no more and few beads and pieces of flattened cutlery.
Tassel Chime by Will Bushell, summerhouseart.com

There are so many things that we can recycle and reuse for our gardens from artwork to garden furniture to garden tools and implements. There really is no need to go out and buy new most of the time. I always like to say the world is an abundant place as long as you don’t mind second hand. Not buying new saves resources and cuts pollution. Buying used saves more stuff from ending up in landfills too.  And the best thing is getting out and about on the weekends looking for deals at garage sales ( we always plot the most efficient course to save gas), enjoying the  sun at a beach on the way from one sale and the next.   Life is good.  So that’s my little, I hope, upbeat, message in honor of Earth Day.  Even the post is recycled.

(BTW, if you’d like to make a comment, just click on the title.  It’ll take you to comments….and we do appreciate comments )

Save
Share