What an Artist Notices in the Garden

While I was out and about in the garden looking for spring in yesterday’s post, I was noticing more than just plants coming up.
Like the colors of the wheelbarrows, leaning against each other as they wait to be used again.

wheelbarrow-collection

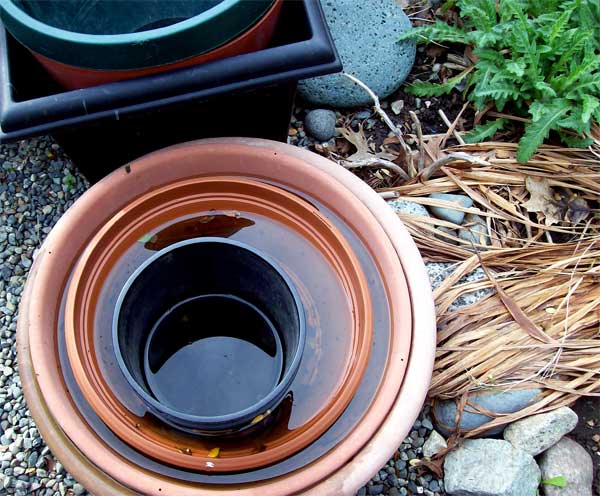
The stacks of pots I’d been collecting last fall and forgot about in the path, now acting as little reflecting pools.

pots-in-path

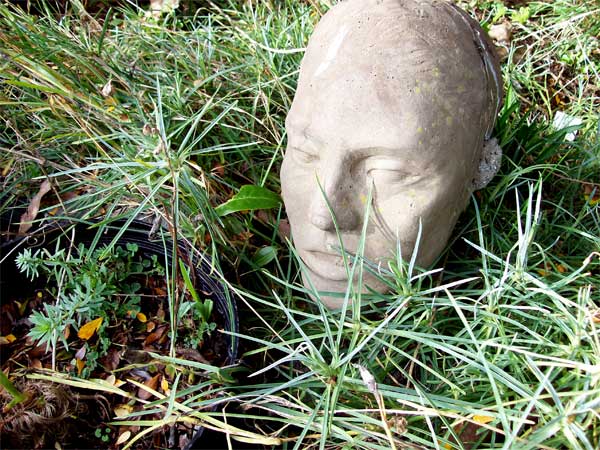
My sculpture, a class project from years ago in art college, now happily growing moss surrounded by carnations. I think some mud wasps have been filling her ear and her mouth. I never did like that model.

cement-head

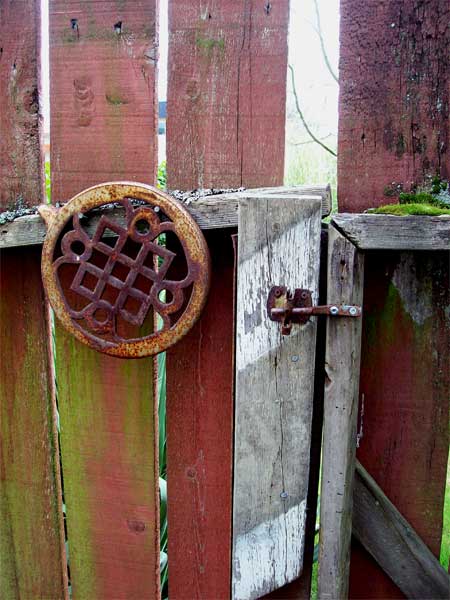
And the gate, also growing moss caught my eye. That little wood-stove grate is to remind Will that someday, hopefully, this summer, I’d like a new gate with that grate acting as a window into the garden.
gate-closeup

We never seem to rush into these things though.  Will claims it’s weathering in.

Share

Will’s Driftwood “Chair” Sculpture and Other Found Garden Art Whimsies

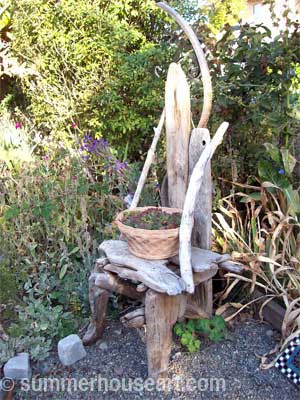
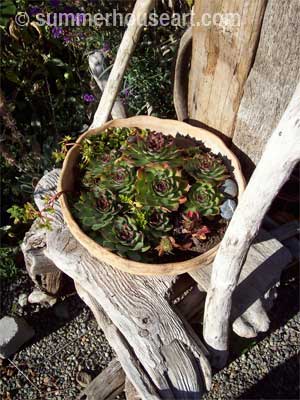
One day this summer, on a whim, Will suddenly built this driftwood chair. It’s not exactly sit-able so I think of it as being more of a sculpture. I’ve put off posting it because he keeps adding to it. But for now, it appears to be done… at least until he finds something new for embellishment.

chair2wm

henchickswm

The seat creates a nice spot for my little dish of Hen and Chicks.

chairdetailwm

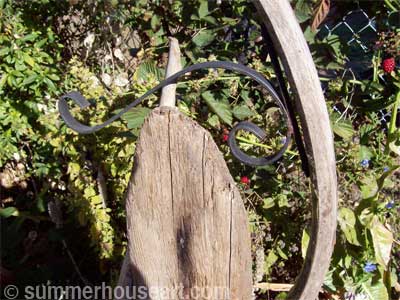
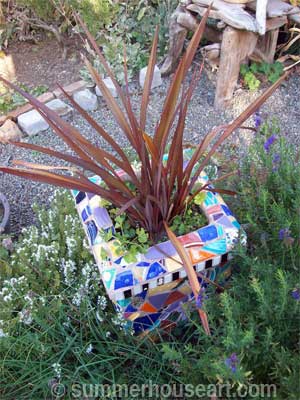
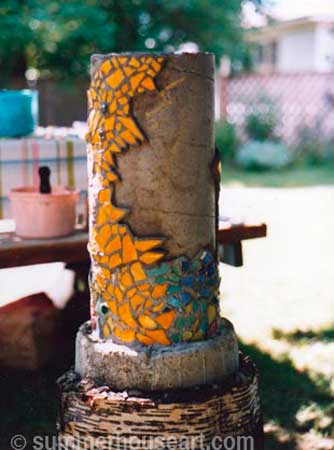
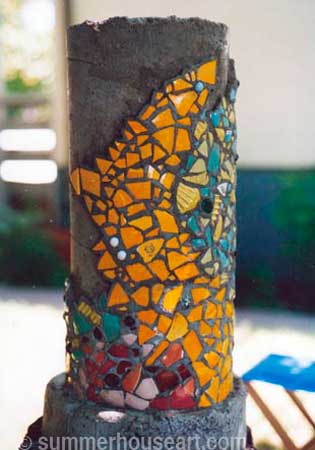
Right now we are trying to decide if his latest embellishment, a spiral hanger attached to the back, should be painted something colorful. I’d like that since it would relate to the mosaic chimney in the herb garden.

chimneywm

More color, I always say.

We have these bits of found art all over our garden that, to us, add a great sense of whimsy to the place.

basinwm

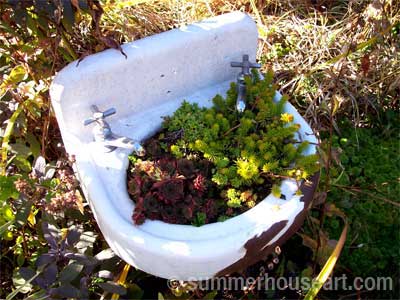
We found the old basin at a demo site years ago, and it’s nicely weathered. It’s a great place to grow succulents and we love it. So do the succulents.

One day, while out walking, Will found this rock tangled up in a piece of rusty wire and it hung on the wall for a long time before we found the perfect circle of rusty wire from an old pot, to pull the whole thing together.
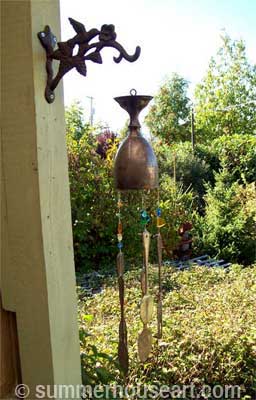
The chime came together last year, oddly enough just before our wedding anniversary. The silver goblet found that day at a garage sale, where else, celebrated some other couples long ago anniversary.

chime2wm

Will put the whole thing together that day as a special gift for me. Friends and relatives have loved it too and he’s made quite a few now from bits and pieces. Seems we’re always looking for good old silverware for another one.

Some of these serendipitous sculptures never really get finished. Will just keeps adding to them.

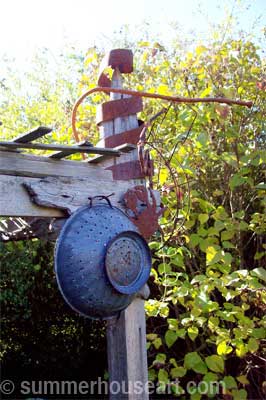
colanderwm

I like to call this one his bird playground and one day he added this rusty colander to it. Just the right addition.

Share

How to Create a Pique Assiette Mosaic Stepping Stone – Helen’s Way

There are probably lots of ways to do stepping stones. I have my way and it works for me. There are lots of things you can put on stepping stones for your garden, like dishes, stones, marbles, keys, whatever you think will look good in a stepping stone.  This type of mosaic is actually called Pique Assiette, which roughly translates to “stolen dishes”. The beauty of doing a stepping stone is that the same method works for most outside mosaic projects.  Check out more of our garden stepping stones.
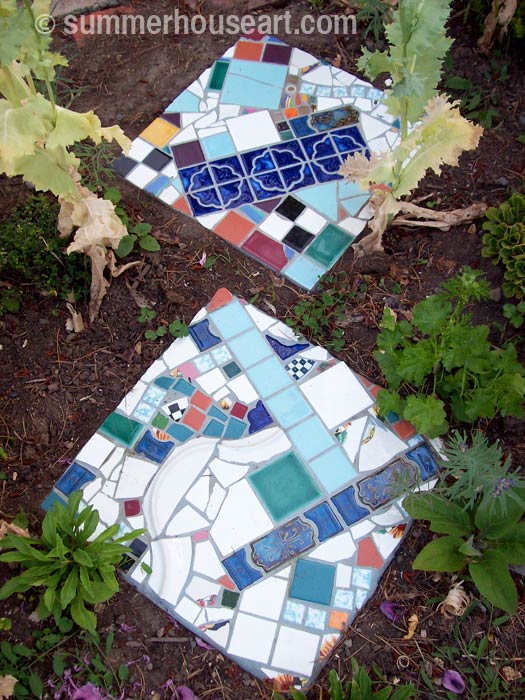
Tutorial, Pique Assiette Stepping Stones, summerhouseart.com

I’m not a big fan of really orderly designs, with symmetrical elements or tidy circles of pieces arranged in a regimented way. No, I tend to go for the intuitive and fast method of working.

First of all, although I’ve seen lots of sites that say otherwise, this is not suitable for children. It has sharp shards from dishes, it has caustic cement and requires some strength and lots of common sense. I am cutting myself all the time and keep bandages handy and I’m way past childhood.

Secondly, I’d like to say, if you are going to make these, use the proper precautions with mortar and grout. These are caustic materials, they require that you use dust masks when mixing to avoid breathing in the caustic dust. They require that you use rubber gloves to avoid getting the caustic mortar on your skin. That said, read the package, note the cautions. Please don’t go leaving this stuff around children and pets! Please remember to clean up as soon as you are done and make sure not to leave this stuff in bowls to harden into cement that you will never ever get off.
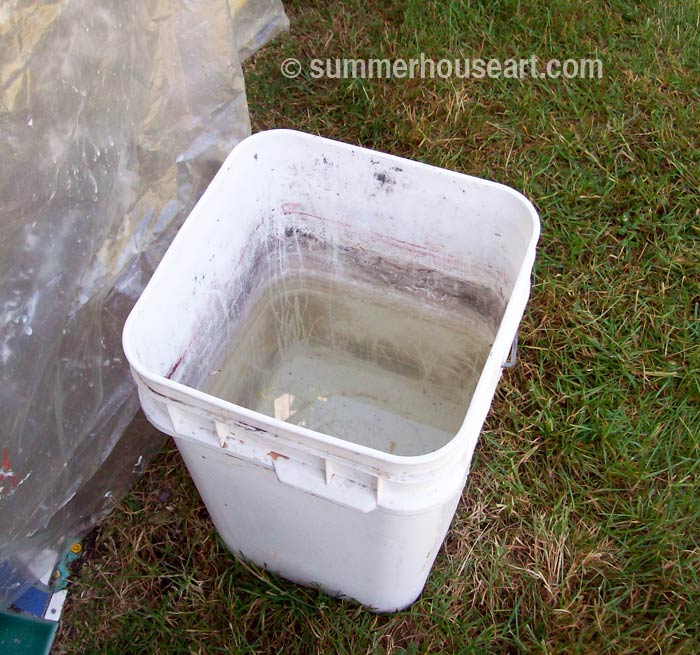
Process, Stepping Stone Tutorial, summerhouseart.com

You may wonder why I have a photo of a pail of water? Well, the next precaution is NEVER NEVER rinse off anything with cement on it down a drain. It will set and your drains will be plugged! Ok, so why the pail? That’s where I do all my rinsing of gloves, mixing bowls and implements. I let the cement settle for a day or so and then gently pour off the water into a garden path and scrape the cement that settled into the bottom of the pail into a bag and put it in the garbage. There won’t be much but, hey, better in the bag than in your drain.  Both mortar and grout have cement in them.

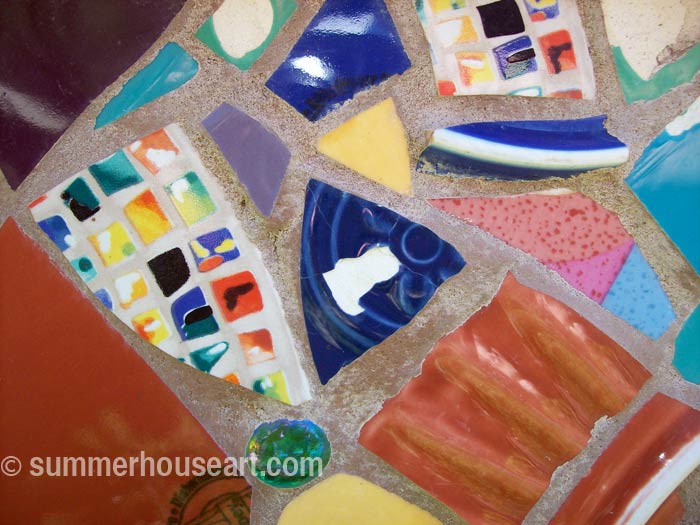
An important note about dishes and tile to use. If you use tile that is meant for indoor use or dishes that are porous under the glaze you will have this nasty thing happen.
Process, Mosaic Stepping Stone Tutorial, summerhouseart.com

The moisture will seep under the glaze and when it’s cold the water will expand and pop the glaze right off the dish or tile. I know, because it’s happened to us. So make sure the dish is really dense and not porous and use tile that is very dense and meant for outside use.

The last important note. Wear goggles when snipping dishes. Broken pieces have a way of flying out and hitting someone. Be careful, for obvious reasons with shards. Don’t wipe away little shards with your bare hands, use a dust brush.

OK enough warnings. On to the fun stuff. As I said, I like the intuitive way of creating stepping stones. But having said that I don’t judge what others may like. Creativity is self-expression after all.

You will need:
A concrete stepping stone
Dishes and/or tile
a work table
a pail of water
rubber gloves
dust mask

old cotton socks

Gray or White Mortar or thin set ( I use it in powder form and add water)
a jar of clean water
a bowl for mixing mortar and grout in ( I use old stainless steel mixing bowls)
a trowel for applying the mortar
something to scrape between the pieces to remove too much mortar, like an old knife.
two-wheeled glass cutter or tile nippers
tile cutter
sanded grout ( it comes in colors, so have fun)

Step 1- Getting ready to start
I buy concrete stepping stones from the local home building supply store. We used to make our own, but honestly, it wasn’t worth the effort. Stones are about $2 or $3 to buy. They come round or square.

Put a concrete stepping stone on a work table so you don’t have to be bent over the whole time while creating it. You’ll thank me later. I like to cover the work table with plastic first to save it for other uses. Also, it’s a good idea to put the cement stepping stone up on a few little blocks of wood to raise it off the table surface. It’ll make it easier to get your fingers under when you finally pick it up to move it.
Process, Mosaic Stepping Stone Tutorial, summerhouseart.com

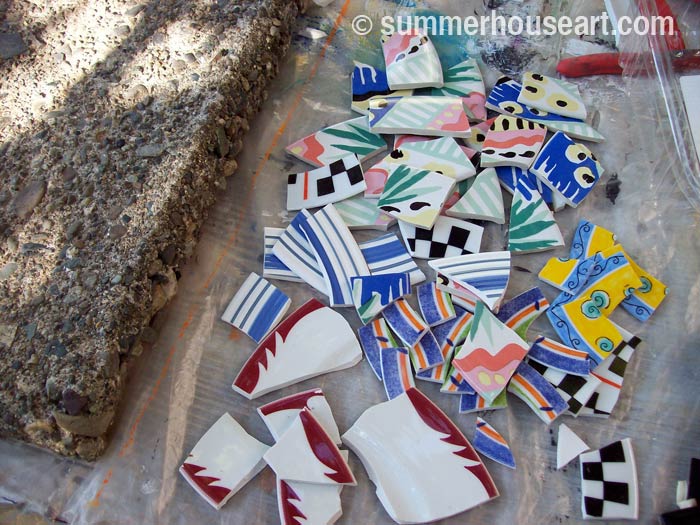
Step 2- Cut up the dishes and tiles
Please put on your eye protection! I wear glasses anyway so that’s mine but really protective goggles are worth it.

Cut up the dishes into bits and pieces using nippers or two-wheel cutters or tile cutters. For cutting up tile, use the scoring wheel on the tile cutters to score the tile and then break it with the tile cutters. If you don’t know how to use one ask the clerk in the tile store, they’ll usually be happy to demonstrate.
Play around a bit with the arrangement. You could arrange them all before hand on an area approximately the same size as the stepping stone. More about this later.

Since mortar sets in about 20 minutes max, laying out your pieces on another surface will cut down on the time it takes.  Or you could do it my way and just arrange them right on the mortar and wing it.  Keeping in mind that the mortar loses its stickiness and you may have to make a little new mortar to finish sticking down pieces.
Process, Mosaic Stepping Stone Tutorial, summerhouseart.com

Step 3- Mixing the mortar
Put on your Dust mask! Put on your Rubber gloves! Seriously!
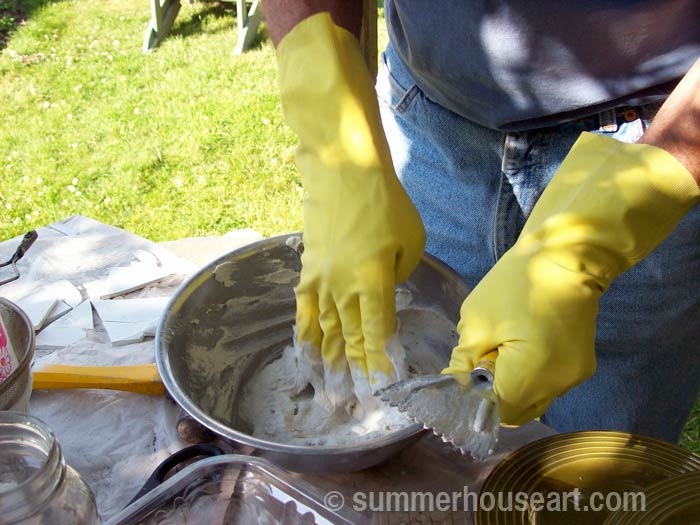
Wear your rubber gloves! I like to mix with my hands, encased in rubber gloves of course. Don’t do this bare handed! It’s caustic. see warnings above!

Put the powdered mortar in the mixing bowl. You will have to guess-timate here for the amount of mortar. Add water from the clean water in the jar, a tiny bit at a time. Mix up the mortar to a peanut butter consistency.

I like to use stainless steel mixing bowls that I find in thrift shops, they work well, and are reusable.

Get it to a peanut butter or just slightly thinner consistency by adding the water to the mortar ( this applies to grout also) very slowly as it will become too thin very quickly if you add too much.
Process, Mosaic Stepping Stone Tutorial, summerhouseart.com

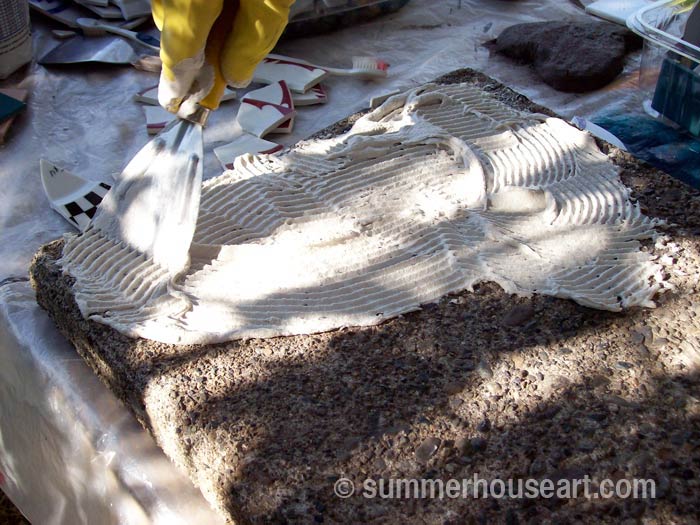
Spread the mortar over the stone using a toothed trowel.
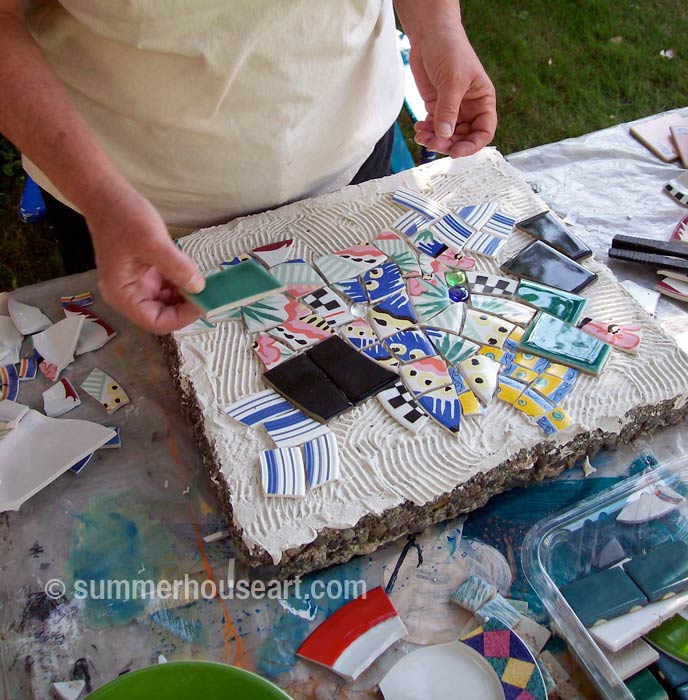
Process, Mosaic Stepping Stone Tutorial, summerhouseart.com

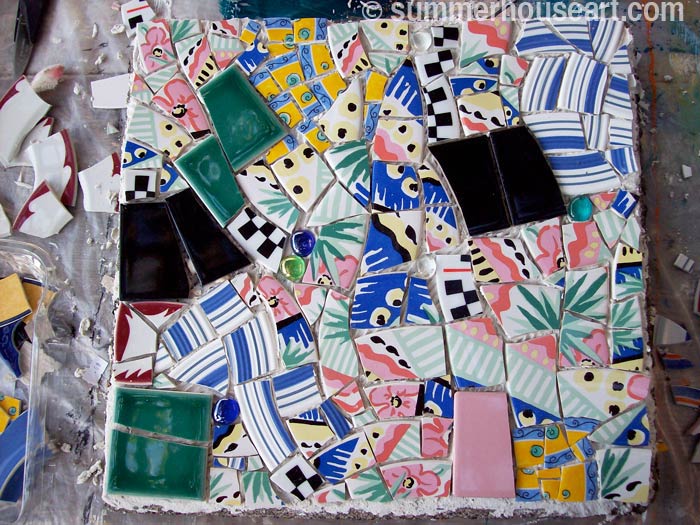
Lay each piece on the mortar and try not to squish up mortar between the pieces. You’ll need that space to put grout in later. If it happens, and it will, just remove it with a blade like tool. I cut and fit dishes as I need to as I go along.

You’ll have to move fast, mortar sets up on a hot day really fast, you’ll have only about 20 minutes! In fact I wasn’t fast enough on this one and it started to dry out and nothing stuck. So I scraped off the dry mortar and just buttered a bit on, for each section I had left to finish. Ok, it’s cheating a bit, but it did work.

BIG NOTE: watch out that when you put pieces down on the mortar that you don’t leave nasty points sticking up. You’ll know you did, painfully, later when you are smoothing grout over the pieces and snag your fingers on a point. And you wouldn’t want to step on a point later.

Be careful, this stuff is sticky and keep the top of your dish pieces clean and wiped off.  Once mortar sets it’s cement and you won’t be able to remove it from the surfaces of the dishes!

NOTE FOR BIG PROJECTS: When we are doing a big project, or if we want to take our time designing a piece, we work a bit differently.  We glue down each piece with a bit of mortar buttered on to the back of each piece.  We just mix up tiny amounts of mortar at a time in a small bowl and apply it to each piece as we stick it down. When the mortar gets too hard, we just clean out the bowl and mix up another fresh tiny amount. 
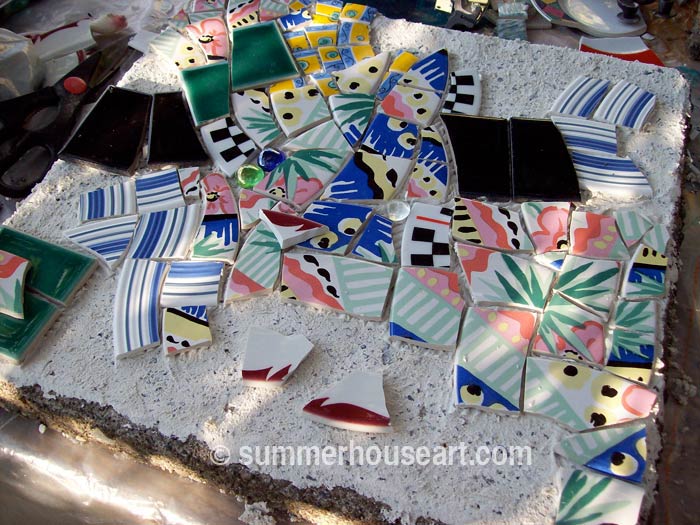
Process, Mosaic Stepping Stone Tutorial, summerhouseart.com

Process, Mosaic Stepping Stone Tutorial, summerhouseart.com

Step 4 -Take a break
Now that you have all the pieces mortared down, take a break and enjoy a cool iced tea. When you can’t move the pieces with your fingers, the mortar has set. We’d actually done the mortaring in the evening after a long day and stopped altogether to go in and watch movies. Of course, we cleaned up all the mortar mess like the bowls and implements first in the bucket of water! Then the next morning I was ready to grout.
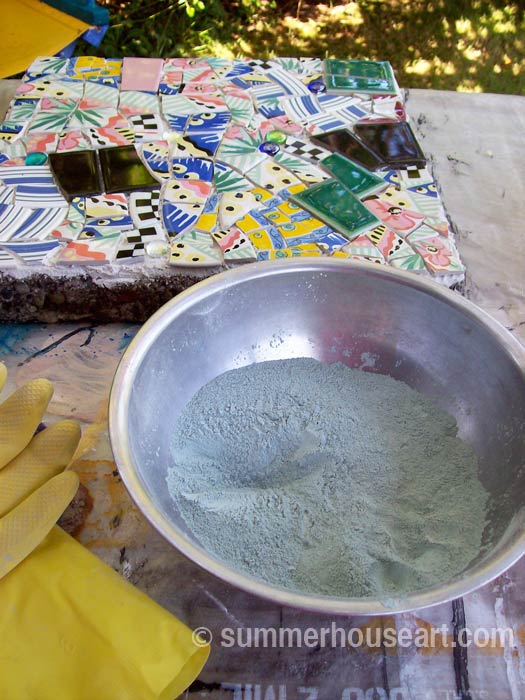
Process, Mosaic Stepping Stone Tutorial, summerhouseart.com

Step 5 -Grouting
Put on your dust mask and rubber gloves!! Mix the grout in a bowl adding just a little bit of water from the jar at a time. Again I like to mix with my hands.

Get it to a peanut butter or just slightly thinner consistency.
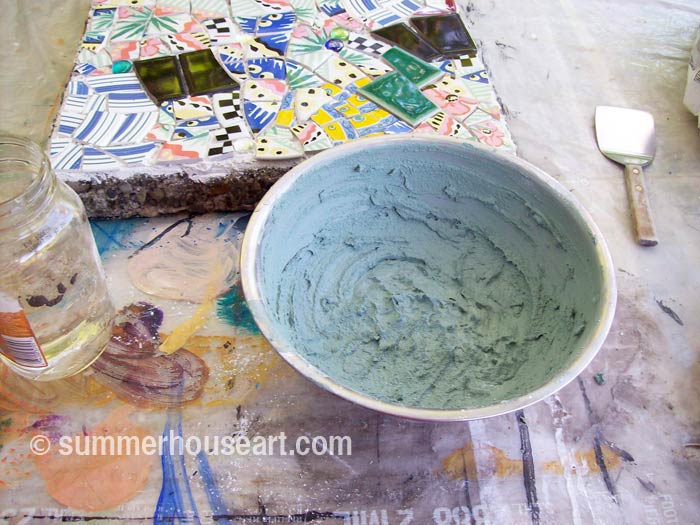
Process, Mosaic Stepping Stone Tutorial, summerhouseart.com

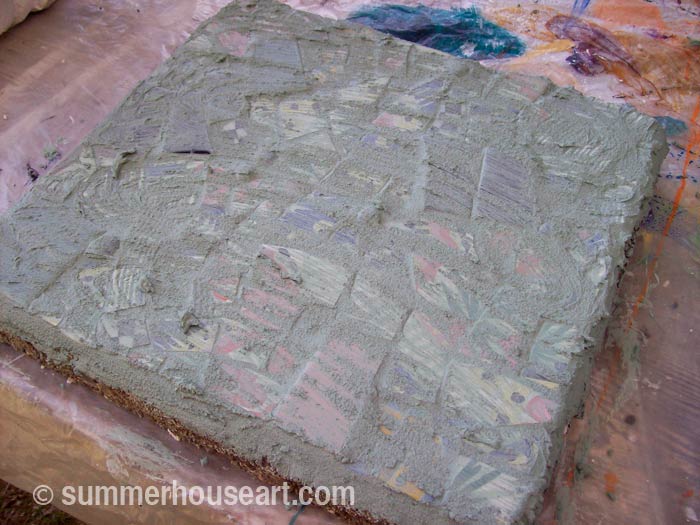
Let the grout “slake” for a few minutes, no more than 5 and with your gloves on still from mixing it by hand pick up a handful and start “smushing ” it all over the surface.
Process, Mosaic Stepping Stone Tutorial, summerhouseart.com

Be sure to fill in each space between the pieces well. I use sanded grout always.

Step 6, or Why should I save old cotton socks?
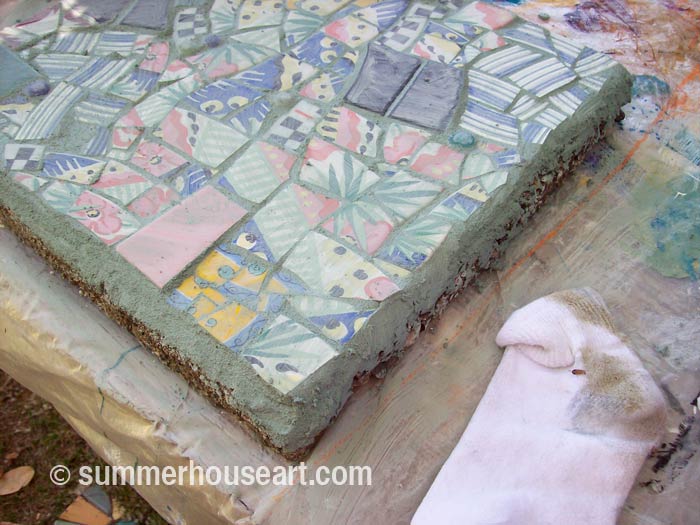
I like to use old cotton socks to remove the grout from the surface. Some people like to use old sponges but I’ve found it’s just too easy to remove the grout from between the pieces with sponge. Dry old socks work well and you can turn them inside out and use the inside too. Once you have most of the grout removed from the surface leaving only a bit of hazy layer, let it sit. Break time again! Not too long, just 5 minutes and then back to work! Come back and with a clean sock shine up the pieces.
Process, Mosaic Stepping Stone Tutorial, summerhouseart.com

Step 6, Enjoy!
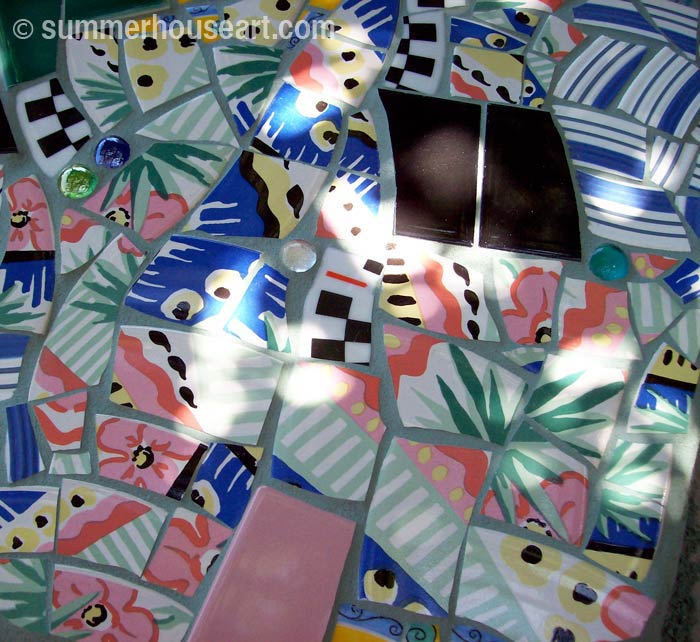
Enjoy the work you’ve just produced. Sit back and tell yourself what a genius you are! Then after your new wonderful stepping stone has had overnight to set and cure, dig it in to your chosen spot in the garden path. Hope you’ve enjoyed my tutorial.  You can use this method for other outdoor projects like bird baths too.  Check out our Mosaic bird baths too, if you’re interested.   you can find them here:  A Serendipitous Mosaic Bird bath  and also A Beach Pottery Bird Bath.   Bird baths are done a little differently.  We create small batches of mortar and butter each piece as we go along.  We set up under a pergola and make a summer project of it.  They do take some time, so be patient and enjoy.
Mosaic Stepping Stone Tutorial, summerhouseart.com

(BTW, if you’d like to make a comment, just click on the title.  It’ll take you to comments….and we do appreciate comments )

Save
Share

Pique Assiette Mosaic Stepping Stones in the Garden

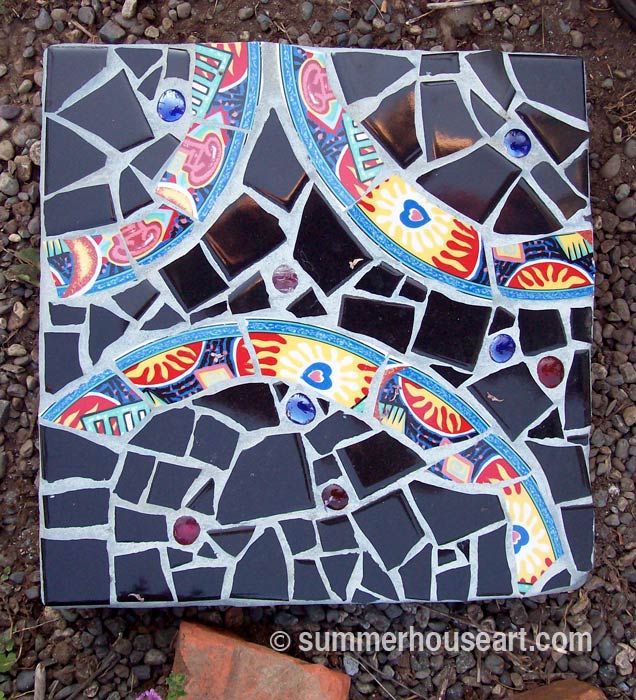
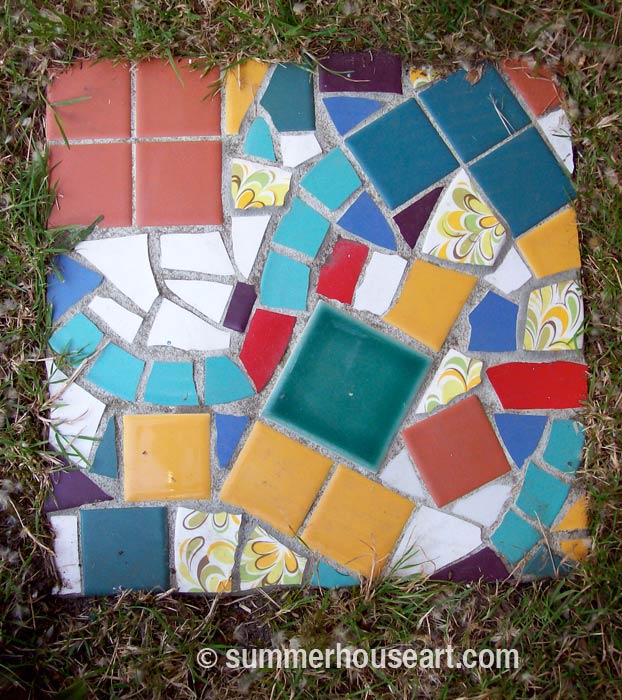
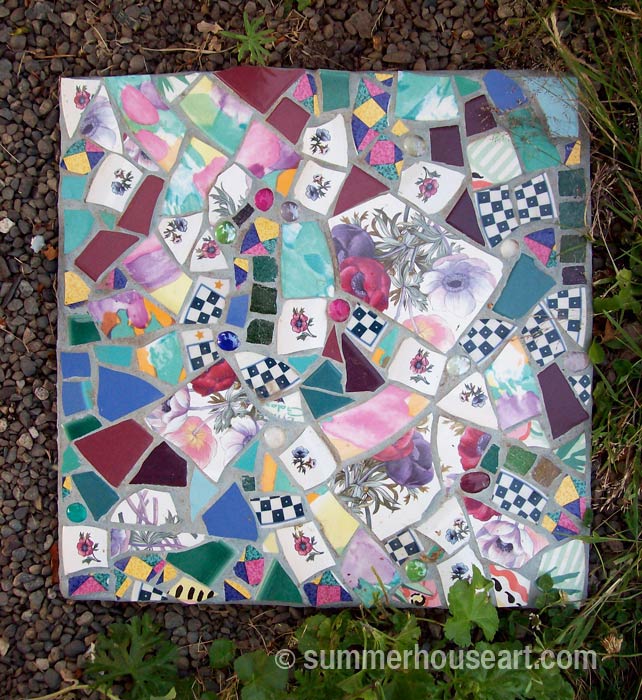
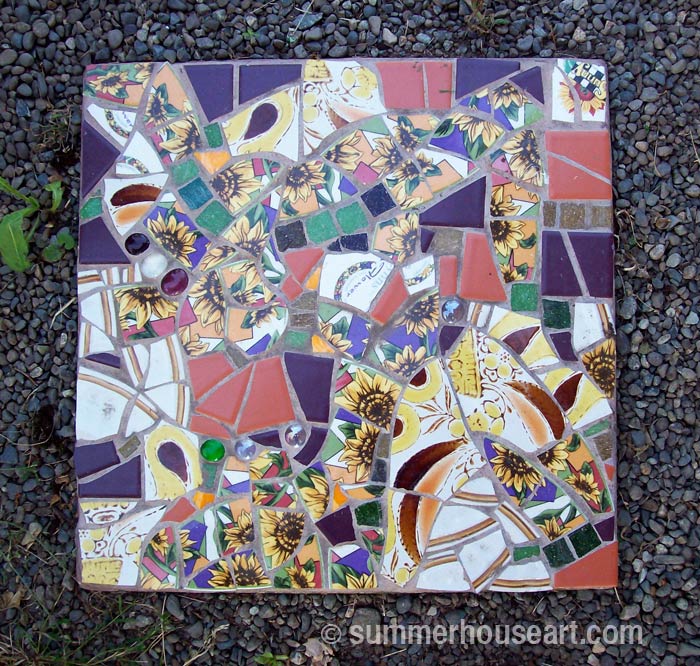
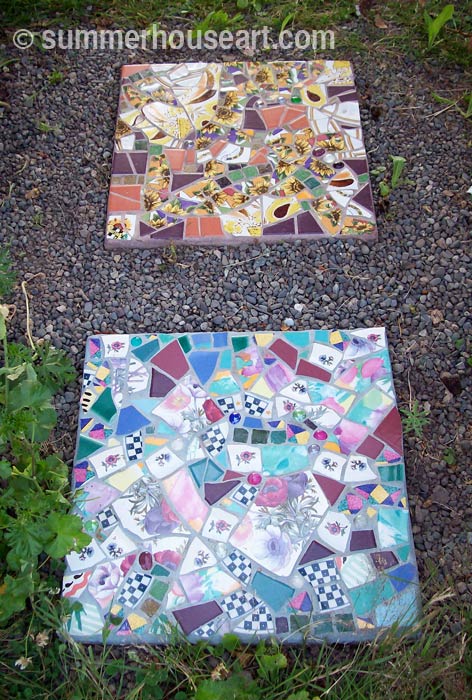
We love making mosaic stepping stones for our garden. They’re fun and easy to do. Well, easy as in low tech. But they do take a bit of work. It’s a chance to use some dishes and tile and sometimes other objects to create some color in the garden. Using dishes and other found objects for mosaic is called Pique Assiette.  I like the whole process of using dishes and found objects, collecting them, finding them and of course breaking them to create new patterns.

Pique Assiette Stepping stone, summerhouseart.com

The other day, instead of grouting inside in the studio, I’d set up a work table under the clematis pergola so my afternoon student could grout her mosaic outside in the garden. After she’d finished, very happy with how her piece had worked out, and had gone home with her mosaic creation, we still had the work table set up. I’d done a quick demo of stepping stones for her on a small chunk of broken cement block while she was there. So we had everything ready, and we turned to each other and almost had the same thought at the same time. Hey, lets make another stepping stone.

Pique Assiette Stepping Stone, summerhouseart.com

So off we went, into the studio, to gather up some dishes and tiles to use. We mixed up some more mortar and started. Before we knew it was 8 pm and time to stop and have a quick supper. We still hadn’t grouted but the stepping stones were done. I got out there this morning and grouted mine. So another stone for the garden.

Pique Assiette Stepping Stone, summerhouseart.com

We enjoy the look of these little art pieces. Each one is different and unique. We have some laid into the lawn under the pergola, to create a sort of patio area. Others become entrance art at the gate, or as a way to step through the garden to the car, or as a bottom step from the deck.

Pique Assiette Stepping Stone, summerhouseart.com

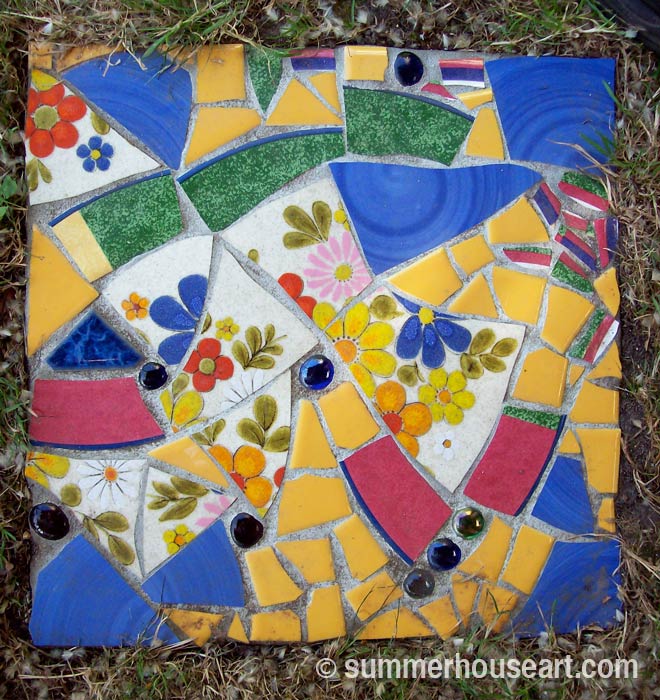
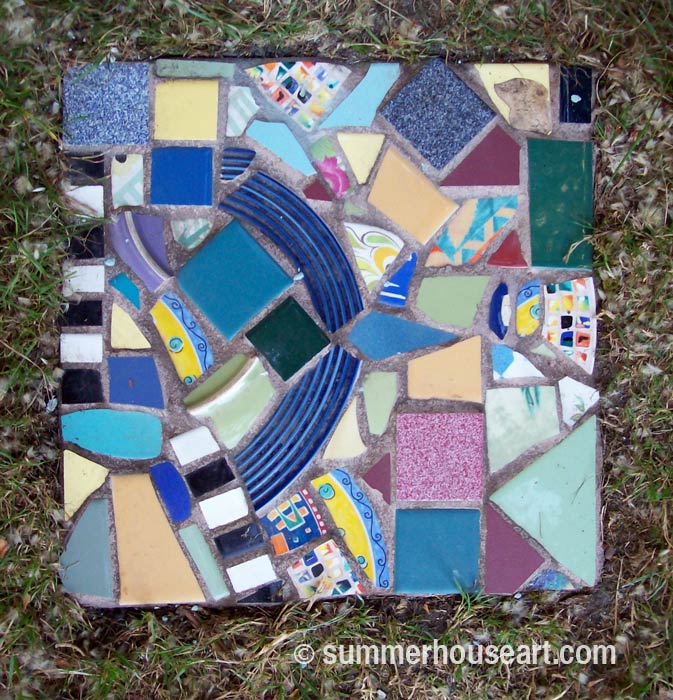
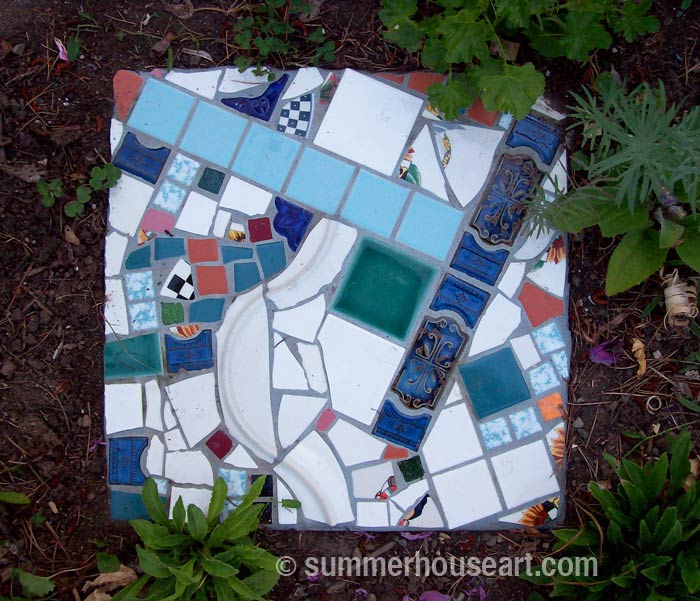
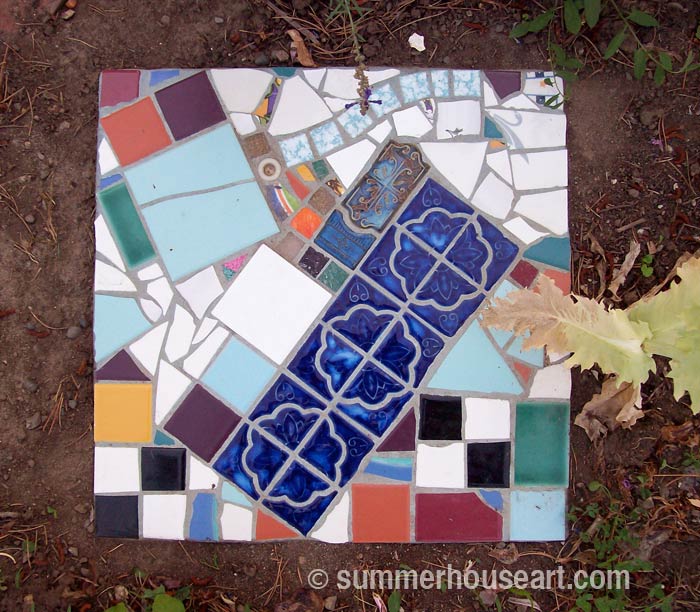
Will and I work totally differently. He likes to create much more minimal abstract compositions. I tend to use dishes with either floral patterns or just basically colorful dishes laid out in an overall sort of crazy quilt manner. We work quickly and without too much thought, counting on our innate sense of composition to work for us. We just relax and enjoy the time.

Pique Assiette Stepping Stone, summerhouseart.com

Pique Assiette Stepping Stone, summerhouseart.com

Pique Assiette Stepping Stones, summerhouseart.com

There’s something about mosaic sparkling in the sunshine and greenery of the garden that makes you enjoy having it underfoot.

Pique Assiette Stepping Stone, summerhouseart.com

Pique Assiette Stepping Stone, summerhouseart.com

Pique Assiette Stepping Stones, summerhouseart.com

If you are interested in creating some stepping stones for your garden and don’t know how, you are in for a treat. My next post is all about how to create mosaic stepping stones. There are lots of ways to do this, but this is my way.

Now you may have noticed that we didn’t tell you which of us created all of the stepping stones in this blog.  So, which ones do you think are mine and which ones are Will’s?

(BTW, if you’d like to make a comment, just click on the title.  It’ll take you to comments….and we do appreciate comments )

Save
Share

How to Paint a Rug on a Deck Floor or at Least How I Did It…

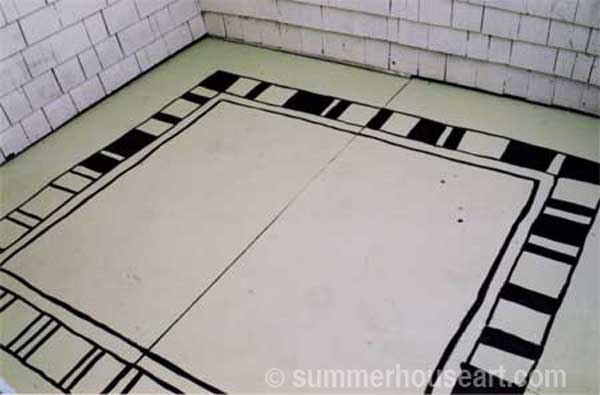
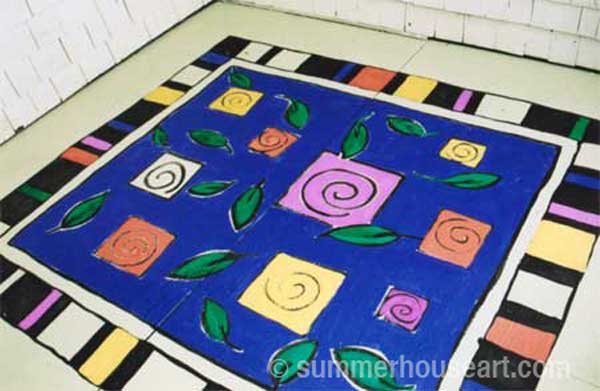
I’d painted a rug on our deck when we first moved in. But one day, due to some rotting of old plywood part of the deck had to be replaced. Now the deck been repaired and repainted and it looked wrong. Just a flat color and there was nothing to hold the area together visually. Obviously, we needed to paint on a new rug!  So today I’m going to have a post all about how to paint a rug on a deck floor, or at least how I painted one…
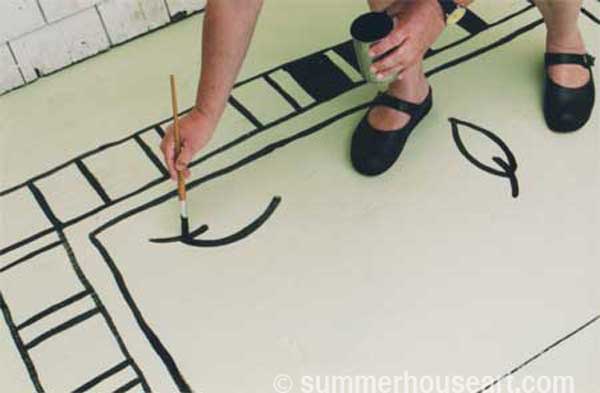
The deck was already clear of furniture and plants so we had a clean slate. What colors? Well that was easy.  As color inspiration, I just chose all my favourite colors at the time. The beauty of that is that they always go together. Everyone gravitates to certain colors naturally, and we tend to buy our clothes and accessorize our lives in these colors. Don’t fight it, just go with the flow and you will find you have a pallet of colors without having to think too hard. My colors have changed a bit since then and if I’d done the rug today I might have chosen deep purple, lime green, turquoise, majenta and touches of red and orange. Hmm, maybe I should change those colors. Oh don’t tempt me!
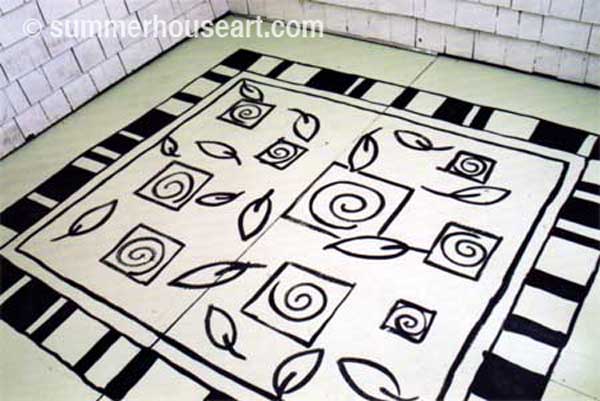
A very simple design was quickly sketched out on paper and off we went.   I drew out the design in pencil and then outlined it all in black paint. By the way, the whole rug is done in acrylic paint, just the paint we get from the art supply store, which we, as painters, had on hand. It dries very quickly (about 20 minutes on a sunny day) and we took lots of  tea breaks between colors. Artist acrylic paint stands up very well to sun and weather and in fact this rug has been on the deck for more than 5 or 6 years and it’s stood up better than the deck paint from the paint store!

How to paint a rug on Deck floor tutorial, Helen Bushell, summerhouseart.com

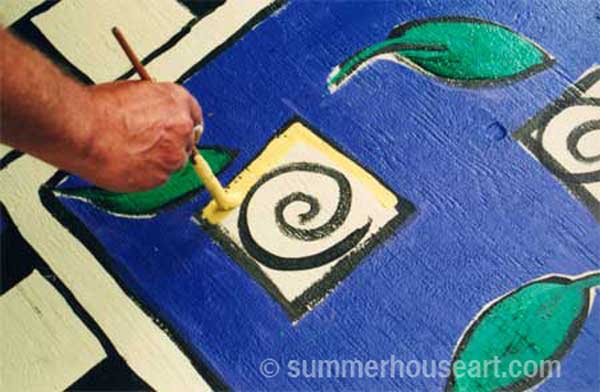
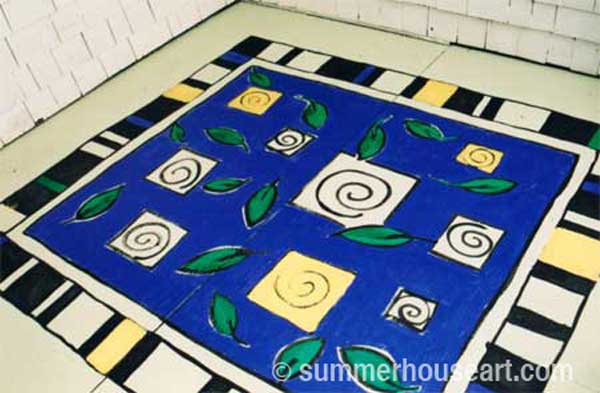
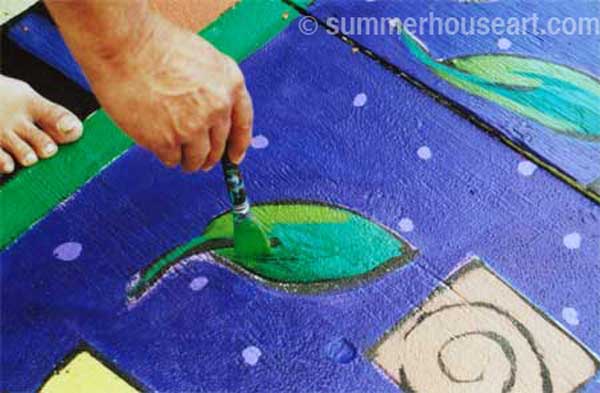
The black outline was done freehand in paint because I wanted a loose and energized feel to it. First the border was done and then I added leaves in a very simple design and squares that punctuated the overall space in a free handed way. Each square held my fave motif, the spiral.

How to paint a rug on Deck floor tutorial, Helen Bushell, summerhouseart.com

Just go with some design element you like. Maybe it’s paisley or maybe flowers, whatever. Just take that element and toss it all over the surface. I kept it very loose and didn’t worry too much about being symmetrical. I don’t  really like things that are too balanced.

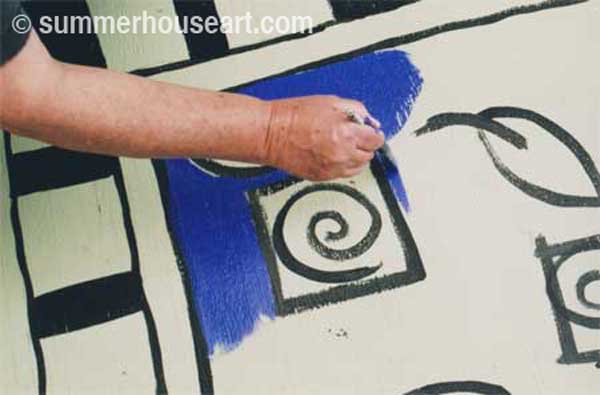
How to paint a rug on Deck floor tutorial, Helen Bushell, summerhouseart.comFrom there I started with the central color, a deep purple-blue, leaving the leaves and squares free of color to be applied later.
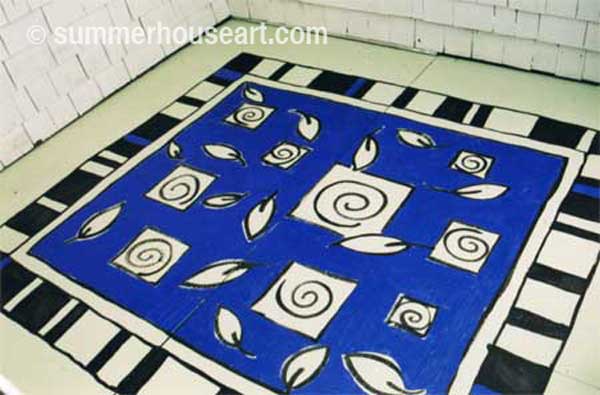
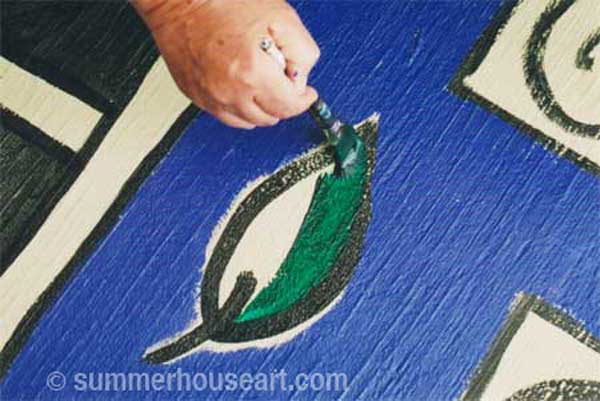
How to paint a rug on Deck floor tutorial, Helen Bushell, summerhouseart.com

How to paint a rug on Deck floor tutorial, Helen Bushell, summerhouseart.com

Then the leaves were filled with one shade of green. I would later add a touch of another shade of green to give them more depth.

How to paint a rug on Deck floor tutorial, Helen Bushell, summerhouseart.com

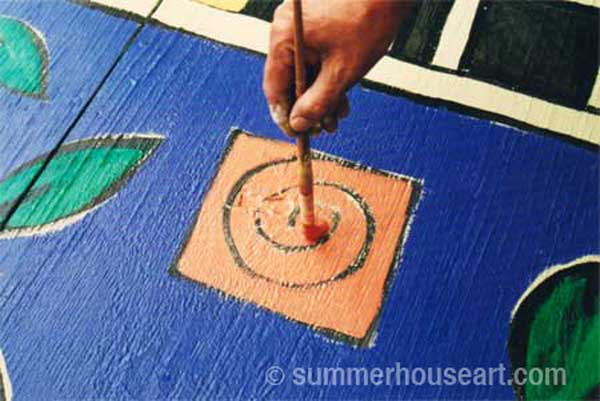
Then each spiral color was mixed and I filled in the squares around the black spiral without worrying too much about being even.

How to paint a rug on Deck floor tutorial, Helen Bushell, summerhouseart.com

How to paint a rug on Deck floor tutorial, Helen Bushell, summerhouseart.com

Whatever was left of that color was added to the spaces in the border.

How to paint a rug on Deck floor tutorial, Helen Bushell, summerhouseart.com

How to paint a rug on Deck floor tutorial, Helen Bushell, summerhouseart.com

I added a light green to the dark green leaves to give them a bit of a pop.

How to paint a rug on Deck floor tutorial, Helen Bushell, summerhouseart.comThen it almost seemed done. But the blue needed something to keep it from visually sinking, something to bring the design right up at the surface. Ah, dots! Little mauve dots were randomly added to the surface. This made the whole area become more animated.
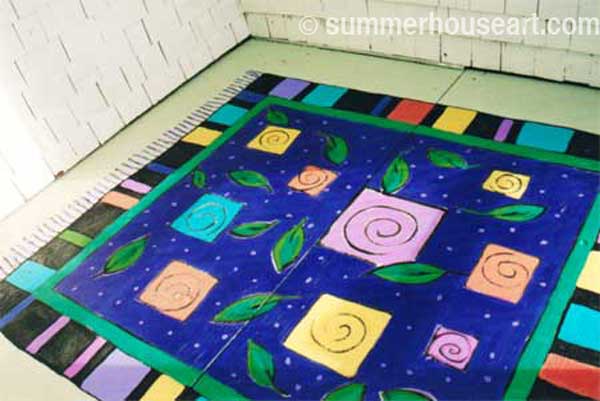
Still something missing? I’d almost forgotten. A rug needs tassels. The tassels were first painted on in black and then a thin line of mauve was added to give them a rounded look.

How to paint a rug on Deck floor tutorial, Helen Bushell, summerhouseart.comTah dah! The whole rug was a hit. After leaving it overnight to allow the paint to cure, all the plants were moved back as well as the chairs and table. We’ve enjoyed it for years now.
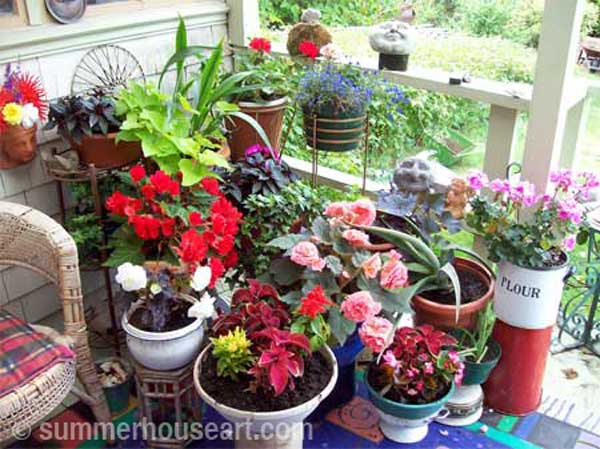
How to paint a rug on Deck floor tutorial, Helen Bushell, summerhouseart.com

Every spring, even though this is a covered deck, after all the winter storms, it’s covered with dirt and leaves. I just wash it off, sometimes even using a scrub brush, and hose it down. It’s become very nicely worn looking. And if I want, I may even one day change the colors just for fun. So as you can see, pretty easy and fun. And I don’t have to worry about corners of the rug rolling up and tripping myself!

Please feel free to leave comments or questions. I’d love to hear from you.

Share

The Gorge On Art Show

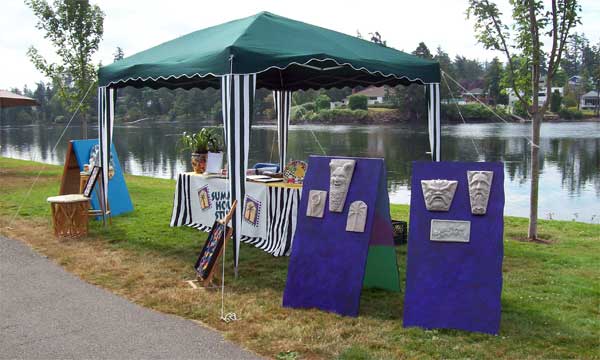
Our site at the "Gorge on Art" show
Our site at the “Gorge on Art” show

This weekend we’ll be packing up our tent, our mosaics and our sculptures once again and setting off for another show. We’ve participated in this one many many times. It’s always enjoyable and so far we’ve only had to take the tent down once when it threatened to take off like a sail in the wind. Hey, it keeps things exciting.

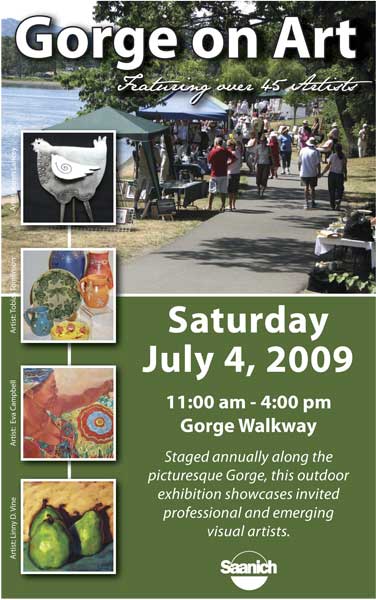
Every summer The Municipality of Saanich creates this wonderful event to show off all the artists that inhabit studios all over the town. There will be 48 artists booths, a variety of musicians and good food all along the Gorge Walkway.

My personal favourite thing is having students that I’ve taught from years past, pop in and say hello and tell me what they’ve been up to. And it’s always fun to get a chance to show off our new sculptures and talk about the fun of mosaic.

A pair of beautiful Newfoundlanders

And did I mention that we have a weakness for some of the wonderful dogs that accompany their owners to this event. Don’t you just love these two teddy bears?

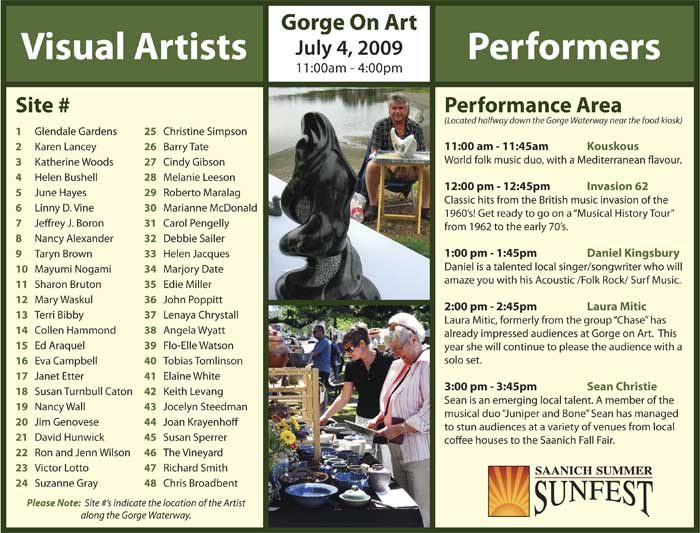
Here is the poster for the show, with a list of all the artists participating.

gorge show poster

artist list

So if you live in Victoria or are visiting, this is well worth taking in. Please come to #4, the Summer House Studio booth and say hello. If I’m not sneaking off to take in the variety and inspiration along the walkway, I’ll be there with Bill, breaking dishes.

Share

Bird Playgrounds

The lilac is in bloom in all its glory. The breezes carry the perfume and you have these little moments of pure joy as you lift up your face to catch that wonderful scent.

arbor sculpture
arbour sculpture

I just had to take a photo of one of Will’s found art sculptures with a background of lilac blooms to set it off.

We have a couple of arbours in our garden. One is to hold the clematis and the other in the far corner of the garden carries the grape vines. Each one of these was made with all found materials. As a finishing touch Will and I went beach combing, not exactly a hardship for us, to find the embellishments. These arbours are projects that never really finish. Will works on them as he finds time and inspiration. We have stacks of beautiful driftwood piled up ready at hand for him to create with.

A door knob on high
A door knob on high

I personally love the spirals he’s created with recycled,rusted barrel hoops. The one on the grape arbour has as it’s crowning glory an old glass doorknob. There is really something magical that happens when the sun hits that doorknob just right and it glows and sparks as the sunlight streams through.

We like to joke that these sculptures serve a much more distinctive and important purpose. They are not just art, or as I like to think of them, three dimensional drawings of curves and lines. No, these are bird playgrounds. Little sparrows and wrens love to play on them, ducking up and under and chasing each other and happily chirping. It’s a sight to see.

And I love to tell Will that he has real purpose as an artist, not just to create lovely bits of sculpture, but more importantly he has a definite role as a bird playground creator. What more could he want?

Share

Getting Hooked on Pique Assiette Mosaics

I think the whole recycling way of life probably led to us getting involved in mosaics. We always found some way to have what we wanted by finding it used or creating it ourselves.

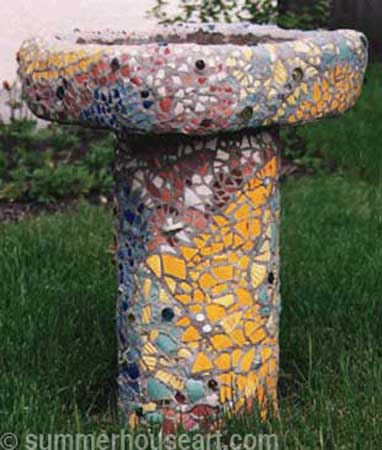
Our very first pique assiette mosaic came about in 1988 or 89, when I decided that I must have birdbath, a really nice birdbath, not just any old birdbath from the garden shop. I’d seen some mosaic made with old dishes in a magazine and the idea clicked. We needed a mosaic birdbath! From that first stab at mosaic we ended up discovering the joys of pique assiette, which in rough translation, means stolen dishes. Well, of course, we didn’t steal dishes, but we found a lot of good material at my favourite store, Value Village. That and all the Sally Ann Thrift stores that abound everywhere.

The base of the birdbath was made by pouring cement into a sono tube found at the local building supply store. The top was built by lining a cardboard box with a black plastic bag and pouring in cement. We scooped out the middle to create a hollow in the centre which would become the bath area. By pulling up on the bag we made the sides rounded.

Now this was our very first attempt and we had no clue. We wouldn’t do the mosaic the same way now that we know so much more. As soon the cement was cured we just set up the base and the top on a picnic table in the back yard. We’d gone to Value Village and found as many dishes as we could in different colors and spread them out on a picnic table in the backyard. We’d put a dish in a plastic grocery bag and whack it with a hammer. The bag was to keep the pieces from flying around on the grass. Soon we were really good at it.

progress, Our first Pique Assiette birdbath, Helen and Will Bushell, summerhouseart.comThen we arranged the pieces in a loose pattern on a piece of newspaper. For each section we mixed up a small batch of cement, applied a small area of it on to the surface of the base about a half an inch thick and pushed the pieces of broken dishes into the mortar. As it began to set, we would scrape away the cement around the last section as closely as we could to the dish pieces and then mix up a new batch of cement and carry on with pushing the pieces in.

progress, Our first Pique Assiette birdbath, Helen and Will Bushell, summerhouseart.com

As you can imagine the sound of all these dishes breaking in our backyard soon brought out the neighbours who one by one made their way over to our back yard to find out what the heck we were up to.

All in all, the bird bath was quite successful. We left the bath area bare of mosaic for easier cleanup of it with a garden hose. We also tried to make quite sure that the pieces on the rim didn’t have any sharp points poking out, didn’t want our feathered friends to get cuts. The bird bath was also very very heavy, and when we moved to Victoria, we gave it to a close artist friend for her front yard where it weathered in beautifully.

Our first Pique Assiette birdbath, Helen and Will Bushell, summerhouseart.com

I like the look of that birdbath, sort of lumpy and rough. If we were to make the same thing today, we would apply mortar to each piece of dish, apply it to the cement base and when it was all set, we would apply grout. So much easier and better looking.

There is something about the surface of mosaic. Something about the way it glistens and sparks in the sunlight. I was hooked with that first mosaic. Even now when I get a piece done I rush outside with it to see it in the sunlight. All in all, the birdbath was the beginning of a wonderful journey.

Creating art with recycled materials is a triple thrill. You wake up a real sense of creativity, get to see dishes and ornaments in a whole new way and hey, you get to make art-without-guilt, as I love to tell my mosaic students. To see more of our mosaics and what can be done with old dishes, have a boo at our mosaic gallery pages.

Share