Just Can’t Resist Playing with the Fall Colors

I started this blog with the idea of just doing a few photos of fall colors. Who can resist, right? But then, as I was getting the photos ready I just couldn’t help playing in Photoshop.

I am hopeless when it comes to color. The more color the better. I also like to play around with things. Ok, so I’m an artist, we like color and we like to play. So now I’m going to treat you to my version of Fall Color, but with a twist. First I’ll show you the regular Fall color, which is good, but then to contrast that (and yes, I did have fun with that Contrast setting in Photoshop) I’ll show you my version…..oh oh.

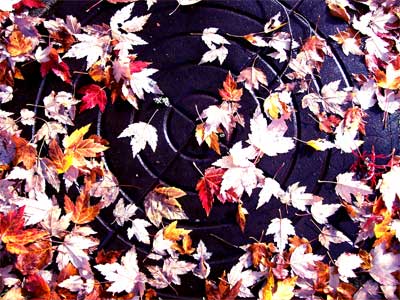
The first is a photo of a manhole cover that I came upon while out strolling, covered in leaves. Now, I love abstraction which is probably why I also like close-up, flat pattern shots. It has something to do with my way of seeing that I suppose has been heightened by all those years in art college. Ok first the regular color which I only slightly goosed up with the contrast setting.
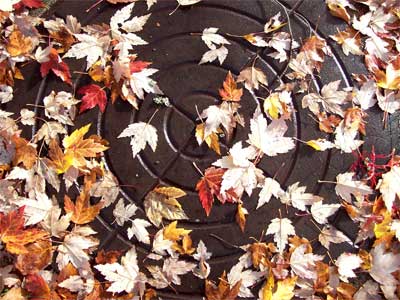
manhole-cover

Next is my high contrast shot. I love it! It takes the color to another level, the manhole is now bluish and the leaves shocking. The pattern glows.
manhole-phtoshp

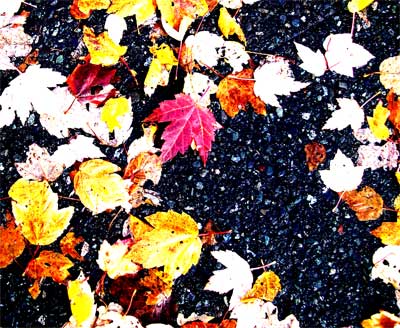
I love an all over pattern on a flat surface and what better than leaves on pavement? Ok first the usual ….
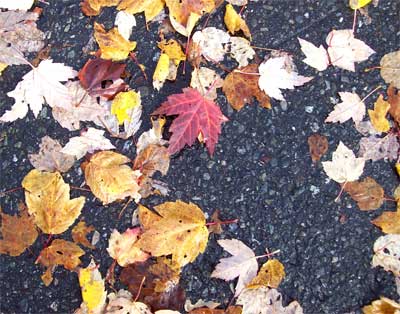
leaves normal

Now the souped up color. I love how it creates an even flatter surface, accenting the shape and color.
leaves-photoshp

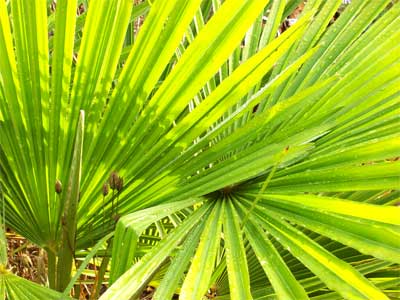
My windmill palm after the rain, close up, face right in the leaves. The “normal” version is for me wonderful, love those lines and patterns!
palm-nrml

But then with the contrast boosted, oh my, it takes on a whole other feeling, the pattern is the focus!
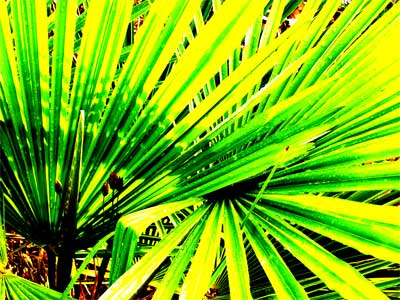
palm-phtoshp

The grape arbour was a wealth of color, almost too much color in fact.
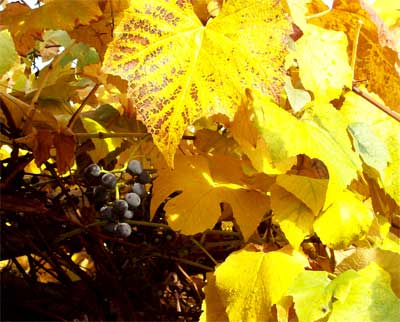
ylwgrapenrml

But then I played with it a bit. I wanted to create even more of a contrast and bring out the purple of the grapes and the beauty of the leaves.
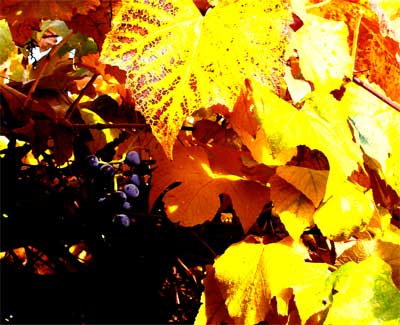
yellow grape photoshop

Next is a mistake, I suppose. The shot naturally came out with this odd intense blue in the upper corner which I loved, of course.
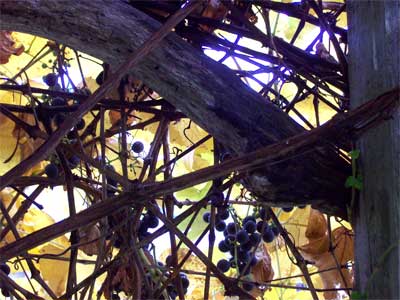
grape-arbour-nrml

So also of course, I just had to go with that intense blue. And look what happened. I love the look of it.
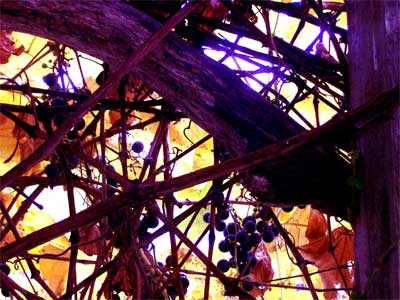
grape arbour phtoshp

OK one more please…
This last one was also a mistake, the flash went off which of course flattened the whole photo. But, me, who loves flat pattern, it wasn’t so much of a mistake.
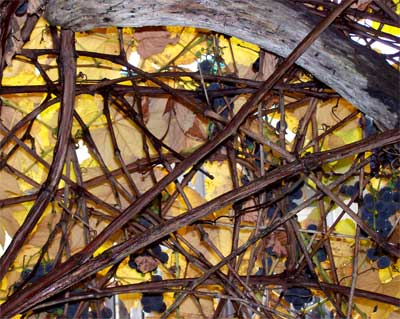
leavesnrml-2

The next version is my attempt at taking that flatness even further. To me this now looks like light coming through glass, stained glass?
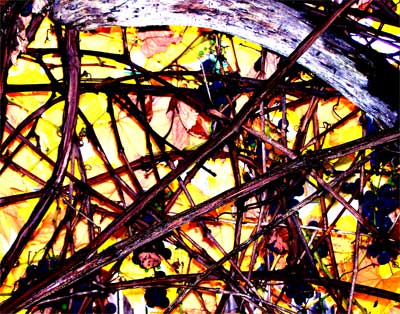
flat grape photoshop

Ah, me, I just love Photoshop! Don’t you?  Too much fun.

Share

The New Pique Assiette Mosaic Buddha Shrine Part 4 – The Search for Serenity

What is it about this little shrine that makes me think that it is becoming a string of problems, one thing after another? Why does it seem like every dish I planned to use on it is either wrong or I don’t have enough of it? Decisions I make and try out, turn out to look all wrong. Frustration is becoming a constant visitor.

Oh, of course, here’s me trying to be as serene as the Buddha, but I can’t.  No, it’s not going to happen. No serenity here today. Ok, Helen, Breathe.

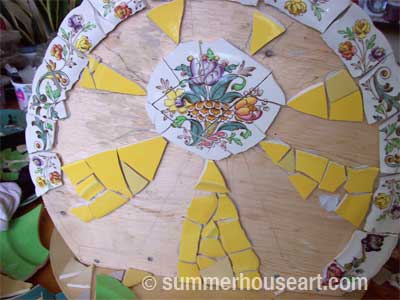
I started on the back of the shrine the other day. I thought OK this lovely little plate and this lovely little edge will be perfect. And that part of it is. I’m happy, I’m serene, even, with that. But then I needed to fill in the space. First I just was going to do a mixture of turquoise, bright green (the same plate as the lily leaves on the front) and yellow. This would be picking up the colors in the pattern on the central area. Then I got the bright idea of having a starburst in yellow and then filling in the spaces with greens.

detail, progress on back, Buddha Shrine by Helen Bushell, summerhouseart.com

Well, after spending almost a whole afternoon at it and then looking at it again the next day, I decided it didn’t work. Too bright, too whatever, at any rate, I removed it.

Since then I’ve been checking out thrift store dishes every chance I get and nothing, nada, I haven’t found anything that is just right….yet.

Ok never mind, I said to myself. Work on the front.
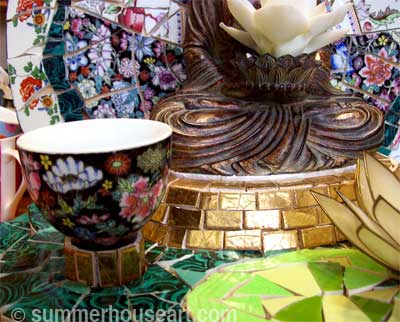
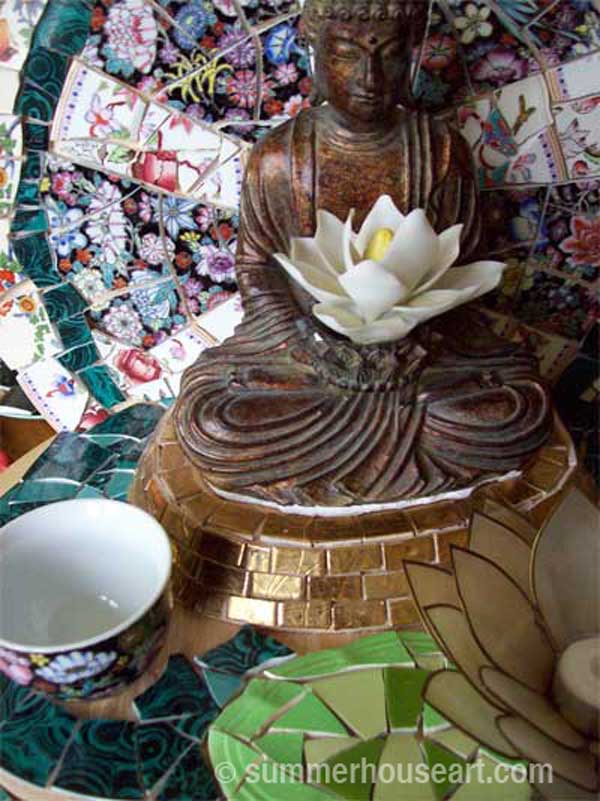
First, I needed to make a little stand for the teacup that I plan to use for a tea light holder. Will, thank goodness, found the perfect solution, a little piece of dowel, now covered in gold tile.

Buddha Shrine by Helen Bushell, summerhouseart.com

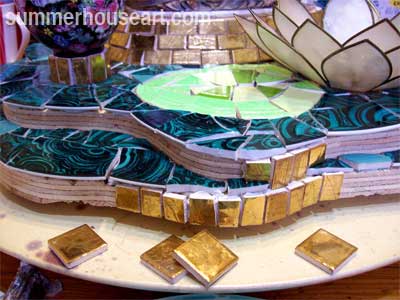
As you know, I’ve been looking for more of that lovely dark green malachite looking plate. Again, no luck. I used almost every little scrap of the dark green plate to finish the pond. I wanted to rim the pond with it too. So, ever the problem solver, I decided to go with using my tiny cache of gold tiles to rim the pond.

detail, progress, Buddha Shrine by Helen Bushell, summerhouseart.com

Each little piece of gold had to be cut from an inch square tile, and individually glued on. At last, something that just required some time doing tedious, repetitious work. Strangely, this became an exercise in becoming calm, focusing and patiently working.

detail, progress, Buddha Shrine by Helen Bushell, summerhouseart.com

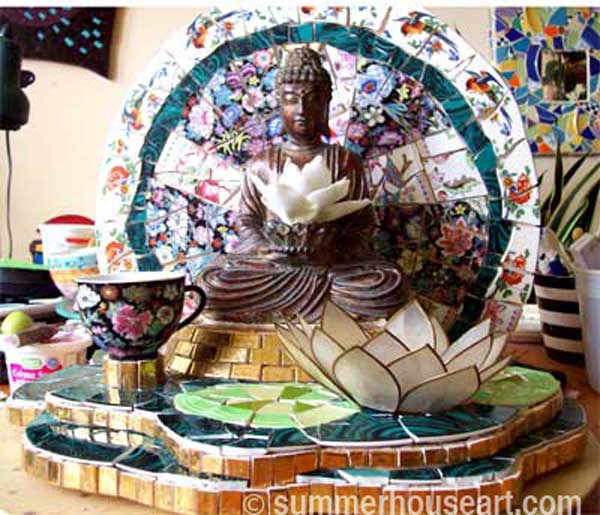
Last night, after I glued on the last tiny little bit, I stood back and enjoyed the almost finished front.

But then today, out on my walk, I quickly nipped into the thrift store across the street, looking for the perfect plates to finish the back. Again, no success. OK Helen, Breathe, Relax and Know that you will find the perfect plates yet. They are just still on their way. Be Serene.

Last installment Buddha Shrine Part 5, The Inevitable but Strangely Perfect Conclusion

Share

The New Pique Assiette Mosaic Buddha Shrine – Part 3 (Progress, a Piece at a Time)

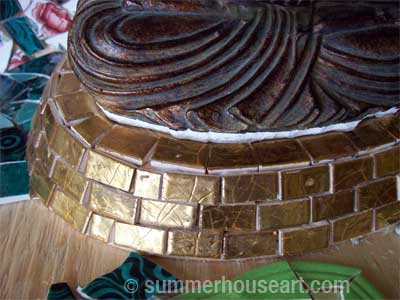
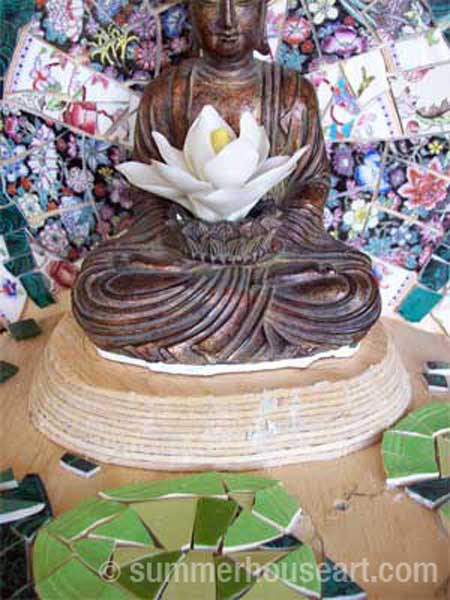
The Buddha shrine is slowly coming along. I haven’t had much time to work on it in the last little while but I did manage to get the base that the Buddha is resting on covered in gold tile. I did say it’s a slow art, didn’t I?

The gold tile is from a stash of Italian tile that I picked up at a garage sale years ago. There is very little of it left and I do what I can to stretch it out. A sneaky way to do that is to cut the tile up into smaller pieces. Luckily the brick pattern I chose perfectly fit the space.

detail, progress, Buddha Shrine by Helen Bushell, summerhouseart.com

The top of the base where the Buddha sits meditating was filled in with tile while the statue was in place. Much the best way to ensure that by grouting time the space where he will be glued down is exactly right. Right now you can see the broken raw edge of the Buddha statue around the bottom, but trust me, when I grout this, it will all look great and be hidden. I’m considering a sort of verdigris color of grout.

detail, progress, Buddha Shrine by Helen Bushell, summerhouseart.com

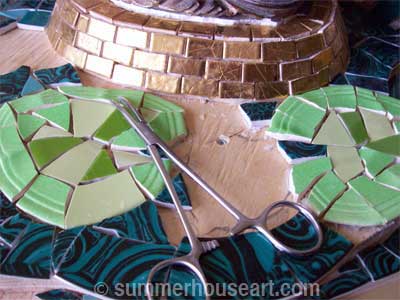
I’ve been doing some of what I call “fine fitting” to make all the little spots left on the back fit well. One of my students this summer, a nurse, left me a pair of forceps and I must admit they’ve come in very handy when fitting tiny bits of mosaic in tight spaces.

I always tell my students to grab all they can if they see a plate that they know they love and will use. Why oh why didn’t I follow my own advice? I’d seen two of these plates a few weeks back in a thrift shop but had the idea that I had much more of it than I actually did and didn’t buy them. Last weekend I hit as many thrift shops as I could, but no luck. Ah well, I’ll keep looking but I may have to come up with another solution for the raw edge around the pond.

detail, progress, Buddha Shrine by Helen Bushell, summerhouseart.com

All in all, though, I’m quite pleased with how it’s progressing. At the moment my next decision is whether or not to mosaic the back of the stand behind the statue. Will it find a home against a wall? Will the back be seen when it’s all done? On the other hand, it does give it a finished look. Oh, more decisions. But I may find just the right plates and that will make the decision easier. I’d still love to find some sort of feet to put under the stand. Wish me luck.

Click for Buddha Shrine Part 4  The Search for Serenity

Share

The New Pique Assiette Mosaic Buddha Shrine – Part 2 (Creating in Real Time)

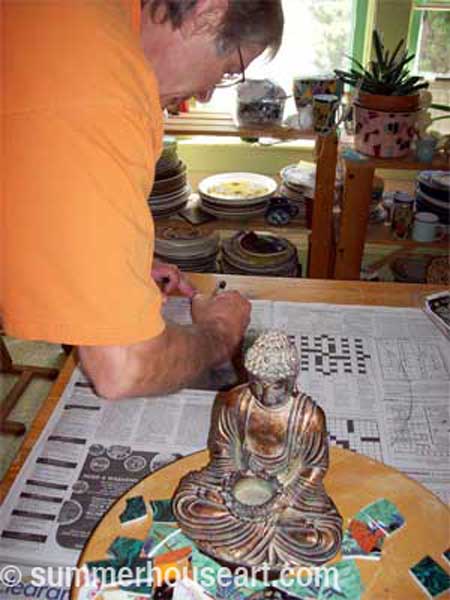
It has occurred to me that doing this in installments may have set up an expectation. Like daily installments, lots of progress. But that’s not how mosaic works. It takes time. Lots of time. Its a slow process. So if you were expecting something that unfolds in fast forward like time lapse photography, well, you may have to deal with time, real time.

I remember reading that the idea that stress is caused by the fast pace of life is actually wrong. Nowadays, we are stressed by things that don’t happen fast enough. We snap our fingers with impatience at microwaves, bank machines and computers that take longer than a few seconds to do their job or load. So mosaic is like a step into the past, where time takes, well, hours, days, weeks but definitely not seconds.

And sometimes other things get in the way of doing things too. Like the fact that sometimes you get sick, as I was for three long weeks. Or that you get company, happy enjoyable company but it puts you off your progress. But lately, I’ve made progress, some forwards, some backwards.

detail, progress, Buddha Shrine by Helen Bushell, summerhouseart.com

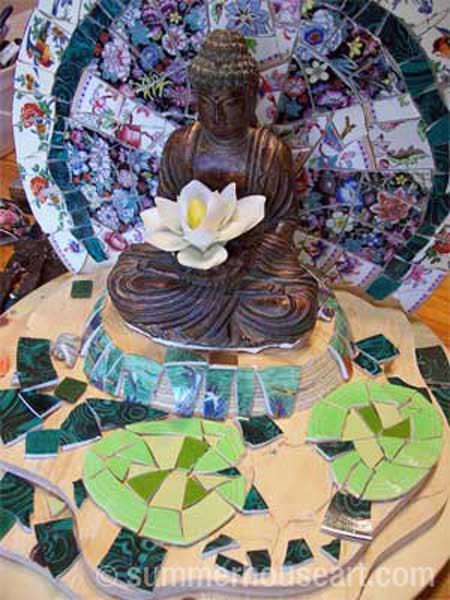
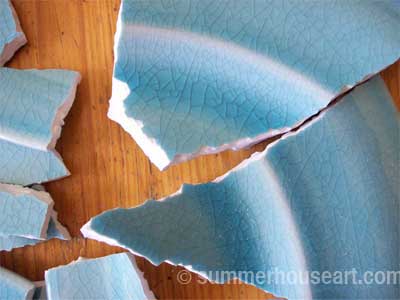
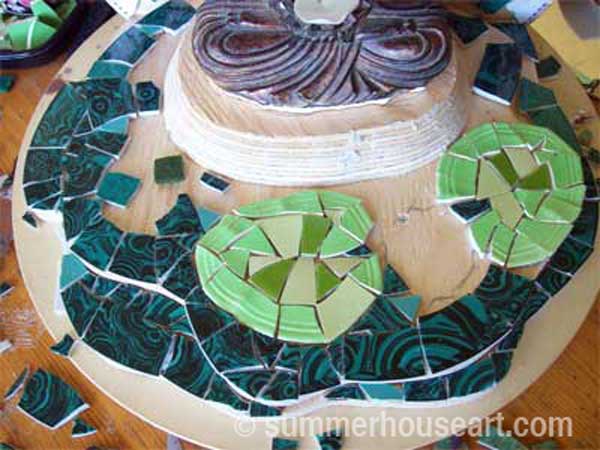
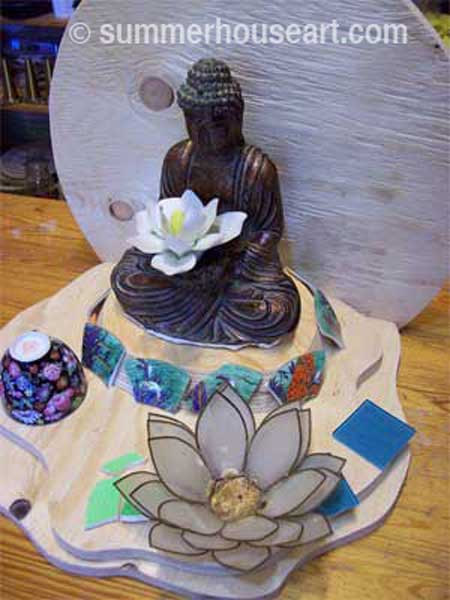
First I worked on the water lily or lotus leaves. That came together well. Then I needed to make decisions about the pond. The plate I’d originally planned to use was a disaster. It broke in jagged edges, was too thick and finally abandoned.

badplatewm

But the one I chose next was an improvement. Lovely, dark green with a pattern that to me spoke of ripples in a pond. The problem with it is that it also doesn’t break as well as I’d like. But that’s also part of mosaic, the lack of control, sometimes you have to go with the flow and work with that. And take more time to piece it together.

Next was the stand that the Buddha is resting on. I’d chosen a plate that just didn’t work with my new choice of pond. Students are always surprised when they discover that you can change things that are glued down. That’s what chisels are for, I tell them.

detail, progress, Buddha Shrine by Helen Bushell, summerhouseart.com

So off came the plate, and now that portion will be covered in my stash of carefully hoarded gold tiles. Being creative always seems to come down to making one decision after another.

Yesterday, I made progress with the pond. It seemed to go along so well. Maybe it was because I was listening to 10 New Songs by Leonard Cohen as I worked. Music is so important in the studio. Somehow Leonard’s deep smoky baritone and beautiful words just helped the pieces fit.

detail, progress, Buddha Shrine by Helen Bushell, summerhouseart.com

Now the only problem I face is that I don’t have enough of this lovely dark green plate and may have to use the chisel again to steal pieces of it already ensconced in the background. Or make another thrift store run. Hopefully I’ll get lucky and find more of it. That will take more time. But, time, the slow unfolding of it as you work is really what creating a mosaic is all about. It’s a slow art.
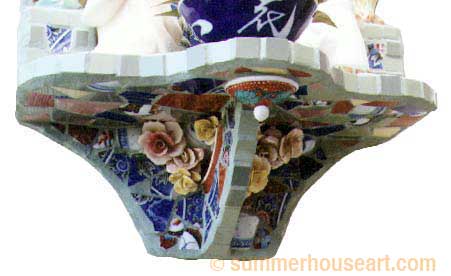
Click for Buddha Shrine part 3 Progress a Piece at a Time

Share

The New Pique Assiette Mosaic Buddha Shrine, Part 1 (In the Creative Flow)

I thought it might be fun to work on a pique assiette mosaic and post the progress and the process from the beginning but in installments. Something to look forward to for some and something to keep me from procrastinating. Because I do procrastinate sometimes. Doesn’t everyone? Maybe procrastination is too hard a word. Let’s just say I get distracted by all the other things like worries and other work. But once I start on something creative, I find myself getting happy.

We are really into garage sailing. Not just for the good finds, but for the time out, the enjoyment of it all.

detail, progress, Buddha Shrine by Helen Bushell, summerhouseart.com

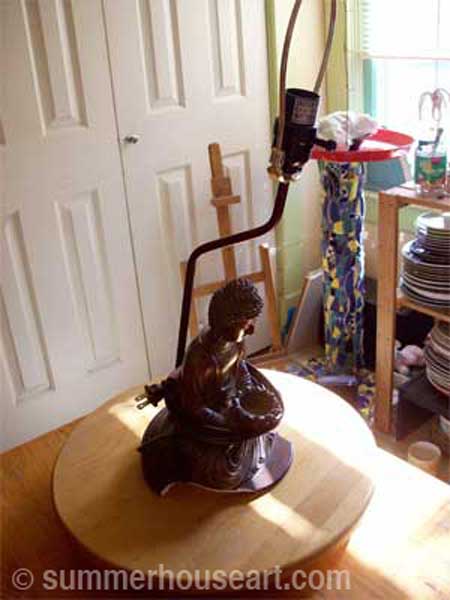
This mosaic’s main piece was found while out garage sailing. It had been tossed on top of a pile of things in the back of a truck full of junk waiting to be hauled off to the dump. I just happened to see it while on my way from one sale to another on the same street. The little Buddha had been a lampstand, but the base was broken. I found the owner of the truck and he very kindly gave it to me, probably wondering why I would even want it.

It sat in my studio for weeks. Now and then I’d show my find to my students, proudly holding it up and saying that some day it would be the start of new piece. As soon as I had some time.

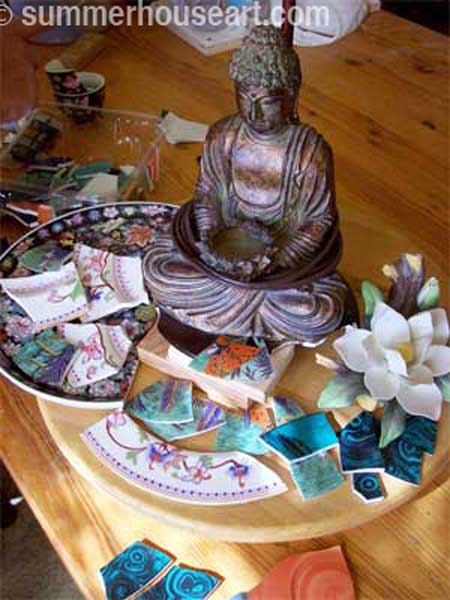
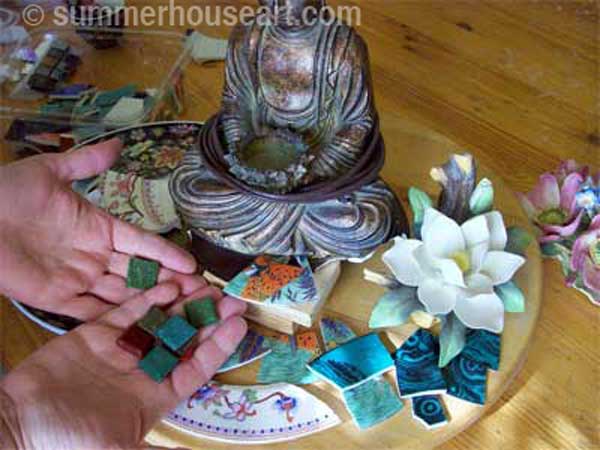
Then finally, last week, the little Buddha finally got his day. Will and I needed something to change the day, something to do to relax, get happy. We pulled out the Buddha and began. First we pondered, should we keep the light fixture attached and make another lamp? I looked around the studio for dishes and ornaments to compliment him.

detail, progress, Buddha Shrine by Helen Bushell, summerhouseart.com
some of the pieces that would compliment the Buddha
detail, progress, Buddha Shrine by Helen Bushell, summerhouseart.com
trying out ideas

Some of these dishes had been saved for a long time, all slightly Oriental and exotic. One idea followed the next and soon we were in the flow. We saw him in front of a pond with a floating lotus flower, meditating with some sort of ray pattern as his backdrop. With this sudden realization we dropped the idea of keeping the light fixture, dismantled it and saved it for some future project.

cutting off the broken lamp base

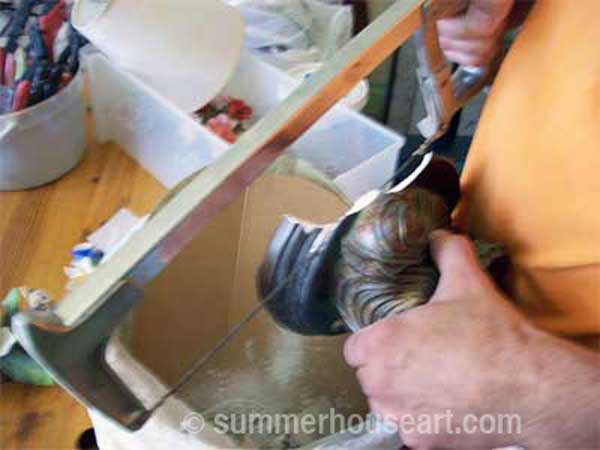
Will carefully sawed off what was left of the lampbase.

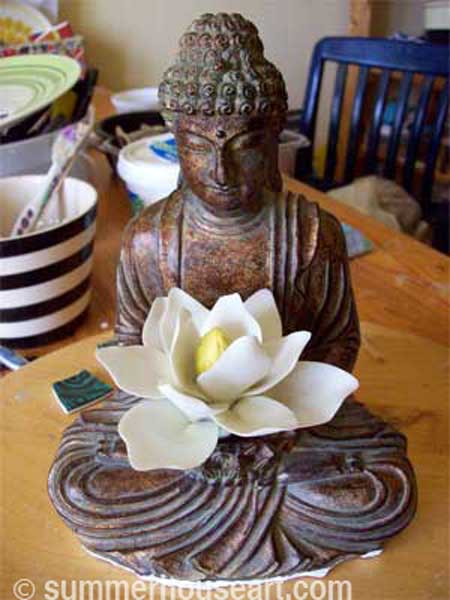
As always, things just seemed to come together. The lotus flower was part of a broken ornament and was originally going to be part of the pond in front in our design.

detail, progress, Buddha Shrine by Helen Bushell, summerhouseart.com

Then it turned out it fit just perfectly into the front of the Buddha ornament itself. Ok, no problem, I had a slightly worn lotus shaped tea light holder to replace it’s original spot. Oooh, tealights in front of him, now that would be good.

detail, progress, Buddha Shrine by Helen Bushell, summerhouseart.com

Sketches were made, deliberations on the placement of the pond, the back drop, the curves and layers, and finally the pattern for the stand was cut out of newspaper. Will, obliging as always, went down to the workshop and cut and screwed and glued the base for me from plywood.

detail, progress, Buddha Shrine by Helen Bushell, summerhouseart.com

While I listened to sawing downstairs I broke the dishes and spent some time doing a few trials of placement for the back-drop.

detail, progress, Buddha Shrine by Helen Bushell, summerhouseart.com

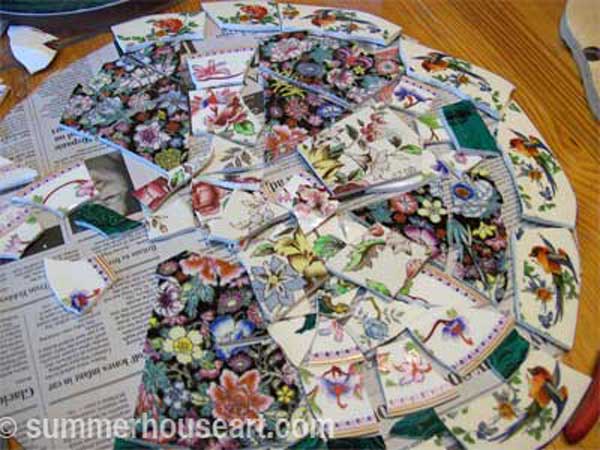
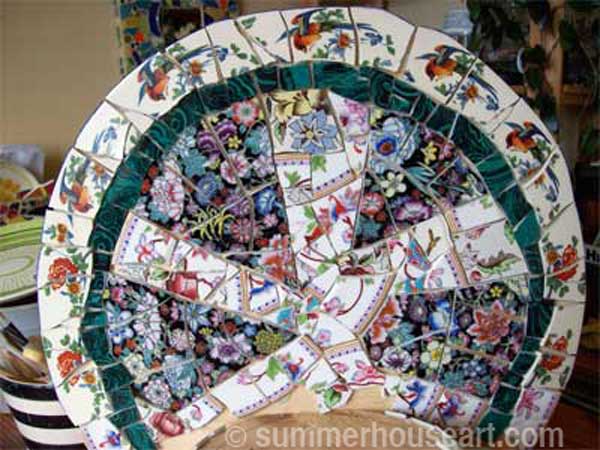
Finally, I could start. And in the bloom of the moment I actually got quite a bit of the backdrop covered.

detail, progress, Buddha Shrine by Helen Bushell, summerhouseart.com

The golden pheasant plate has become the border, the pheasants flying over his head. One oriental plate with a black background became the ray and two other plates also having a floral oriental feel but with white backgrounds became the filler.

Next will come the pond, the lotus flower and leaves. Will I need a spot for another tealight? Decisions, decisions. Trial and error. Too much pattern? Will it “work” together? I love this part. Doing a bit, stopping, standing back and looking, assessing. I’m getting happier.

Click for part 2 of the Buddha Shrine Creating in Real Time

Share

#7 in the Pique Assiette Mosaic Inspiration Series – A Little Bird and an Abundance of Fruit

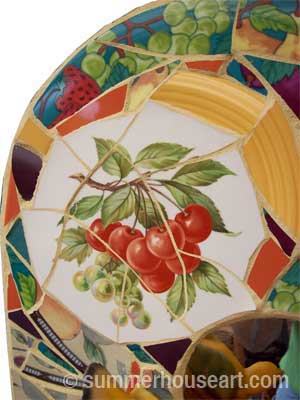
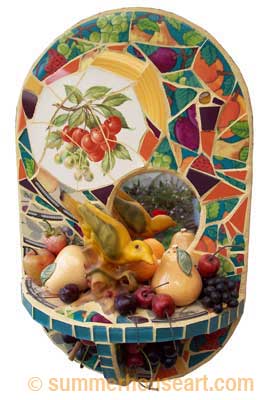
With this Pique Assiette mosaic shrine, the fruity patterns on the dishes created the main theme. As sometimes happens there was one dish that started the ball rolling. In this case it was the little plate with cherries.

Bird and Fruits mosaic, Helen Bushell, summerhouseart.com

Without a clear idea in mind, I started to set aside dishes I found with fruit patterns on them. I didn’t know where it was going, had no clue really, just a feeling that someday I’d do something with a fruit theme. Besides, all these fruity dishes were really quite beautiful. For months no real idea came to me as to what I’d do with them.

Then one day, probably while out shopping for dishes to break, with some of my students, I happened upon this wonderful little bird. I don’t know who designed this bird, who lovingly sculpted the original, but thank you, mystery artist. Ok, looking at it, it’s probably a collectible ornament, maybe even worth money, but to me it was the missing piece. It was the piece that twigged an idea. Fruit and birds, birds and fruit. We have grapes and kiwi in our garden as well as a small apple tree. Birds love these fruits. They like to take a tiny bite and move on to the next fruit.

Bird and Fruits mosaic, Helen Bushell, summerhouseart.com

I saw the bird on a shelf and immediately knew the bird should be reflected in a mirror. Then I needed fruit. Where to get some? Well, thrift stores are full of fake fruit, nice squishy fake grapes and cherries, pear salt and pepper shakers, apple and orange ornaments. It didn’t take long at all to collect what I needed.

I often tell my students that making art is all about making one decision after another, often using intuition. In this case, once I had the final ingredients, all the decisions seemed to make themselves. For one, I made everything rounded, the shelf, the shape of the support, it all seemed to call for roundness, fullness, dare I say rounded fruitiness.

I could have done the mosaic pieces as a random overall pattern but chose instead to group the patterns in flowing areas to set off the cherry plate. The piece was almost too easy to do. I let intuition guide my decisions and with the find of the bird ornament, the piece just “flew” together. OK, OK, I’ll stop now.

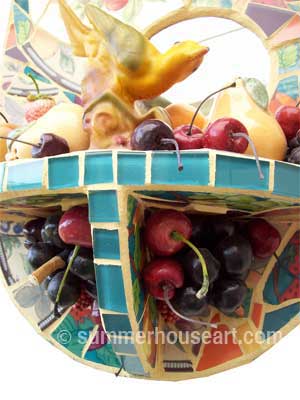
detail, Bird and Fruits mosaic, Helen Bushell, summerhouseart.com

Then last, but not least, I wanted it feel abundant, like the way that trees and vines full of fruit make us feel. Under the shelf, I glued veritable bunches of those nice squishy, kitschy grapes and a few cherries, so it was practically dripping abundance. I’ve given the pretty bird a setting, a home. I like it, it makes me smile. That’s all I really need.

Share

#5 In the Pique Assiette Mosaic Inspiration Series – Feng Shui and the Foo Dog


I like to dabble in all sorts of things, like to shake up my thinking a bit. Feng Shui was one of those interests that I took up for a time and I even incorporated some of its ideas into my home here and there. For instance the far corner of the greenhouse, the “wealth corner”, is full of Jade plants, or money plants. There are other little touches throughout the house too. And I admit that keeping the Chi flowing is a good reason to tidy up. But for an old hippie like me, there are just too many rules to Feng Shui, so I just picked up a few that I liked.

Feng Shui Mosaic, Helen Bushell, summerhouseart.com

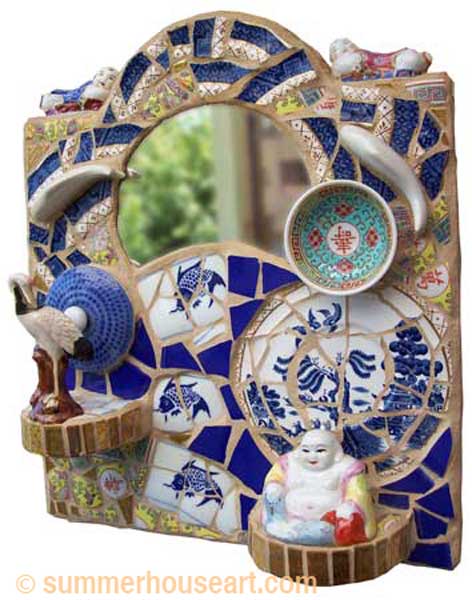
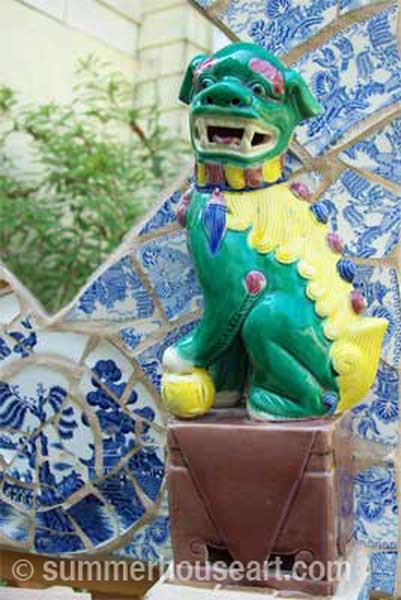
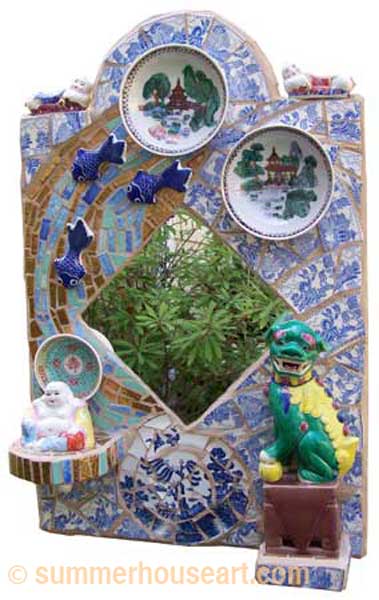
When I found the Foo Dog or Lion at a flea market, I knew I just had to do another Oriental Shrine pique assiette mosaic and I wanted to incorporate a bit of Feng Shui too. I’d already done a small shrine incorporating a couple of Blue Willow porcelain saucers, some chopstick rests, a little Buddha and a stork figurine.  Pique Assiette mosaics, by the way, are a type of mosaic quite different from the usual mosaic made with tesserae, because of the use of the dishes and ornaments.

I’d been trying to cut a round mirror when it just cracked on its own in this wonderful semi-moon shape. Well, something like that cannot be wasted! The shape of that mirror dictated the shape of the shrine and created the shoulders to put the little chopstick rests on. Everything just flowed together.

Where did I get almost all of these wonderful ingredients for the shrine? Well, here in Victoria, we have the most wonderful Chinatown ever. I love shopping in Chinatown, especially in a hidden little alley called Fan Tan Alley which is just too much fun to prowl.

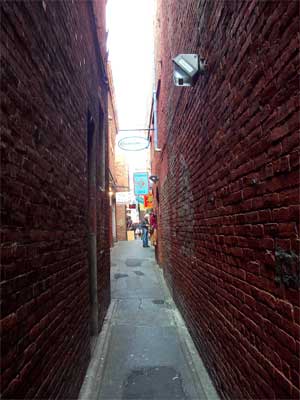
Fan Tan Alley entrance from Pandora Street, Victoria BC, photo summerhouseart.com
The mystery entrance to Fan Tan Alley from Pandora Street
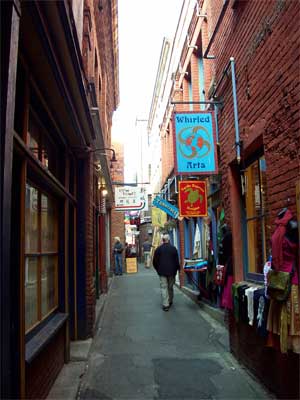
Fan Tan Alley,  Victoria BC, photo summerhouseart.com
Character shops in the alley
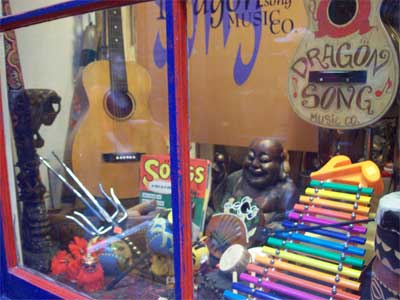
Fan Tan Alley,  Victoria BC, photo summerhouseart.com
The window of Dragon Song Music
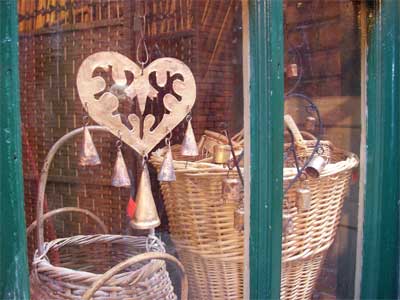
Fan Tan Alley,  Victoria BC, photo summerhouseart.com
Baskets in a Fan Tan shop window

Now, with the find of the Foo dog, again things that I needed just seemed to fall into my lap. The background was made from some really good, antique Blue Willow dishes, given to me by an antique dealer friend of Eric’s. They were chipped and perfect for breaking. And break they did, like butter! So easy to cut and shape.


detail, Foo Dog Mosaic, by Helen Bushell, summerhouseart.com

More chopstick rests and another little Buddha were found on a trip to Chinatown. Any excuse to go there will do, after all. Other oriental saucers were found in Value Village and before I knew it, the piece was ready to start.

Foo Dog Mosaic, by Helen Bushell, summerhouseart.com

But this time I wanted to incorporate some Chi into the design. Chi is a flow of energy in Feng Shui . For that I wanted a water flow, so I created a little “golden river” for the fish to swim in, that led to the serene Buddha. The Foo Dog or Lion was at the gate to protect the Buddha and would keep the “Blue Willow garden” tranquil.

And so Feng Shui, with a nod to tranquility, Chi, and the garden became a design element in this little shrine.

Share

#3 In the Pique Assiette Mosaic Inspiration Series – Meditation, the Bowl and the Buddha

Meditation was something that I always wanted to do but never thought I could. I’d read about it and researched it a bit and decided it was not for me. Me, empty my mind? Don’t think so. Find 30 minutes to meditate more than once a day? Uh uh. So I gave up on it. But one day at the library I found a book written as though just for me, “Miss Instant Gratification”. It was called “Meditation Made Easy” by Lorin Roche.

Well, I snapped it up and you know, it was wonderful. The book made it all easy. You don’t have to empty your mind, just return your focus to your breathing, after allowing thoughts to “float through”. Ok I could do that. And you can do it in 5 minutes! Or even less once you get the knack of it.

He encourages you to develop your own way of meditating that fits your life. Since then, I’ve been recommending his book and been busy teaching my version of it to everyone I think needs it . And that, just recently, included my #1 son Paul (we have three sons and he was our first) and his wife, Olya, who are just a bit frazzled with a quite wonderful, adorable, beautiful and totally lovable (grandma speaking here) two-week old son.

Which brings me to my next Pique Assiette Mosaic inspiration and how it came to be. Bet you wondered where this was leading, didn’t you?

Buddha Shrine, Helen Bushell, summerhouseart.com

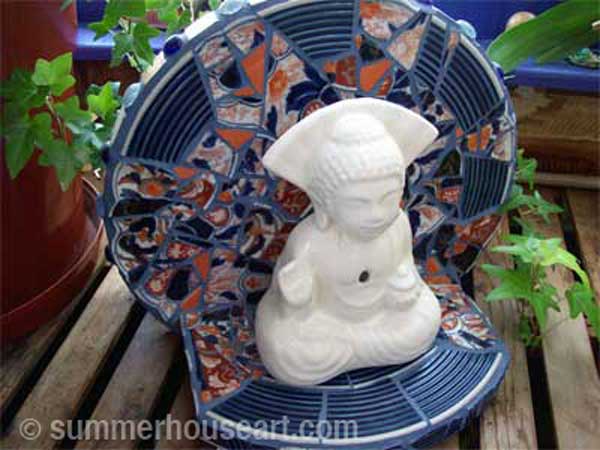
Again, the piece started with a piece of crockery but this time it was already broken.  Using crockery, dishes and ornaments puts this mosaic into the Pique Assiette category, which roughly translated means “stolen dishes”.

Hart, our fellow artist and great friend, had a client who had this lovely Japanese bowl, actually an antique, maybe valuable, now not fixable and she gave it to him to do his creative magic with. And he gave it to me.

Somehow the colors in the intricate pattern which are an almost burnt orange color and a deep blue seemed to be a perfect backdrop for one of my most meditative buddha ornaments from the Japanese restaurant collection. And with the thought that a circular shape would be most restful, the design inspiration was almost complete. Another blue plate, with an edge of concentric raised lines, was broken to create a feeling of rippled water in front of the meditating figure which became the finishing touch.

So there were all the elements of design inspiration: Meditation, Japan, blue rippled water, circular shapes being restful, the beautiful pattern of the Japanese bowl in burnt orange and blue, and the white buddha all coming together.

Buddha Shrine, Helen Bushell, summerhouseart.com

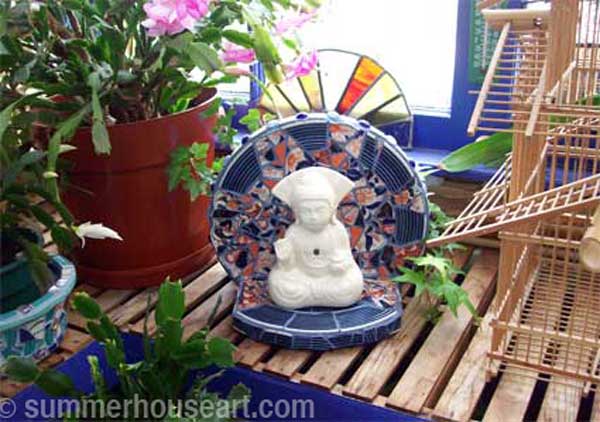
Today this mosaic has it’s honoured spot in the corner of the greenhouse, in amongst the plants and next to a wicker birdcage. It draws my eye and just it’s peaceful look gives me a meditative moment. And according to “Meditation Made Easy”, sometimes a moment is all you need.

Share

#2 In the Pique Assiette Mosaic Inspiration Series – The Japanese Plate

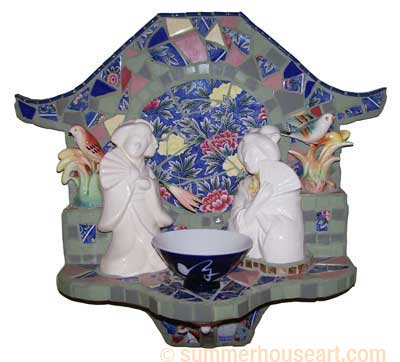
I didn’t have an idea for this piece to start with. I wasn’t thinking about Japan at all. Until I found this beautiful plate at a garage sale. It was an authentic gorgeous plate Hand Made in Japan, printed on the back and had a little chip in the border. The reason it had been sacrificed to the sale table I suppose. The pattern was of chrysanthemums or carnations, I’ve never been sure. But I think that the former is more of a Japanese favourite. It was a large plate, about 12 inches across. I saw it as a background for something. And I knew it would look really good broken and reassembled in a mosaic.

Geisha Mosaic, Helen Bushell, summerhouseart.com

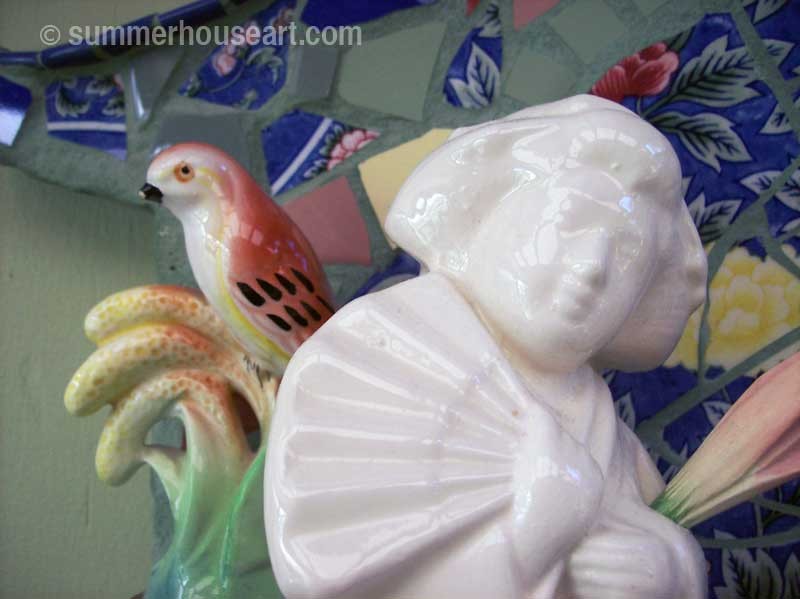
So the plate was the start or maybe it was the finish. Because suddenly I had a use for a few things that I’d collected in my studio and it all came together. The Geishas are actually drink glasses from a Japanese restaurant.

Geisha Mosaic Detail, by Helen Bushell, summerhouseart.com

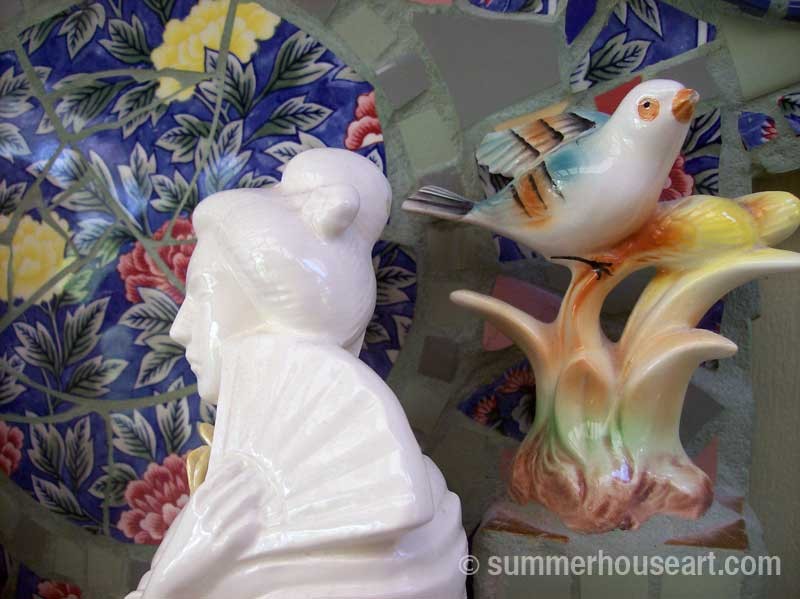
The backs of them are open and there is a little hole in the front of each one to put a straw in so you can sip your drink. These drink glasses come in all types of figures from geishas to samurai warriors to Buddhas, lots of Buddhas. You find them everywhere at garage sales and thrift shops. And I have a collection of them. Ok I have lots of collections but more about that on another blog. So now I had the geishas in front of the plate, on a shelf and I needed something else. The quiet little birds had been gathering dust for ages and their color caught my eye as being perfect with the colors of the plate. And they gave this sort of lyrical touch to the ladies.

Geisha Mosaic Detail, by Helen Bushell, summerhouseart.com

What else? A bowl. A Japanese bowl to float a flower in for my little Japanese shrine.

Geisha Mosaic Detail, by Helen Bushell, summerhouseart.com

Then there was shape of the background to deal with, and in keeping with the theme, I drew out a pagoda shape for the top of the shrine. Now I only had to come up with something for under the shelf. I also collect those little porcelain floral bouquets. No, not to display, but to take apart very carefully with plyers or a hammer and chisel, and use the flowers on mosaics. They’re good even if a bit chipped because you can hide the missing petals in an arrangement easily. So under the shelf there is an arrangement of flowers. They don’t necessarily match the plate but who wants to be too matchy-matchy? And the little lid from a broken pot, turned upside down? Well, that became the finishing touch.

I suppose this was a case of inspiration backwards. The plate started the idea and the Japanese shrine came later. The Hawaii shrine started with an idea and the pieces came later. Backwards, forwards. Inspiration works either way if you let it.

Quote for today. Apropos, I think, for today’s blog

Minds are like parachutes – they only function when open.
Thomas Dewar

Share