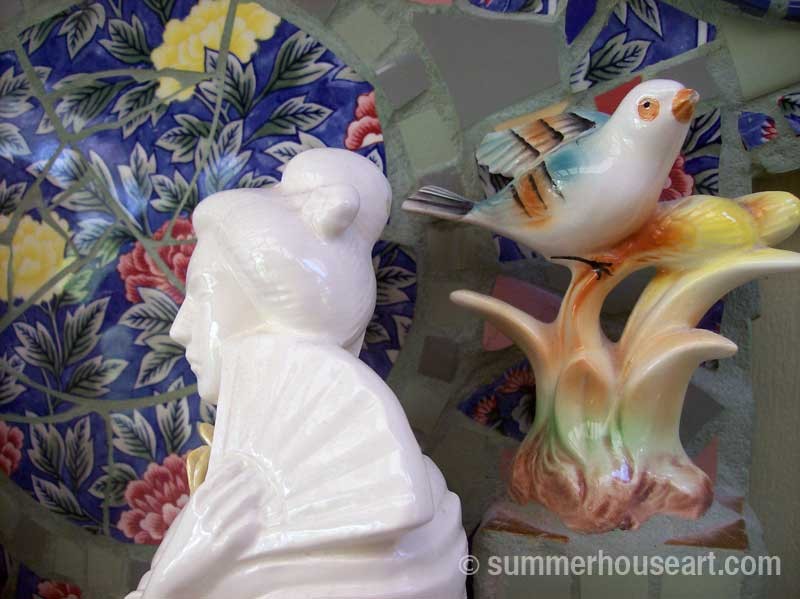
The New Pique Assiette Mosaic Buddha Shrine – Part 2 (Creating in Real Time)

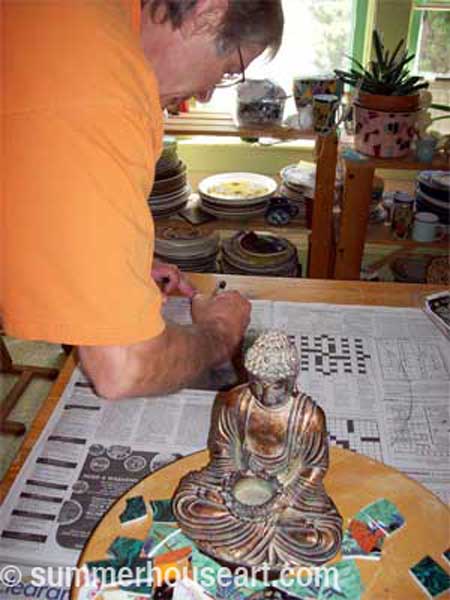
It has occurred to me that doing this in installments may have set up an expectation. Like daily installments, lots of progress. But that’s not how mosaic works. It takes time. Lots of time. Its a slow process. So if you were expecting something that unfolds in fast forward like time lapse photography, well, you may have to deal with time, real time.

I remember reading that the idea that stress is caused by the fast pace of life is actually wrong. Nowadays, we are stressed by things that don’t happen fast enough. We snap our fingers with impatience at microwaves, bank machines and computers that take longer than a few seconds to do their job or load. So mosaic is like a step into the past, where time takes, well, hours, days, weeks but definitely not seconds.

And sometimes other things get in the way of doing things too. Like the fact that sometimes you get sick, as I was for three long weeks. Or that you get company, happy enjoyable company but it puts you off your progress. But lately, I’ve made progress, some forwards, some backwards.

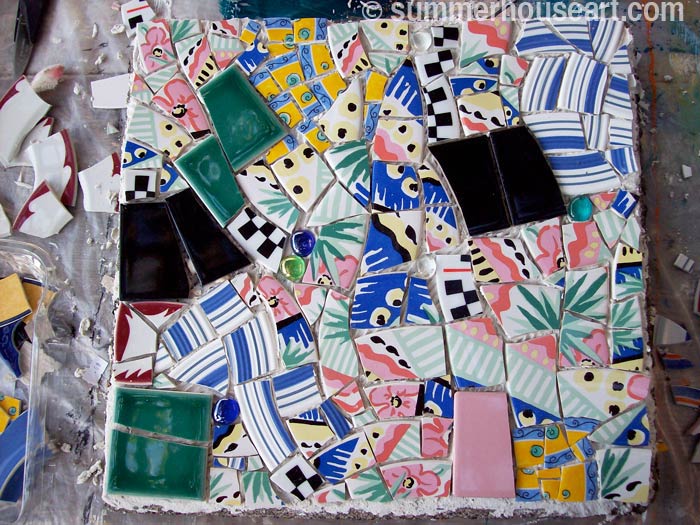
detail, progress, Buddha Shrine by Helen Bushell, summerhouseart.com

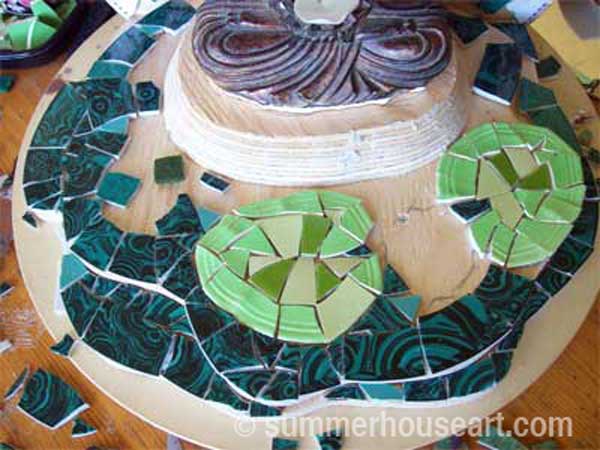
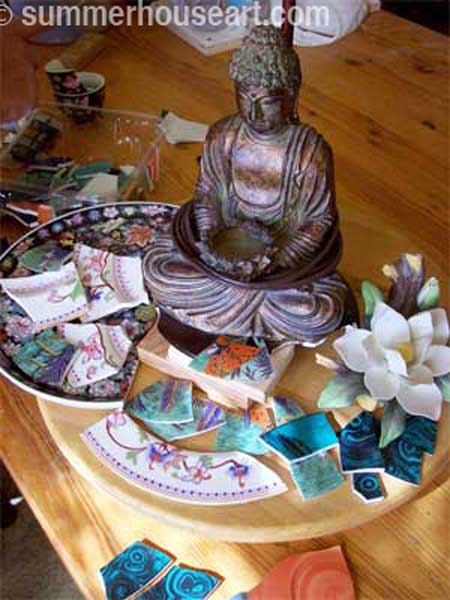
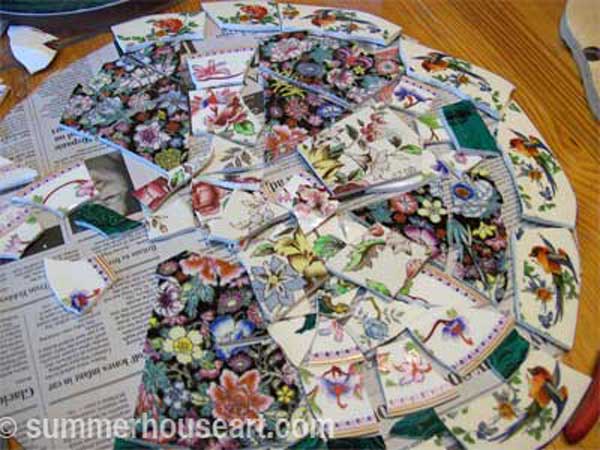
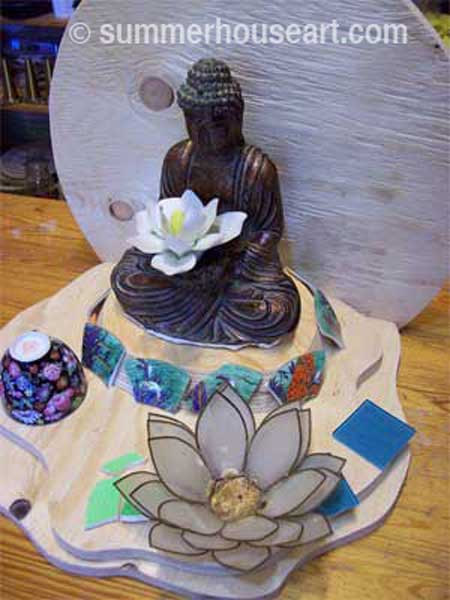
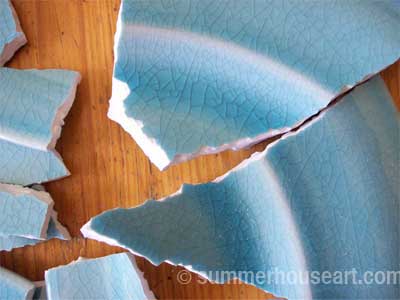
First I worked on the water lily or lotus leaves. That came together well. Then I needed to make decisions about the pond. The plate I’d originally planned to use was a disaster. It broke in jagged edges, was too thick and finally abandoned.

badplatewm

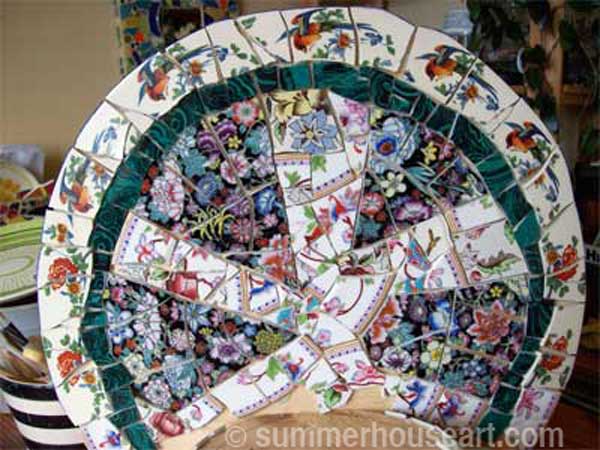
But the one I chose next was an improvement. Lovely, dark green with a pattern that to me spoke of ripples in a pond. The problem with it is that it also doesn’t break as well as I’d like. But that’s also part of mosaic, the lack of control, sometimes you have to go with the flow and work with that. And take more time to piece it together.

Next was the stand that the Buddha is resting on. I’d chosen a plate that just didn’t work with my new choice of pond. Students are always surprised when they discover that you can change things that are glued down. That’s what chisels are for, I tell them.

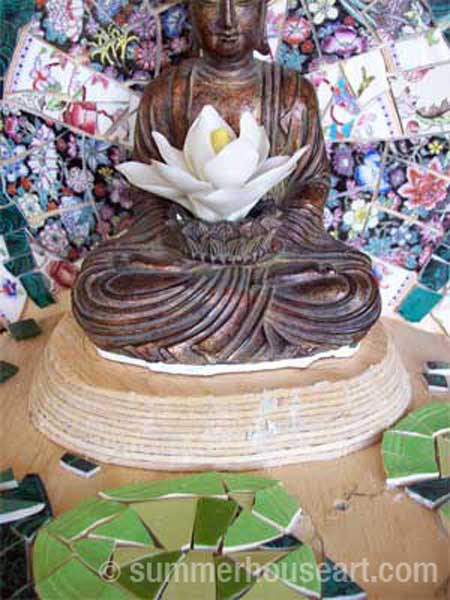
detail, progress, Buddha Shrine by Helen Bushell, summerhouseart.com

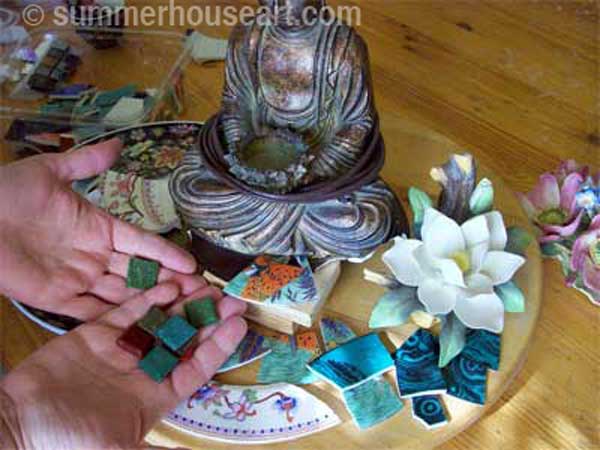
So off came the plate, and now that portion will be covered in my stash of carefully hoarded gold tiles. Being creative always seems to come down to making one decision after another.

Yesterday, I made progress with the pond. It seemed to go along so well. Maybe it was because I was listening to 10 New Songs by Leonard Cohen as I worked. Music is so important in the studio. Somehow Leonard’s deep smoky baritone and beautiful words just helped the pieces fit.

detail, progress, Buddha Shrine by Helen Bushell, summerhouseart.com

Now the only problem I face is that I don’t have enough of this lovely dark green plate and may have to use the chisel again to steal pieces of it already ensconced in the background. Or make another thrift store run. Hopefully I’ll get lucky and find more of it. That will take more time. But, time, the slow unfolding of it as you work is really what creating a mosaic is all about. It’s a slow art.

Click for Buddha Shrine part 3 Progress a Piece at a Time

Share

The New Pique Assiette Mosaic Buddha Shrine, Part 1 (In the Creative Flow)

I thought it might be fun to work on a pique assiette mosaic and post the progress and the process from the beginning but in installments. Something to look forward to for some and something to keep me from procrastinating. Because I do procrastinate sometimes. Doesn’t everyone? Maybe procrastination is too hard a word. Let’s just say I get distracted by all the other things like worries and other work. But once I start on something creative, I find myself getting happy.

We are really into garage sailing. Not just for the good finds, but for the time out, the enjoyment of it all.

detail, progress, Buddha Shrine by Helen Bushell, summerhouseart.com

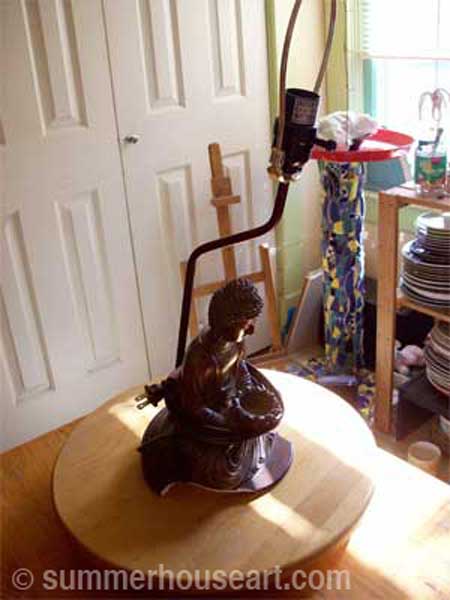
This mosaic’s main piece was found while out garage sailing. It had been tossed on top of a pile of things in the back of a truck full of junk waiting to be hauled off to the dump. I just happened to see it while on my way from one sale to another on the same street. The little Buddha had been a lampstand, but the base was broken. I found the owner of the truck and he very kindly gave it to me, probably wondering why I would even want it.

It sat in my studio for weeks. Now and then I’d show my find to my students, proudly holding it up and saying that some day it would be the start of new piece. As soon as I had some time.

Then finally, last week, the little Buddha finally got his day. Will and I needed something to change the day, something to do to relax, get happy. We pulled out the Buddha and began. First we pondered, should we keep the light fixture attached and make another lamp? I looked around the studio for dishes and ornaments to compliment him.

detail, progress, Buddha Shrine by Helen Bushell, summerhouseart.com
some of the pieces that would compliment the Buddha
detail, progress, Buddha Shrine by Helen Bushell, summerhouseart.com
trying out ideas

Some of these dishes had been saved for a long time, all slightly Oriental and exotic. One idea followed the next and soon we were in the flow. We saw him in front of a pond with a floating lotus flower, meditating with some sort of ray pattern as his backdrop. With this sudden realization we dropped the idea of keeping the light fixture, dismantled it and saved it for some future project.

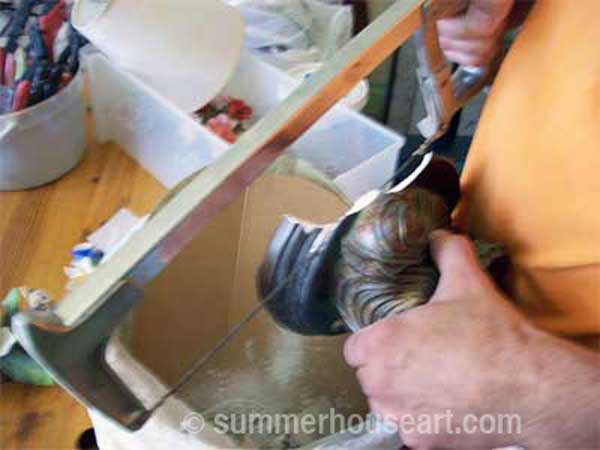
cutting off the broken lamp base

Will carefully sawed off what was left of the lampbase.

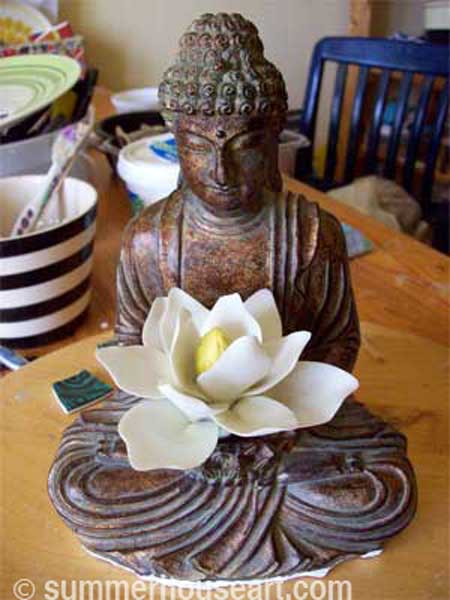
As always, things just seemed to come together. The lotus flower was part of a broken ornament and was originally going to be part of the pond in front in our design.

detail, progress, Buddha Shrine by Helen Bushell, summerhouseart.com

Then it turned out it fit just perfectly into the front of the Buddha ornament itself. Ok, no problem, I had a slightly worn lotus shaped tea light holder to replace it’s original spot. Oooh, tealights in front of him, now that would be good.

detail, progress, Buddha Shrine by Helen Bushell, summerhouseart.com

Sketches were made, deliberations on the placement of the pond, the back drop, the curves and layers, and finally the pattern for the stand was cut out of newspaper. Will, obliging as always, went down to the workshop and cut and screwed and glued the base for me from plywood.

detail, progress, Buddha Shrine by Helen Bushell, summerhouseart.com

While I listened to sawing downstairs I broke the dishes and spent some time doing a few trials of placement for the back-drop.

detail, progress, Buddha Shrine by Helen Bushell, summerhouseart.com

Finally, I could start. And in the bloom of the moment I actually got quite a bit of the backdrop covered.

detail, progress, Buddha Shrine by Helen Bushell, summerhouseart.com

The golden pheasant plate has become the border, the pheasants flying over his head. One oriental plate with a black background became the ray and two other plates also having a floral oriental feel but with white backgrounds became the filler.

Next will come the pond, the lotus flower and leaves. Will I need a spot for another tealight? Decisions, decisions. Trial and error. Too much pattern? Will it “work” together? I love this part. Doing a bit, stopping, standing back and looking, assessing. I’m getting happier.

Click for part 2 of the Buddha Shrine Creating in Real Time

Share

#7 in the Pique Assiette Mosaic Inspiration Series – A Little Bird and an Abundance of Fruit

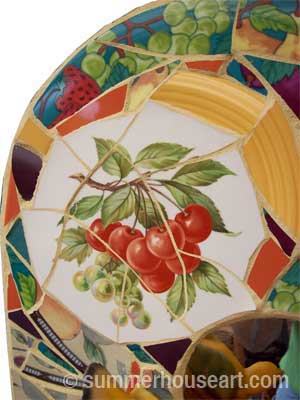
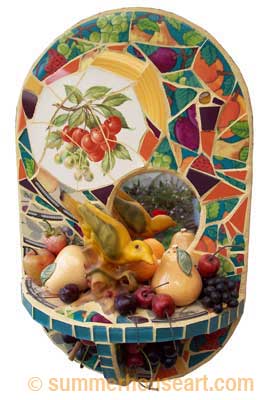
With this Pique Assiette mosaic shrine, the fruity patterns on the dishes created the main theme. As sometimes happens there was one dish that started the ball rolling. In this case it was the little plate with cherries.

Bird and Fruits mosaic, Helen Bushell, summerhouseart.com

Without a clear idea in mind, I started to set aside dishes I found with fruit patterns on them. I didn’t know where it was going, had no clue really, just a feeling that someday I’d do something with a fruit theme. Besides, all these fruity dishes were really quite beautiful. For months no real idea came to me as to what I’d do with them.

Then one day, probably while out shopping for dishes to break, with some of my students, I happened upon this wonderful little bird. I don’t know who designed this bird, who lovingly sculpted the original, but thank you, mystery artist. Ok, looking at it, it’s probably a collectible ornament, maybe even worth money, but to me it was the missing piece. It was the piece that twigged an idea. Fruit and birds, birds and fruit. We have grapes and kiwi in our garden as well as a small apple tree. Birds love these fruits. They like to take a tiny bite and move on to the next fruit.

Bird and Fruits mosaic, Helen Bushell, summerhouseart.com

I saw the bird on a shelf and immediately knew the bird should be reflected in a mirror. Then I needed fruit. Where to get some? Well, thrift stores are full of fake fruit, nice squishy fake grapes and cherries, pear salt and pepper shakers, apple and orange ornaments. It didn’t take long at all to collect what I needed.

I often tell my students that making art is all about making one decision after another, often using intuition. In this case, once I had the final ingredients, all the decisions seemed to make themselves. For one, I made everything rounded, the shelf, the shape of the support, it all seemed to call for roundness, fullness, dare I say rounded fruitiness.

I could have done the mosaic pieces as a random overall pattern but chose instead to group the patterns in flowing areas to set off the cherry plate. The piece was almost too easy to do. I let intuition guide my decisions and with the find of the bird ornament, the piece just “flew” together. OK, OK, I’ll stop now.

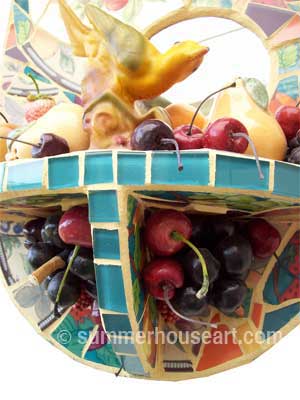
detail, Bird and Fruits mosaic, Helen Bushell, summerhouseart.com

Then last, but not least, I wanted it feel abundant, like the way that trees and vines full of fruit make us feel. Under the shelf, I glued veritable bunches of those nice squishy, kitschy grapes and a few cherries, so it was practically dripping abundance. I’ve given the pretty bird a setting, a home. I like it, it makes me smile. That’s all I really need.

Share

#6 in the Pique Assiette Mosaic Inspiration Series – Using Intuitive Design on Pots or How Not to Be a Control Freak

Mosaic Inspiration #4 I talked about the intuitive process to create an overall random design on a flat surface like a mirror. And if you’ve looked at our stepping stones you’ll see that I use this method there as well. I admit, I like working this way, it’s meditative and challenging at the same time and never boring. And there are benefits!

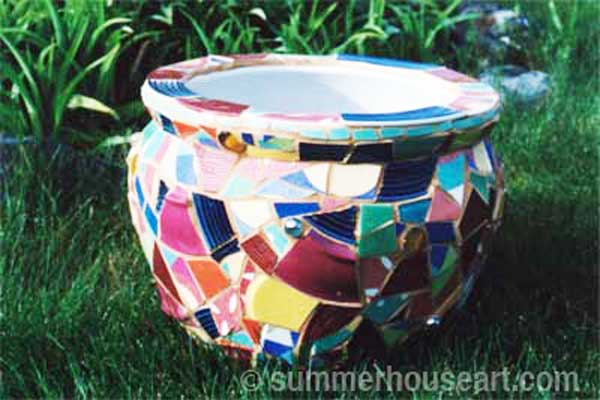
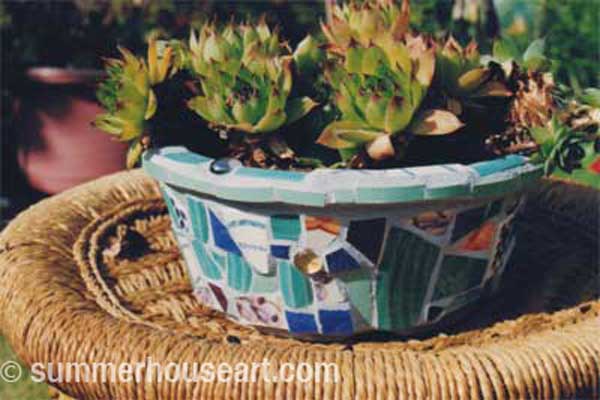
 Mosaic Pot by Helen Bushell, summerhouseart.com

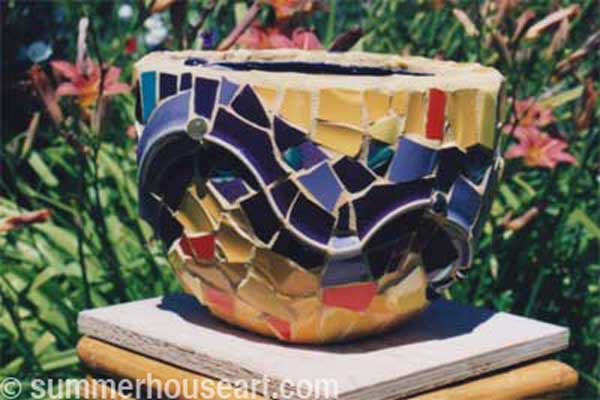
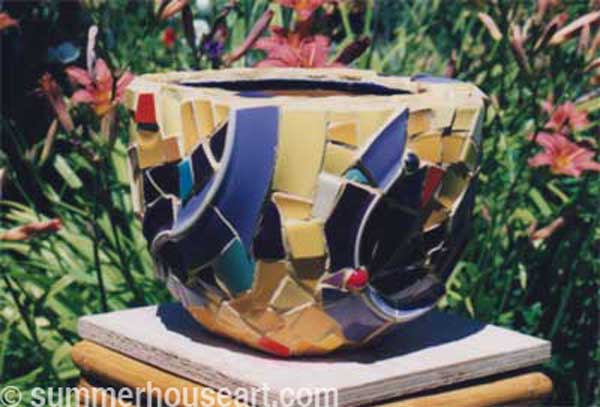
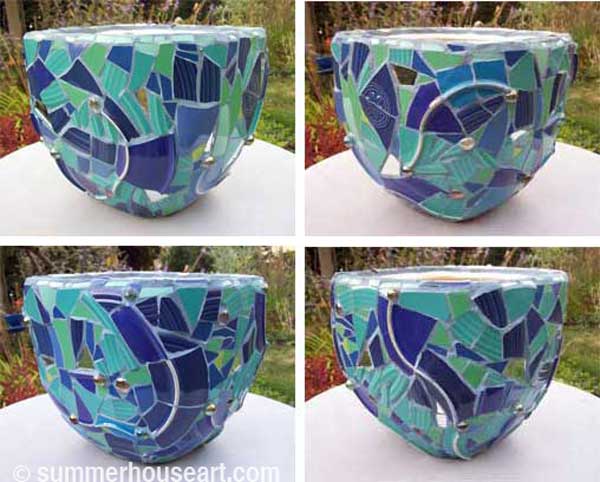
Now, I have to say that working like this is especially fun on 3D surfaces like pots. I’ve done quite a few pots in this manner. In each case, I selected dishes that had colors, patterns and textures that I liked together. To those, I added some solid colors and a few marbles. Marbles have a way of glowing when the light shines through, that I find totally captivating.

Pique assiette Mosaic Pot by Helen Bushell, summerhouseart.com

I tell my students that doing intuitive mosaic design has one really great benefit, especially if you tend to be a control freak. You will learn to let go. Working intuitively allows you to forget control and just go with the flow. After all you are not creating a picture, or a rigid pattern. Nope, just an overall pattern with a mixture of surface designs. Ah, the freedom to just let go and mix it up.

Going with the flow also applies to fitting dishes onto a curved surface. A dish does not have the same curvature as a pot. To make up for this you often have to adjust how you apply a piece to the curve of the pot. Oh sure, you can keep breaking the piece till it’s small enough to apply to the curve ( um, this could be called exerting control) or…you can just find the curve of the dish and find a place where it will match the curve of the pot. Ah, even less control.


Pique assiette Mosaic Pot by Helen Bushell, summerhouseart.com


Pique assiette Mosaic Pot by Helen Bushell, summerhouseart.com

Using dishes that have color on the bottom as well, creates an extra little benefit. The ridge on the under side of the plate, once broken, can be pieced back together to create some very nice undulating lines, thank you. I’ve used this often to create a flow or direction. It’s a little trick that I totally took advantage of on some of these pots.

Pique assiette Mosaic Pot by Helen Bushell, summerhouseart.com

The last little benefit about applying pique assiette mosaic to pots is that unlike a flat surface like a tray or mirror frame, you can’t see the whole surface at once. You may ask, how is this a benefit? Well, if you get tired of one side you just turn the pot around and viola, you have a whole new surface to feast your eyes on.

Share

How to Create a Pique Assiette Mosaic Stepping Stone – Helen’s Way

There are probably lots of ways to do stepping stones. I have my way and it works for me. There are lots of things you can put on stepping stones for your garden, like dishes, stones, marbles, keys, whatever you think will look good in a stepping stone.  This type of mosaic is actually called Pique Assiette, which roughly translates to “stolen dishes”. The beauty of doing a stepping stone is that the same method works for most outside mosaic projects.  Check out more of our garden stepping stones.
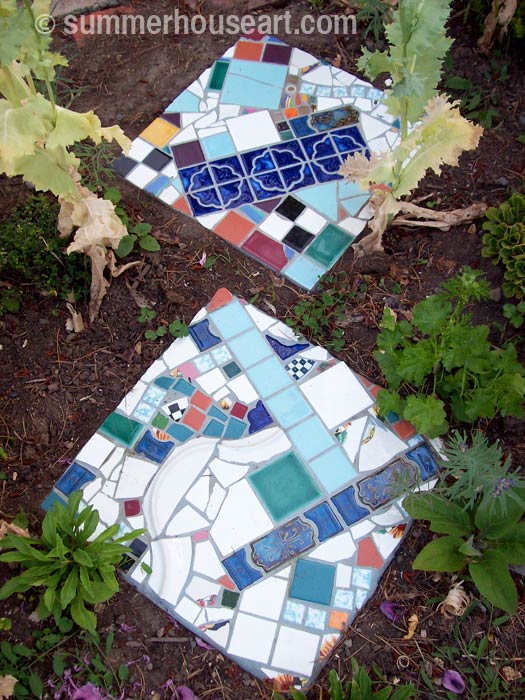
Tutorial, Pique Assiette Stepping Stones, summerhouseart.com

I’m not a big fan of really orderly designs, with symmetrical elements or tidy circles of pieces arranged in a regimented way. No, I tend to go for the intuitive and fast method of working.

First of all, although I’ve seen lots of sites that say otherwise, this is not suitable for children. It has sharp shards from dishes, it has caustic cement and requires some strength and lots of common sense. I am cutting myself all the time and keep bandages handy and I’m way past childhood.

Secondly, I’d like to say, if you are going to make these, use the proper precautions with mortar and grout. These are caustic materials, they require that you use dust masks when mixing to avoid breathing in the caustic dust. They require that you use rubber gloves to avoid getting the caustic mortar on your skin. That said, read the package, note the cautions. Please don’t go leaving this stuff around children and pets! Please remember to clean up as soon as you are done and make sure not to leave this stuff in bowls to harden into cement that you will never ever get off.
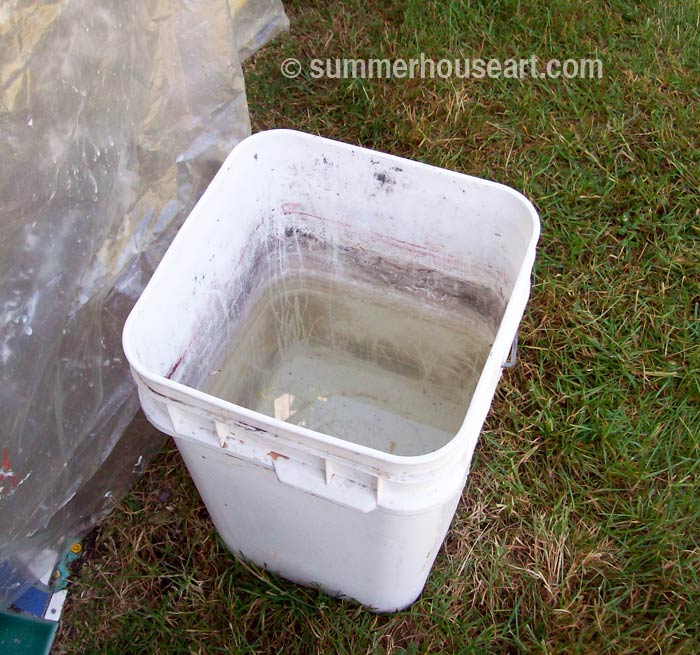
Process, Stepping Stone Tutorial, summerhouseart.com

You may wonder why I have a photo of a pail of water? Well, the next precaution is NEVER NEVER rinse off anything with cement on it down a drain. It will set and your drains will be plugged! Ok, so why the pail? That’s where I do all my rinsing of gloves, mixing bowls and implements. I let the cement settle for a day or so and then gently pour off the water into a garden path and scrape the cement that settled into the bottom of the pail into a bag and put it in the garbage. There won’t be much but, hey, better in the bag than in your drain.  Both mortar and grout have cement in them.

An important note about dishes and tile to use. If you use tile that is meant for indoor use or dishes that are porous under the glaze you will have this nasty thing happen.
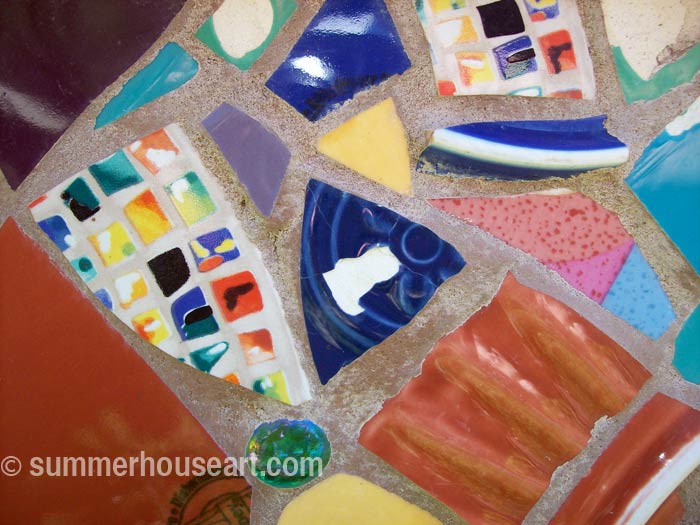
Process, Mosaic Stepping Stone Tutorial, summerhouseart.com

The moisture will seep under the glaze and when it’s cold the water will expand and pop the glaze right off the dish or tile. I know, because it’s happened to us. So make sure the dish is really dense and not porous and use tile that is very dense and meant for outside use.

The last important note. Wear goggles when snipping dishes. Broken pieces have a way of flying out and hitting someone. Be careful, for obvious reasons with shards. Don’t wipe away little shards with your bare hands, use a dust brush.

OK enough warnings. On to the fun stuff. As I said, I like the intuitive way of creating stepping stones. But having said that I don’t judge what others may like. Creativity is self-expression after all.

You will need:
A concrete stepping stone
Dishes and/or tile
a work table
a pail of water
rubber gloves
dust mask

old cotton socks

Gray or White Mortar or thin set ( I use it in powder form and add water)
a jar of clean water
a bowl for mixing mortar and grout in ( I use old stainless steel mixing bowls)
a trowel for applying the mortar
something to scrape between the pieces to remove too much mortar, like an old knife.
two-wheeled glass cutter or tile nippers
tile cutter
sanded grout ( it comes in colors, so have fun)

Step 1- Getting ready to start
I buy concrete stepping stones from the local home building supply store. We used to make our own, but honestly, it wasn’t worth the effort. Stones are about $2 or $3 to buy. They come round or square.

Put a concrete stepping stone on a work table so you don’t have to be bent over the whole time while creating it. You’ll thank me later. I like to cover the work table with plastic first to save it for other uses. Also, it’s a good idea to put the cement stepping stone up on a few little blocks of wood to raise it off the table surface. It’ll make it easier to get your fingers under when you finally pick it up to move it.
Process, Mosaic Stepping Stone Tutorial, summerhouseart.com

Step 2- Cut up the dishes and tiles
Please put on your eye protection! I wear glasses anyway so that’s mine but really protective goggles are worth it.

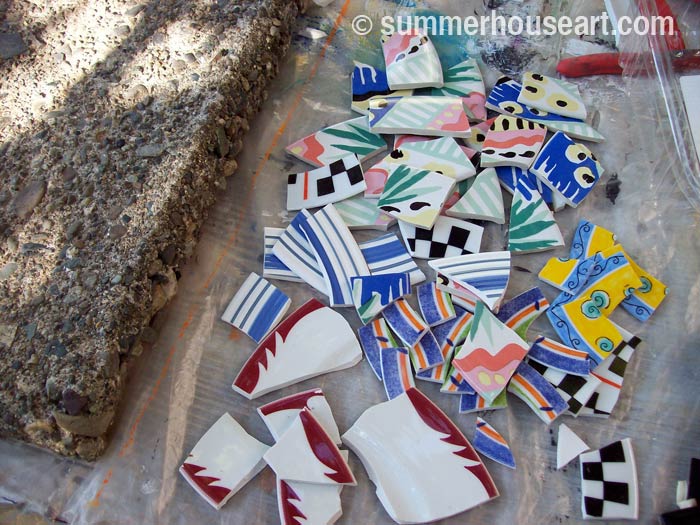
Cut up the dishes into bits and pieces using nippers or two-wheel cutters or tile cutters. For cutting up tile, use the scoring wheel on the tile cutters to score the tile and then break it with the tile cutters. If you don’t know how to use one ask the clerk in the tile store, they’ll usually be happy to demonstrate.
Play around a bit with the arrangement. You could arrange them all before hand on an area approximately the same size as the stepping stone. More about this later.

Since mortar sets in about 20 minutes max, laying out your pieces on another surface will cut down on the time it takes.  Or you could do it my way and just arrange them right on the mortar and wing it.  Keeping in mind that the mortar loses its stickiness and you may have to make a little new mortar to finish sticking down pieces.
Process, Mosaic Stepping Stone Tutorial, summerhouseart.com

Step 3- Mixing the mortar
Put on your Dust mask! Put on your Rubber gloves! Seriously!
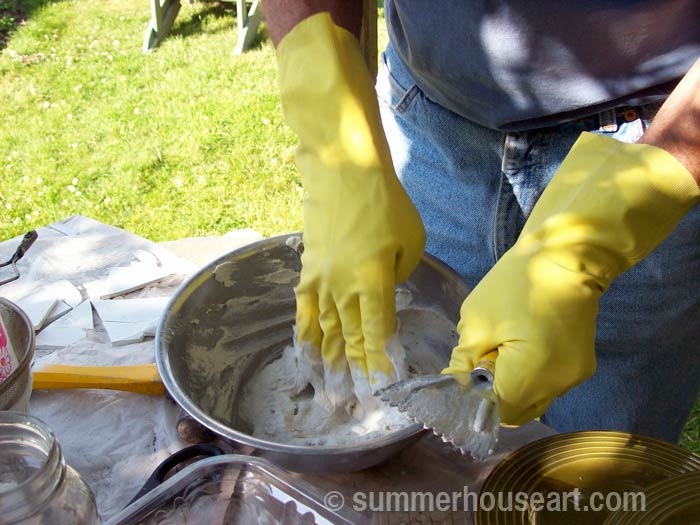
Wear your rubber gloves! I like to mix with my hands, encased in rubber gloves of course. Don’t do this bare handed! It’s caustic. see warnings above!

Put the powdered mortar in the mixing bowl. You will have to guess-timate here for the amount of mortar. Add water from the clean water in the jar, a tiny bit at a time. Mix up the mortar to a peanut butter consistency.

I like to use stainless steel mixing bowls that I find in thrift shops, they work well, and are reusable.

Get it to a peanut butter or just slightly thinner consistency by adding the water to the mortar ( this applies to grout also) very slowly as it will become too thin very quickly if you add too much.
Process, Mosaic Stepping Stone Tutorial, summerhouseart.com

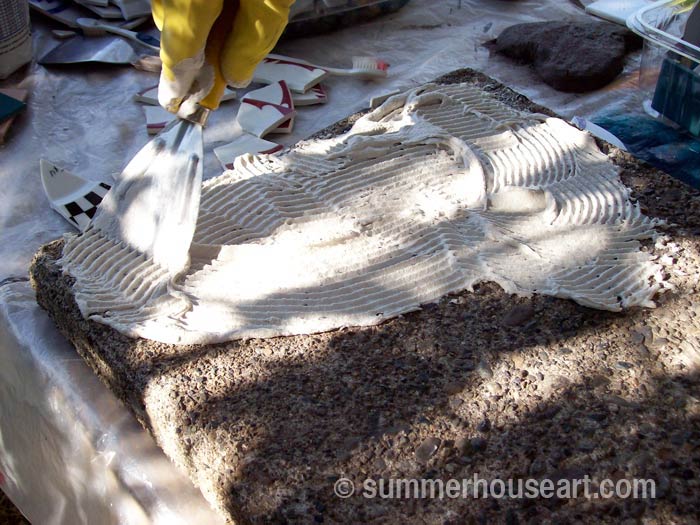
Spread the mortar over the stone using a toothed trowel.
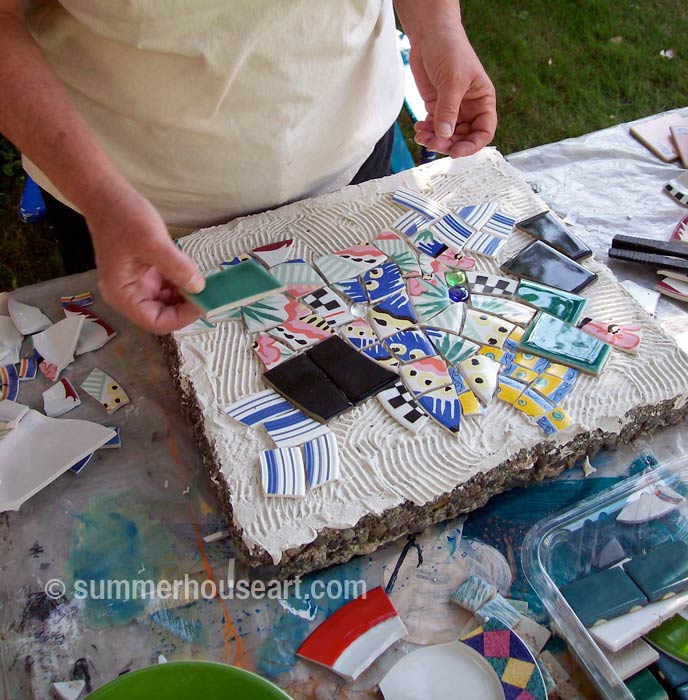
Process, Mosaic Stepping Stone Tutorial, summerhouseart.com

Lay each piece on the mortar and try not to squish up mortar between the pieces. You’ll need that space to put grout in later. If it happens, and it will, just remove it with a blade like tool. I cut and fit dishes as I need to as I go along.

You’ll have to move fast, mortar sets up on a hot day really fast, you’ll have only about 20 minutes! In fact I wasn’t fast enough on this one and it started to dry out and nothing stuck. So I scraped off the dry mortar and just buttered a bit on, for each section I had left to finish. Ok, it’s cheating a bit, but it did work.

BIG NOTE: watch out that when you put pieces down on the mortar that you don’t leave nasty points sticking up. You’ll know you did, painfully, later when you are smoothing grout over the pieces and snag your fingers on a point. And you wouldn’t want to step on a point later.

Be careful, this stuff is sticky and keep the top of your dish pieces clean and wiped off.  Once mortar sets it’s cement and you won’t be able to remove it from the surfaces of the dishes!

NOTE FOR BIG PROJECTS: When we are doing a big project, or if we want to take our time designing a piece, we work a bit differently.  We glue down each piece with a bit of mortar buttered on to the back of each piece.  We just mix up tiny amounts of mortar at a time in a small bowl and apply it to each piece as we stick it down. When the mortar gets too hard, we just clean out the bowl and mix up another fresh tiny amount. 
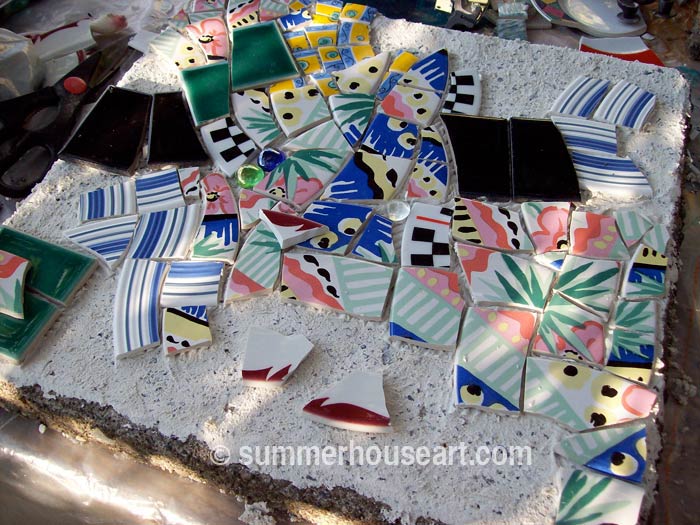
Process, Mosaic Stepping Stone Tutorial, summerhouseart.com

Process, Mosaic Stepping Stone Tutorial, summerhouseart.com

Step 4 -Take a break
Now that you have all the pieces mortared down, take a break and enjoy a cool iced tea. When you can’t move the pieces with your fingers, the mortar has set. We’d actually done the mortaring in the evening after a long day and stopped altogether to go in and watch movies. Of course, we cleaned up all the mortar mess like the bowls and implements first in the bucket of water! Then the next morning I was ready to grout.
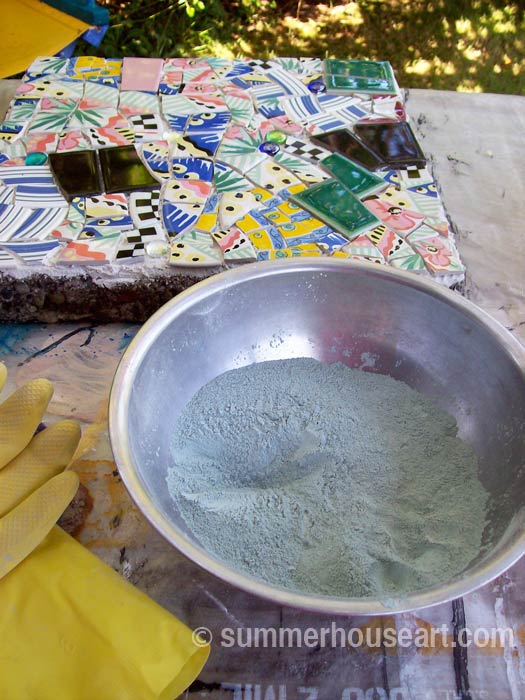
Process, Mosaic Stepping Stone Tutorial, summerhouseart.com

Step 5 -Grouting
Put on your dust mask and rubber gloves!! Mix the grout in a bowl adding just a little bit of water from the jar at a time. Again I like to mix with my hands.

Get it to a peanut butter or just slightly thinner consistency.
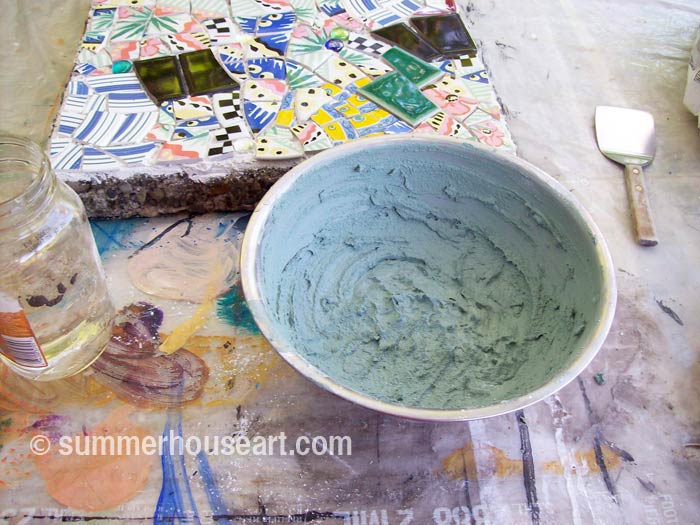
Process, Mosaic Stepping Stone Tutorial, summerhouseart.com

Let the grout “slake” for a few minutes, no more than 5 and with your gloves on still from mixing it by hand pick up a handful and start “smushing ” it all over the surface.
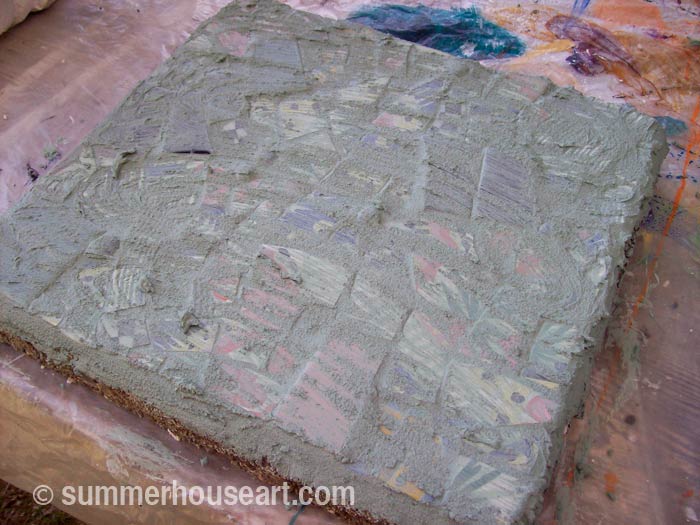
Process, Mosaic Stepping Stone Tutorial, summerhouseart.com

Be sure to fill in each space between the pieces well. I use sanded grout always.

Step 6, or Why should I save old cotton socks?
I like to use old cotton socks to remove the grout from the surface. Some people like to use old sponges but I’ve found it’s just too easy to remove the grout from between the pieces with sponge. Dry old socks work well and you can turn them inside out and use the inside too. Once you have most of the grout removed from the surface leaving only a bit of hazy layer, let it sit. Break time again! Not too long, just 5 minutes and then back to work! Come back and with a clean sock shine up the pieces.
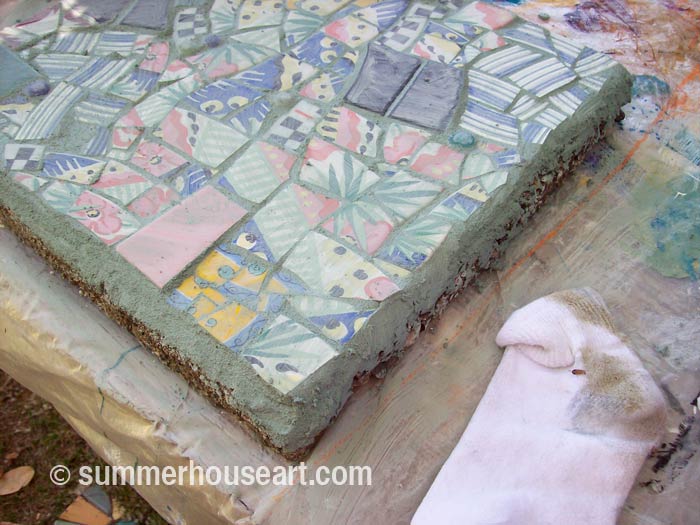
Process, Mosaic Stepping Stone Tutorial, summerhouseart.com

Step 6, Enjoy!
Enjoy the work you’ve just produced. Sit back and tell yourself what a genius you are! Then after your new wonderful stepping stone has had overnight to set and cure, dig it in to your chosen spot in the garden path. Hope you’ve enjoyed my tutorial.  You can use this method for other outdoor projects like bird baths too.  Check out our Mosaic bird baths too, if you’re interested.   you can find them here:  A Serendipitous Mosaic Bird bath  and also A Beach Pottery Bird Bath.   Bird baths are done a little differently.  We create small batches of mortar and butter each piece as we go along.  We set up under a pergola and make a summer project of it.  They do take some time, so be patient and enjoy.
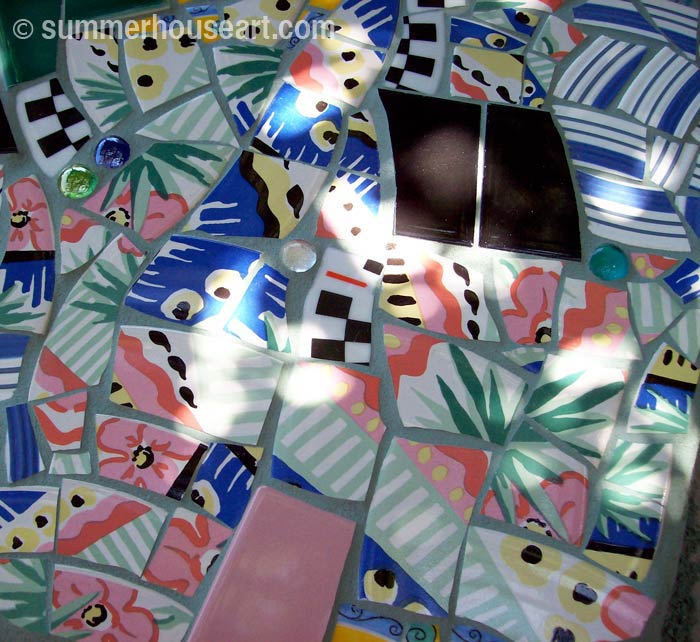
Mosaic Stepping Stone Tutorial, summerhouseart.com

(BTW, if you’d like to make a comment, just click on the title.  It’ll take you to comments….and we do appreciate comments )

Save
Share

Pique Assiette Mosaic Stepping Stones in the Garden

We love making mosaic stepping stones for our garden. They’re fun and easy to do. Well, easy as in low tech. But they do take a bit of work. It’s a chance to use some dishes and tile and sometimes other objects to create some color in the garden. Using dishes and other found objects for mosaic is called Pique Assiette.  I like the whole process of using dishes and found objects, collecting them, finding them and of course breaking them to create new patterns.

Pique Assiette Stepping stone, summerhouseart.com

The other day, instead of grouting inside in the studio, I’d set up a work table under the clematis pergola so my afternoon student could grout her mosaic outside in the garden. After she’d finished, very happy with how her piece had worked out, and had gone home with her mosaic creation, we still had the work table set up. I’d done a quick demo of stepping stones for her on a small chunk of broken cement block while she was there. So we had everything ready, and we turned to each other and almost had the same thought at the same time. Hey, lets make another stepping stone.

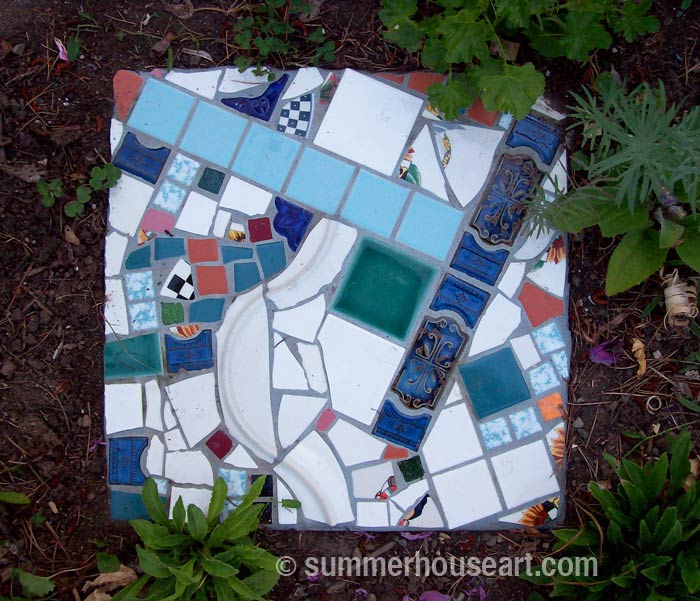
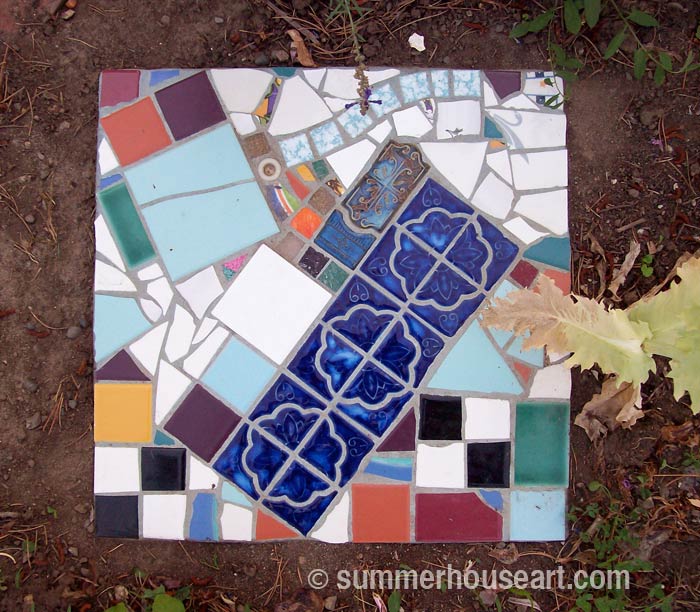
Pique Assiette Stepping Stone, summerhouseart.com

So off we went, into the studio, to gather up some dishes and tiles to use. We mixed up some more mortar and started. Before we knew it was 8 pm and time to stop and have a quick supper. We still hadn’t grouted but the stepping stones were done. I got out there this morning and grouted mine. So another stone for the garden.

Pique Assiette Stepping Stone, summerhouseart.com

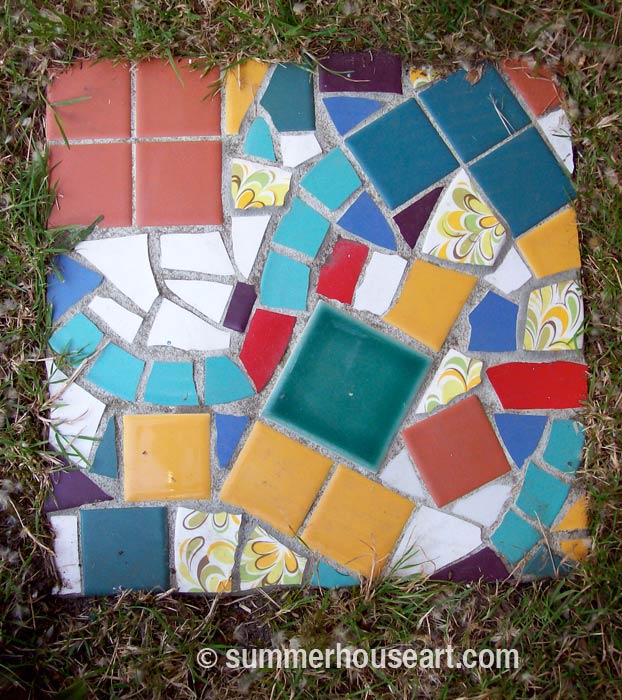
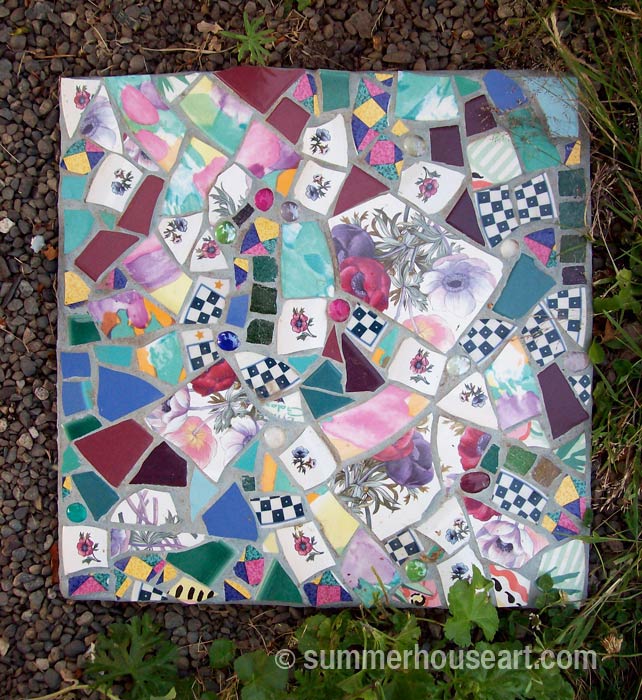
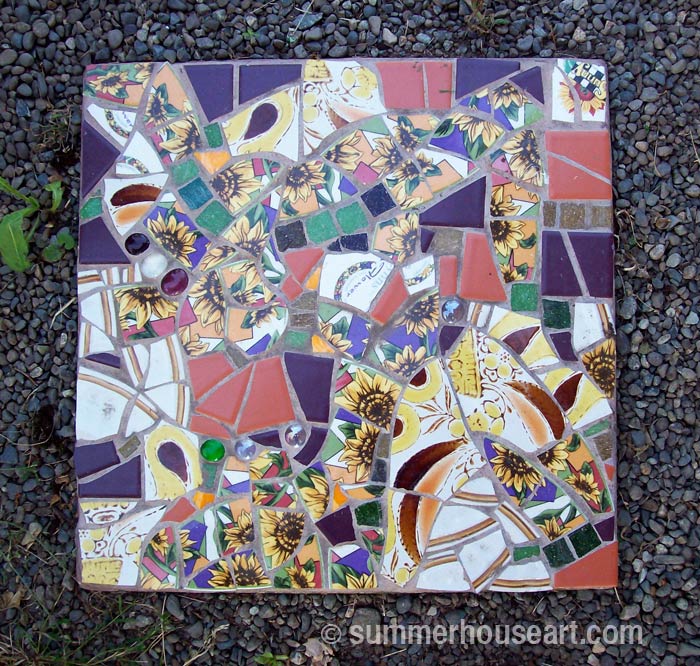
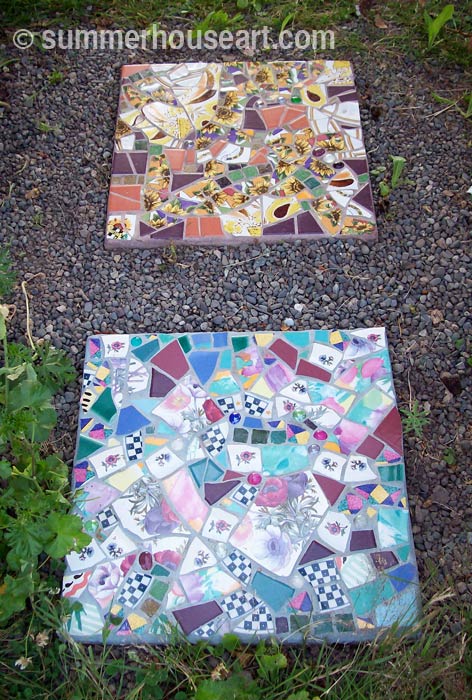
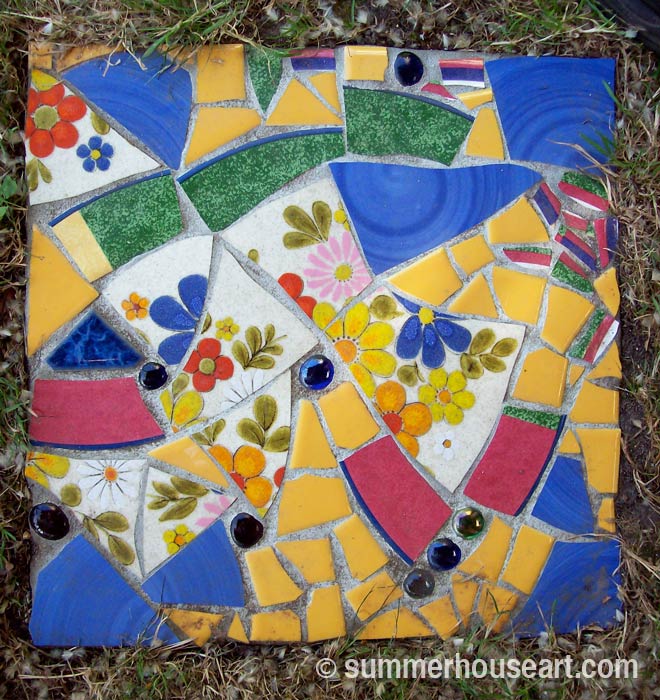
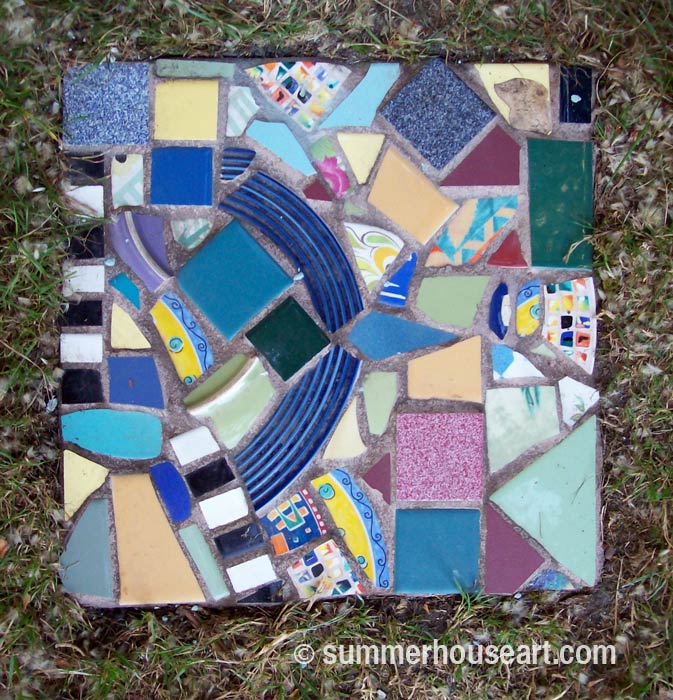
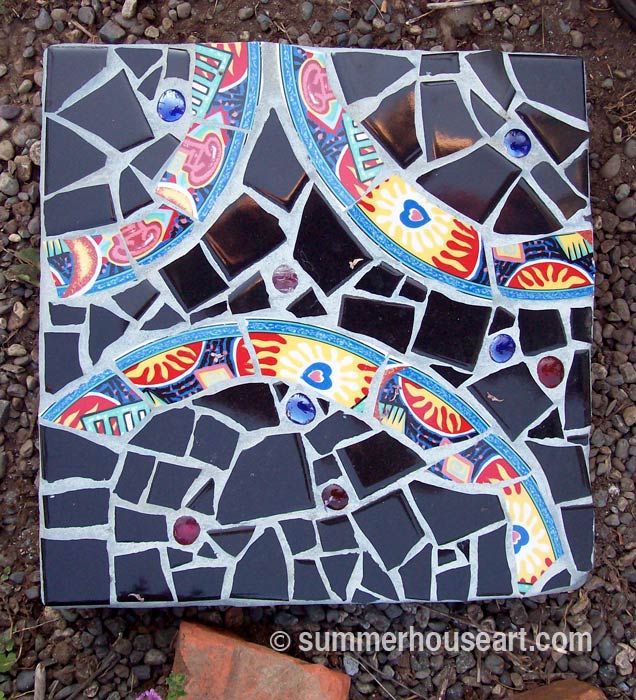
We enjoy the look of these little art pieces. Each one is different and unique. We have some laid into the lawn under the pergola, to create a sort of patio area. Others become entrance art at the gate, or as a way to step through the garden to the car, or as a bottom step from the deck.

Pique Assiette Stepping Stone, summerhouseart.com

Will and I work totally differently. He likes to create much more minimal abstract compositions. I tend to use dishes with either floral patterns or just basically colorful dishes laid out in an overall sort of crazy quilt manner. We work quickly and without too much thought, counting on our innate sense of composition to work for us. We just relax and enjoy the time.

Pique Assiette Stepping Stone, summerhouseart.com

Pique Assiette Stepping Stone, summerhouseart.com

Pique Assiette Stepping Stones, summerhouseart.com

There’s something about mosaic sparkling in the sunshine and greenery of the garden that makes you enjoy having it underfoot.

Pique Assiette Stepping Stone, summerhouseart.com

Pique Assiette Stepping Stone, summerhouseart.com

Pique Assiette Stepping Stones, summerhouseart.com

If you are interested in creating some stepping stones for your garden and don’t know how, you are in for a treat. My next post is all about how to create mosaic stepping stones. There are lots of ways to do this, but this is my way.

Now you may have noticed that we didn’t tell you which of us created all of the stepping stones in this blog.  So, which ones do you think are mine and which ones are Will’s?

(BTW, if you’d like to make a comment, just click on the title.  It’ll take you to comments….and we do appreciate comments )

Save
Share

#5 In the Pique Assiette Mosaic Inspiration Series – Feng Shui and the Foo Dog


I like to dabble in all sorts of things, like to shake up my thinking a bit. Feng Shui was one of those interests that I took up for a time and I even incorporated some of its ideas into my home here and there. For instance the far corner of the greenhouse, the “wealth corner”, is full of Jade plants, or money plants. There are other little touches throughout the house too. And I admit that keeping the Chi flowing is a good reason to tidy up. But for an old hippie like me, there are just too many rules to Feng Shui, so I just picked up a few that I liked.

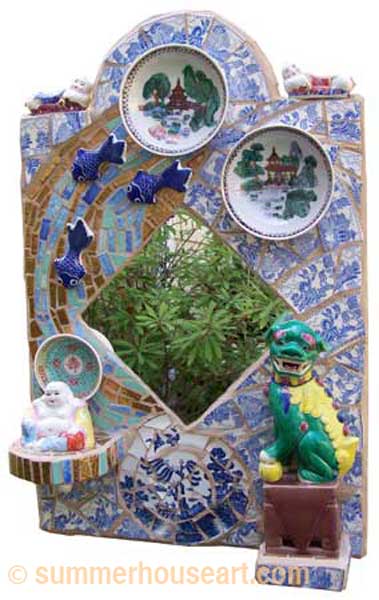
Feng Shui Mosaic, Helen Bushell, summerhouseart.com

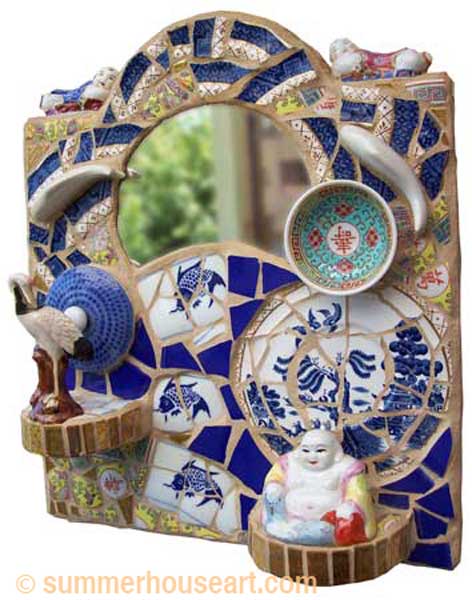
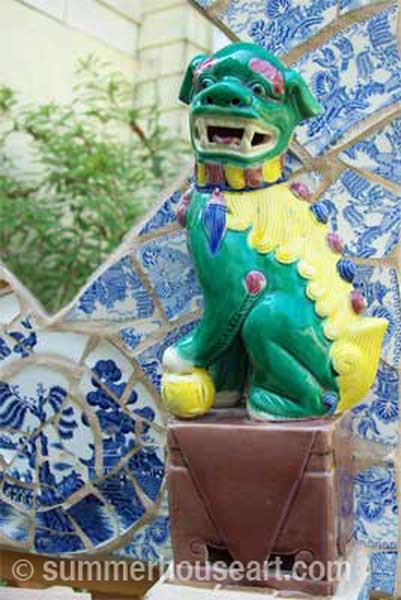
When I found the Foo Dog or Lion at a flea market, I knew I just had to do another Oriental Shrine pique assiette mosaic and I wanted to incorporate a bit of Feng Shui too. I’d already done a small shrine incorporating a couple of Blue Willow porcelain saucers, some chopstick rests, a little Buddha and a stork figurine.  Pique Assiette mosaics, by the way, are a type of mosaic quite different from the usual mosaic made with tesserae, because of the use of the dishes and ornaments.

I’d been trying to cut a round mirror when it just cracked on its own in this wonderful semi-moon shape. Well, something like that cannot be wasted! The shape of that mirror dictated the shape of the shrine and created the shoulders to put the little chopstick rests on. Everything just flowed together.

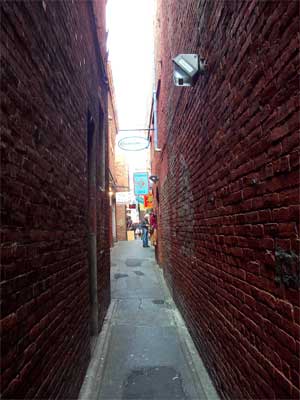
Where did I get almost all of these wonderful ingredients for the shrine? Well, here in Victoria, we have the most wonderful Chinatown ever. I love shopping in Chinatown, especially in a hidden little alley called Fan Tan Alley which is just too much fun to prowl.
Fan Tan Alley entrance from Pandora Street, Victoria BC, photo summerhouseart.com
The mystery entrance to Fan Tan Alley from Pandora Street

Fan Tan Alley,  Victoria BC, photo summerhouseart.com
Character shops in the alley

Fan Tan Alley,  Victoria BC, photo summerhouseart.com
The window of Dragon Song Music

Fan Tan Alley,  Victoria BC, photo summerhouseart.com
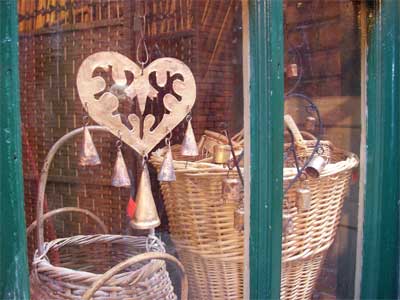
Baskets in a Fan Tan shop window

Now, with the find of the Foo dog, again things that I needed just seemed to fall into my lap. The background was made from some really good, antique Blue Willow dishes, given to me by an antique dealer friend of Eric’s. They were chipped and perfect for breaking. And break they did, like butter! So easy to cut and shape.


detail, Foo Dog Mosaic, by Helen Bushell, summerhouseart.com

More chopstick rests and another little Buddha were found on a trip to Chinatown. Any excuse to go there will do, after all. Other oriental saucers were found in Value Village and before I knew it, the piece was ready to start.

Foo Dog Mosaic, by Helen Bushell, summerhouseart.com

But this time I wanted to incorporate some Chi into the design. Chi is a flow of energy in Feng Shui . For that I wanted a water flow, so I created a little “golden river” for the fish to swim in, that led to the serene Buddha. The Foo Dog or Lion was at the gate to protect the Buddha and would keep the “Blue Willow garden” tranquil.

And so Feng Shui, with a nod to tranquility, Chi, and the garden became a design element in this little shrine.

Share

#4 in the Pique Assiette Mosaic Inspiration Series – Intuitive Composition

Making a Pique Assiette mosaic can actually be a meditative pursuit.  Pique Assiette Mosaics are a type of mosaic made with dishes and found objects.  Part of the fun with this is wandering  through my huge collection of dishes to find pattern and colors that work together. The time spent cutting pieces of dishes or tiles, the slow work in arrangement of those pieces is a quiet and focused time.

Past inspiration entries have been about an idea that started a piece, as in the Hawaii shrine or a certain dish that inspired a shrine as in the Geisha Ladies Japanese Shrine. The composition was planned, the drawing made, the goal in mind, more or less. Now I’d like to show a much more abstract way of approaching mosaic. Strangely enough it is the easiest to do, the hardest thing to explain and also the hardest to teach. A photo or two might explain it better.

All artwork has a composition. Good composition has a balance to it. Not that everything should be symmetrical, but that colors and pattern are visually weighted  to make the piece have  balance, as in not top-heavy, or with too much happening on one side, without the balance of a larger area opposite to give an equal weight. I think it’s something we all do intuitively.

Sometimes I just want to create a surface, a surface that has no real narrative to it, in that the surface is not a picture of anything. It doesn’t tell a story, the pieces don’t make up a recognizable object like a bird or tree. It’s just a surface. I like to think of it as abstract.

Sometimes I feel like doing a nice relaxing mosaic. I just want to play with color, texture and pattern and let the mosaic happen.
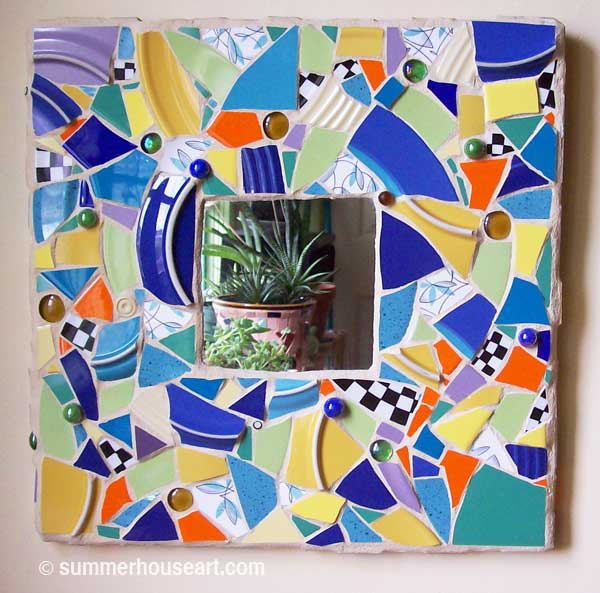
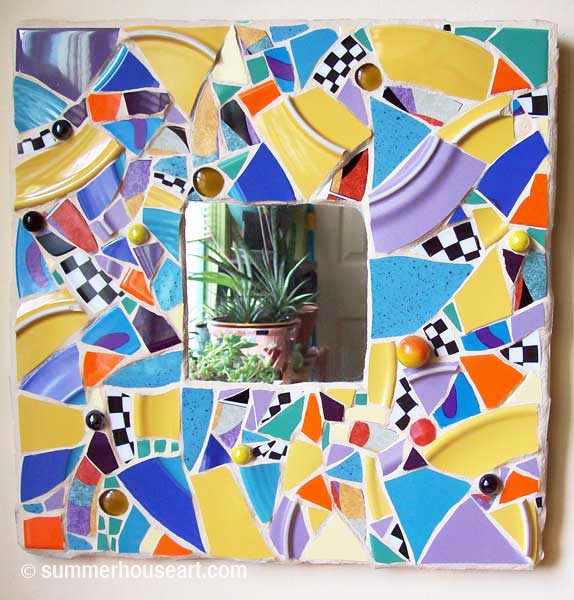
The two mirror frames I’m showing today were done just for the fun of creating an abstract surface.

Pique Assiette mirror, by Helen Bushell, summerhouseart.com

To start I choose the basic shape. These were square, because I just happen to like the square format. The mirror is set just a little deeper at the bottom, to give a visual lift to it. But I have sometimes thought it would be interesting to have each side equal because then there would be no up or down designated and the mirror could be turned to enjoy a new view of the design.

detail, Pique Assiette mirror, by Helen Bushell, summerhouseart.com

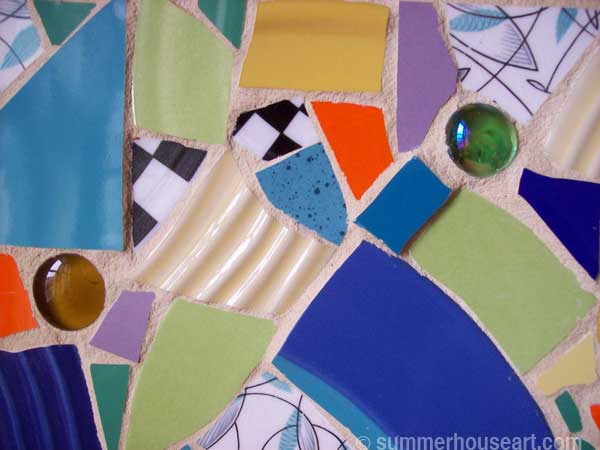
Next, I chose the colors and other elements. Maybe I’ll have only one plate with a pattern on it that I love. So I choose that and then choose other colors and textures to compliment it or set it off, riffling through my collection of dishes for just the right ones. The first mirror frame above, has a plate from the 50’s on it, a delicate turquoise and black pattern of leaves and lines shown in the photo above. I only had one of these plates so could only use it sparingly. The broken pieces of that one plate are placed throughout the design, a little bit here and there, spread out over the surface.

Pique Assiette mirror, by Helen Bushell, summerhouseart.com

detail, Pique Assiette mirror, by Helen Bushell, summerhouseart.com

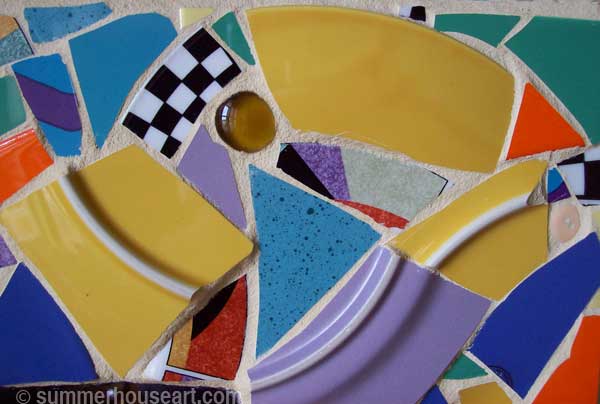
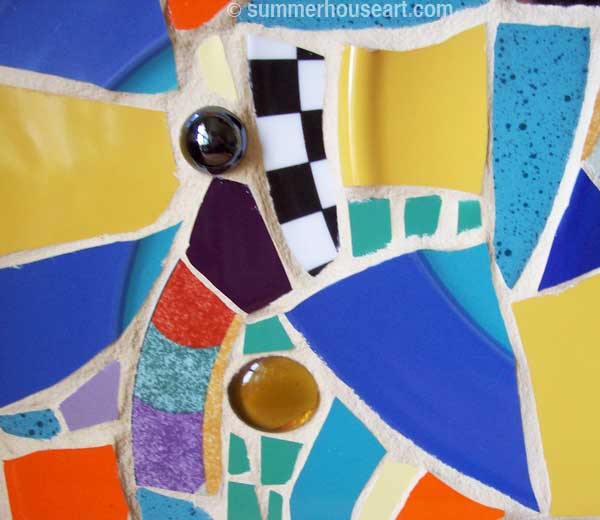
And all the other space? Well, that’s were intuitive composition comes in. That’s where letting the mosaic flow on it’s own comes in. I just start. Putting down a piece in the corner, whatever fits, and keep going from there. If a piece fits naturally next to that, in another color, it goes next to it. The curves above give a sense of movement.

It’s like fitting a puzzle together. Your eye scans the broken pieces for fit, for a color, a texture and if it fits, in it goes, glued down and on to the next one. You step back now and then and sense, rather than see the balance in the composition. You know intuitively that you need a bolder color over in this area to balance the pattern across from it. It’s hard to explain, but much easier to do if you let your instinctive color response go to work.

detail, Pique Assiette mirror, by Helen Bushell, summerhouseart.com

And yes there are a few “rules” to make the composition more interesting for the “eye”, such as varying the size of the pieces, as in the close up shown above.

The mosaic, with the help of my mediative, intuitive senses and vision, just creates itself. And at the end, what do I have? If I trust myself, and let things happen, very often a piece with movement, that encourages my eyes to roam the surface directed by a curve of color which leads it to another color or texture that leads it to another area and somehow you end up with a surface that your eye loves to skate over,over and over. Eye-candy I like to call it.

Why is it so hard to teach? Most people are not used to just letting go and allowing intuition to take over. That’s the crux of it I think. But once you do and let it happen the focus on arranging and searching for the next piece is meditative and quite relaxing. And once you’ve done it once, maybe just a little bit addictive.

Share

#3 In the Pique Assiette Mosaic Inspiration Series – Meditation, the Bowl and the Buddha

Meditation was something that I always wanted to do but never thought I could. I’d read about it and researched it a bit and decided it was not for me. Me, empty my mind? Don’t think so. Find 30 minutes to meditate more than once a day? Uh uh. So I gave up on it. But one day at the library I found a book written as though just for me, “Miss Instant Gratification”. It was called “Meditation Made Easy” by Lorin Roche.

Well, I snapped it up and you know, it was wonderful. The book made it all easy. You don’t have to empty your mind, just return your focus to your breathing, after allowing thoughts to “float through”. Ok I could do that. And you can do it in 5 minutes! Or even less once you get the knack of it.

He encourages you to develop your own way of meditating that fits your life. Since then, I’ve been recommending his book and been busy teaching my version of it to everyone I think needs it . And that, just recently, included my #1 son Paul (we have three sons and he was our first) and his wife, Olya, who are just a bit frazzled with a quite wonderful, adorable, beautiful and totally lovable (grandma speaking here) two-week old son.

Which brings me to my next Pique Assiette Mosaic inspiration and how it came to be. Bet you wondered where this was leading, didn’t you?

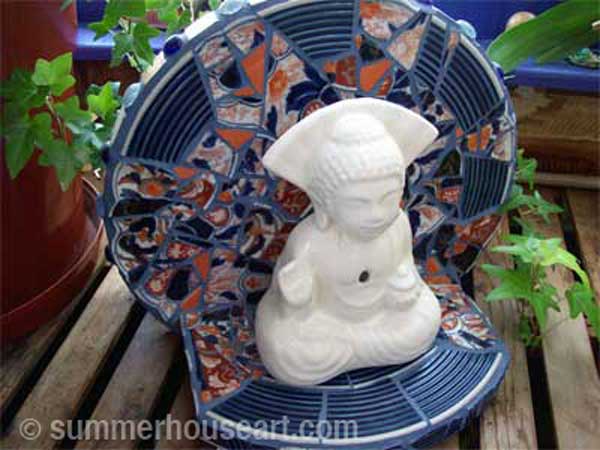
Buddha Shrine, Helen Bushell, summerhouseart.com

Again, the piece started with a piece of crockery but this time it was already broken.  Using crockery, dishes and ornaments puts this mosaic into the Pique Assiette category, which roughly translated means “stolen dishes”.

Hart, our fellow artist and great friend, had a client who had this lovely Japanese bowl, actually an antique, maybe valuable, now not fixable and she gave it to him to do his creative magic with. And he gave it to me.

Somehow the colors in the intricate pattern which are an almost burnt orange color and a deep blue seemed to be a perfect backdrop for one of my most meditative buddha ornaments from the Japanese restaurant collection. And with the thought that a circular shape would be most restful, the design inspiration was almost complete. Another blue plate, with an edge of concentric raised lines, was broken to create a feeling of rippled water in front of the meditating figure which became the finishing touch.

So there were all the elements of design inspiration: Meditation, Japan, blue rippled water, circular shapes being restful, the beautiful pattern of the Japanese bowl in burnt orange and blue, and the white buddha all coming together.

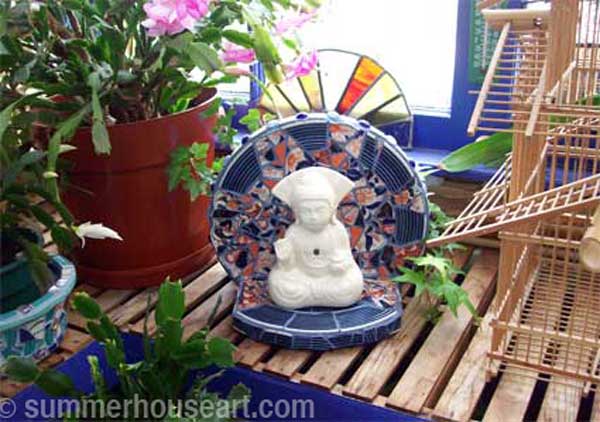
Buddha Shrine, Helen Bushell, summerhouseart.com

Today this mosaic has it’s honoured spot in the corner of the greenhouse, in amongst the plants and next to a wicker birdcage. It draws my eye and just it’s peaceful look gives me a meditative moment. And according to “Meditation Made Easy”, sometimes a moment is all you need.

Share

#2 In the Pique Assiette Mosaic Inspiration Series – The Japanese Plate

I didn’t have an idea for this piece to start with. I wasn’t thinking about Japan at all. Until I found this beautiful plate at a garage sale. It was an authentic gorgeous plate Hand Made in Japan, printed on the back and had a little chip in the border. The reason it had been sacrificed to the sale table I suppose. The pattern was of chrysanthemums or carnations, I’ve never been sure. But I think that the former is more of a Japanese favourite. It was a large plate, about 12 inches across. I saw it as a background for something. And I knew it would look really good broken and reassembled in a mosaic.

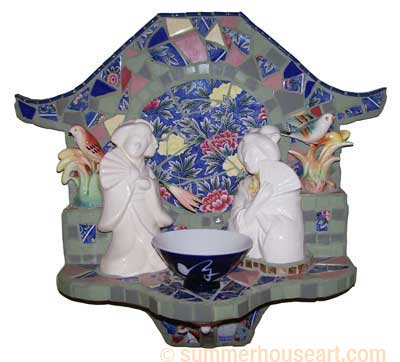
Geisha Mosaic, Helen Bushell, summerhouseart.com

So the plate was the start or maybe it was the finish. Because suddenly I had a use for a few things that I’d collected in my studio and it all came together. The Geishas are actually drink glasses from a Japanese restaurant.

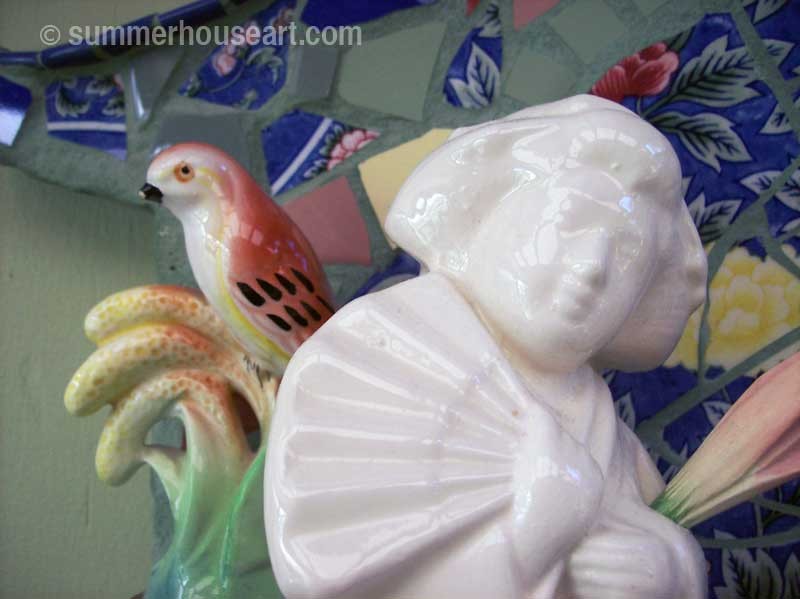
Geisha Mosaic Detail, by Helen Bushell, summerhouseart.com

The backs of them are open and there is a little hole in the front of each one to put a straw in so you can sip your drink. These drink glasses come in all types of figures from geishas to samurai warriors to Buddhas, lots of Buddhas. You find them everywhere at garage sales and thrift shops. And I have a collection of them. Ok I have lots of collections but more about that on another blog. So now I had the geishas in front of the plate, on a shelf and I needed something else. The quiet little birds had been gathering dust for ages and their color caught my eye as being perfect with the colors of the plate. And they gave this sort of lyrical touch to the ladies.

Geisha Mosaic Detail, by Helen Bushell, summerhouseart.com

What else? A bowl. A Japanese bowl to float a flower in for my little Japanese shrine.

Geisha Mosaic Detail, by Helen Bushell, summerhouseart.com

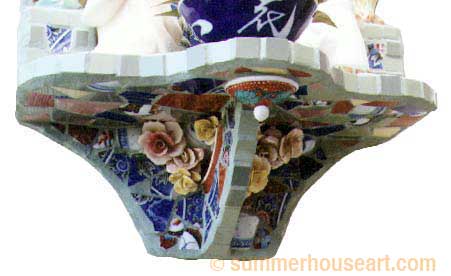
Then there was shape of the background to deal with, and in keeping with the theme, I drew out a pagoda shape for the top of the shrine. Now I only had to come up with something for under the shelf. I also collect those little porcelain floral bouquets. No, not to display, but to take apart very carefully with plyers or a hammer and chisel, and use the flowers on mosaics. They’re good even if a bit chipped because you can hide the missing petals in an arrangement easily. So under the shelf there is an arrangement of flowers. They don’t necessarily match the plate but who wants to be too matchy-matchy? And the little lid from a broken pot, turned upside down? Well, that became the finishing touch.

I suppose this was a case of inspiration backwards. The plate started the idea and the Japanese shrine came later. The Hawaii shrine started with an idea and the pieces came later. Backwards, forwards. Inspiration works either way if you let it.

Quote for today. Apropos, I think, for today’s blog

Minds are like parachutes – they only function when open.
Thomas Dewar

Share