A Couple of Over-the-Top, Yet Green and Recycled, Christmas Displays

We used to have the whole Santa collection on the sideboard in the living room.  Then as you may have guessed, the collection grew and grew until it didn’t fit anymore and had to be moved to the front door entry way. Of course that meant we had to move quite a few elephant ornaments out once a year but it was all worth it.

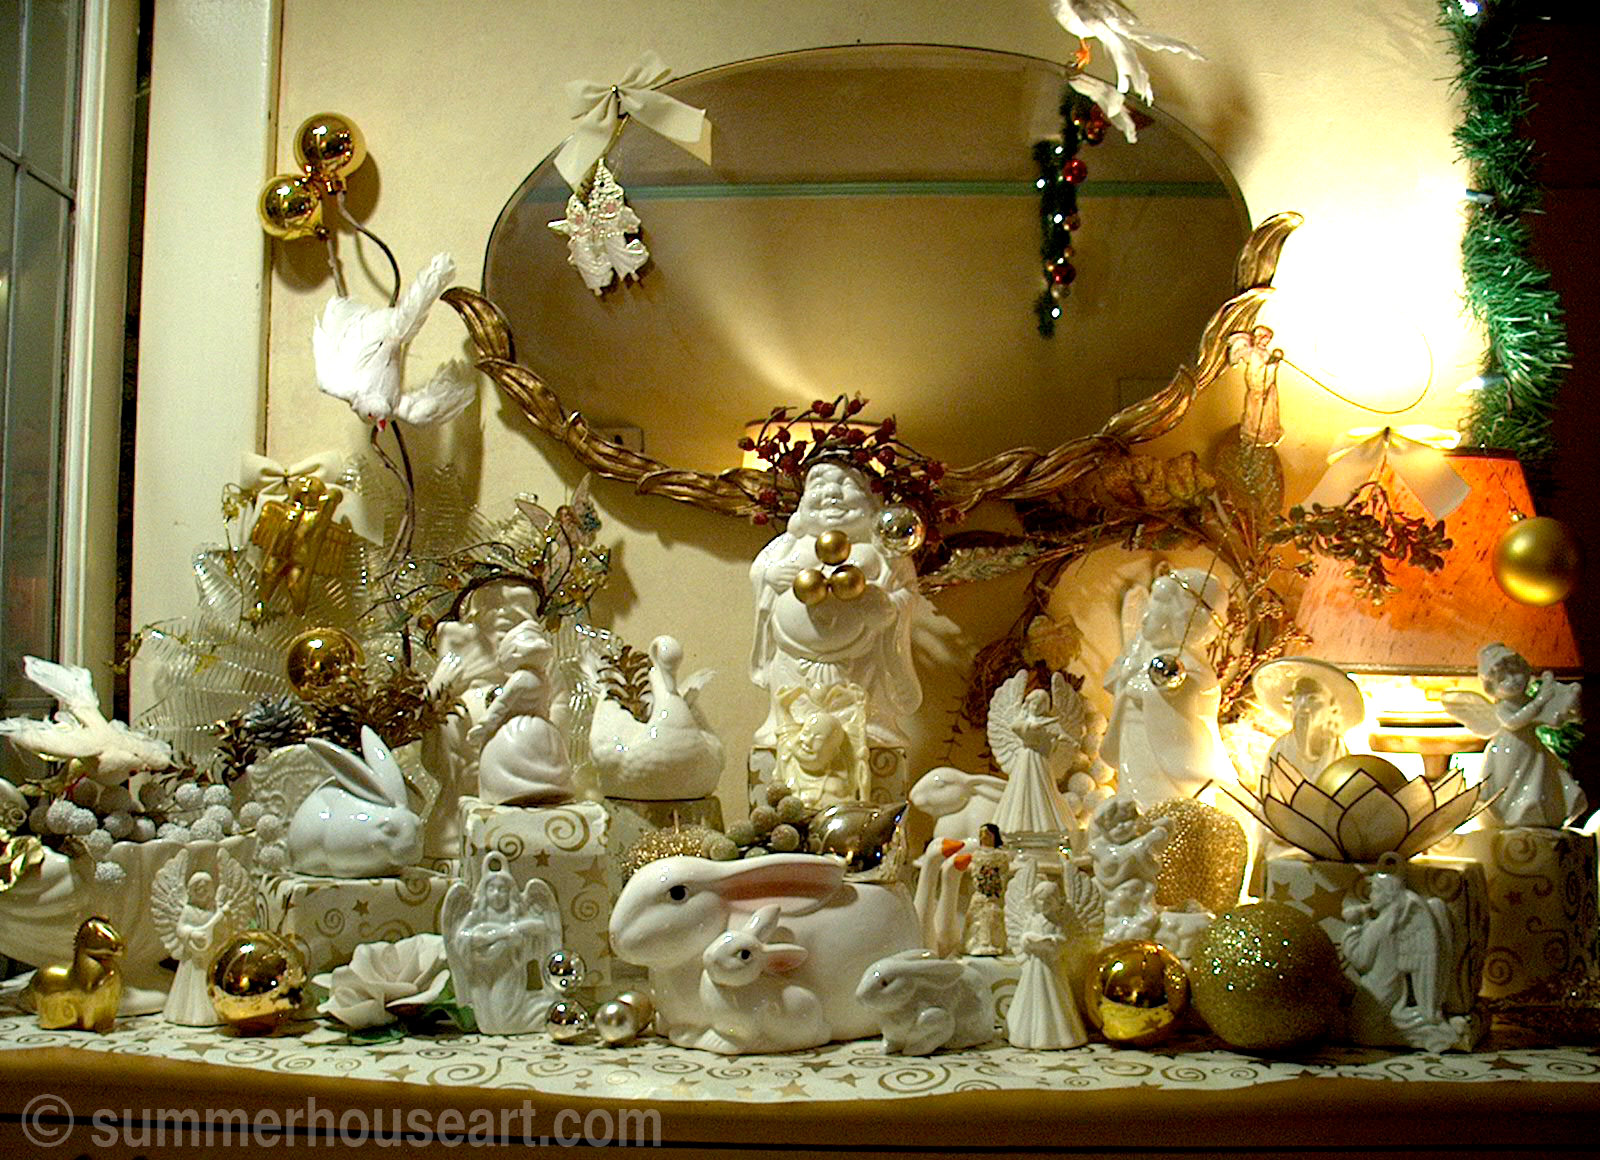
Now suddenly I had a whole new space to play with. So the first year I decided to do just a little angel ornament display. Just a few white angels, I thought, and then that idea just went completely berserk and the next thing I knew I was in my studio, fishing out anything that was white. The display became a sort of an over-the-top, (just the way I like it) crazy,  exuberant display that had angels, Buddhas, geese, geisha ornaments,white swans, white grapes and even quite a few white rabbits! All of it recycled finds for my mosaics.

White ornament Christmas display, summerhouseart.com

It was great! Friends came over and carried on with the outrageous creation and we added gold accents, the antique gold framed mirror, white doves and even a glass tray in the background in the shape of a snowflake ( a great 25 cent garage sale find by the way ) and golden Christmas globe ornaments.

This year I decided to use all the sparkly fruit I collected at thrift stores and garage sales a few years ago when I did the entire tree in sparkly fruits. I’d spent the whole summer before collecting it all and had a whole box full of every kind of glitter encrusted fruit from grapes and apples to pomegranates. Kind of obvious I’ve got Christmas on the brain way before December eh?

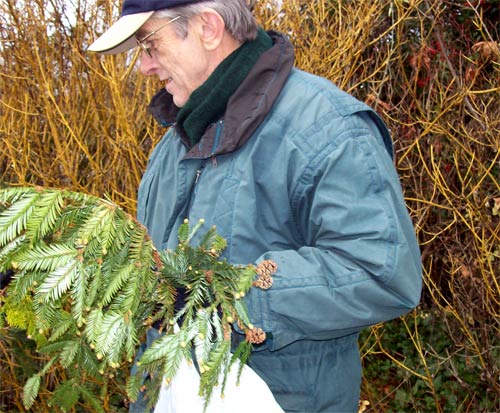
Last week Will and I went out to our favourite stroll, The Gorge Walkway, and collected lots of evergreen windfall.

Will-w-evergrns

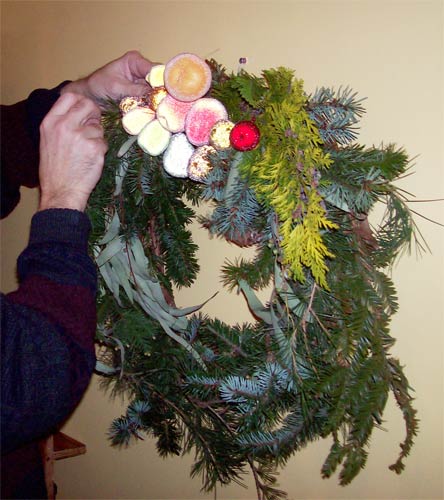
This was all saved in buckets in the back porch until we had time. Then yesterday, the start was made. Will created the beautiful lush and lavish wreath integrating all the fruit and evergreens. Of course I couldn’t resist putting in my two bits worth here and there.

bill-making-wrth1

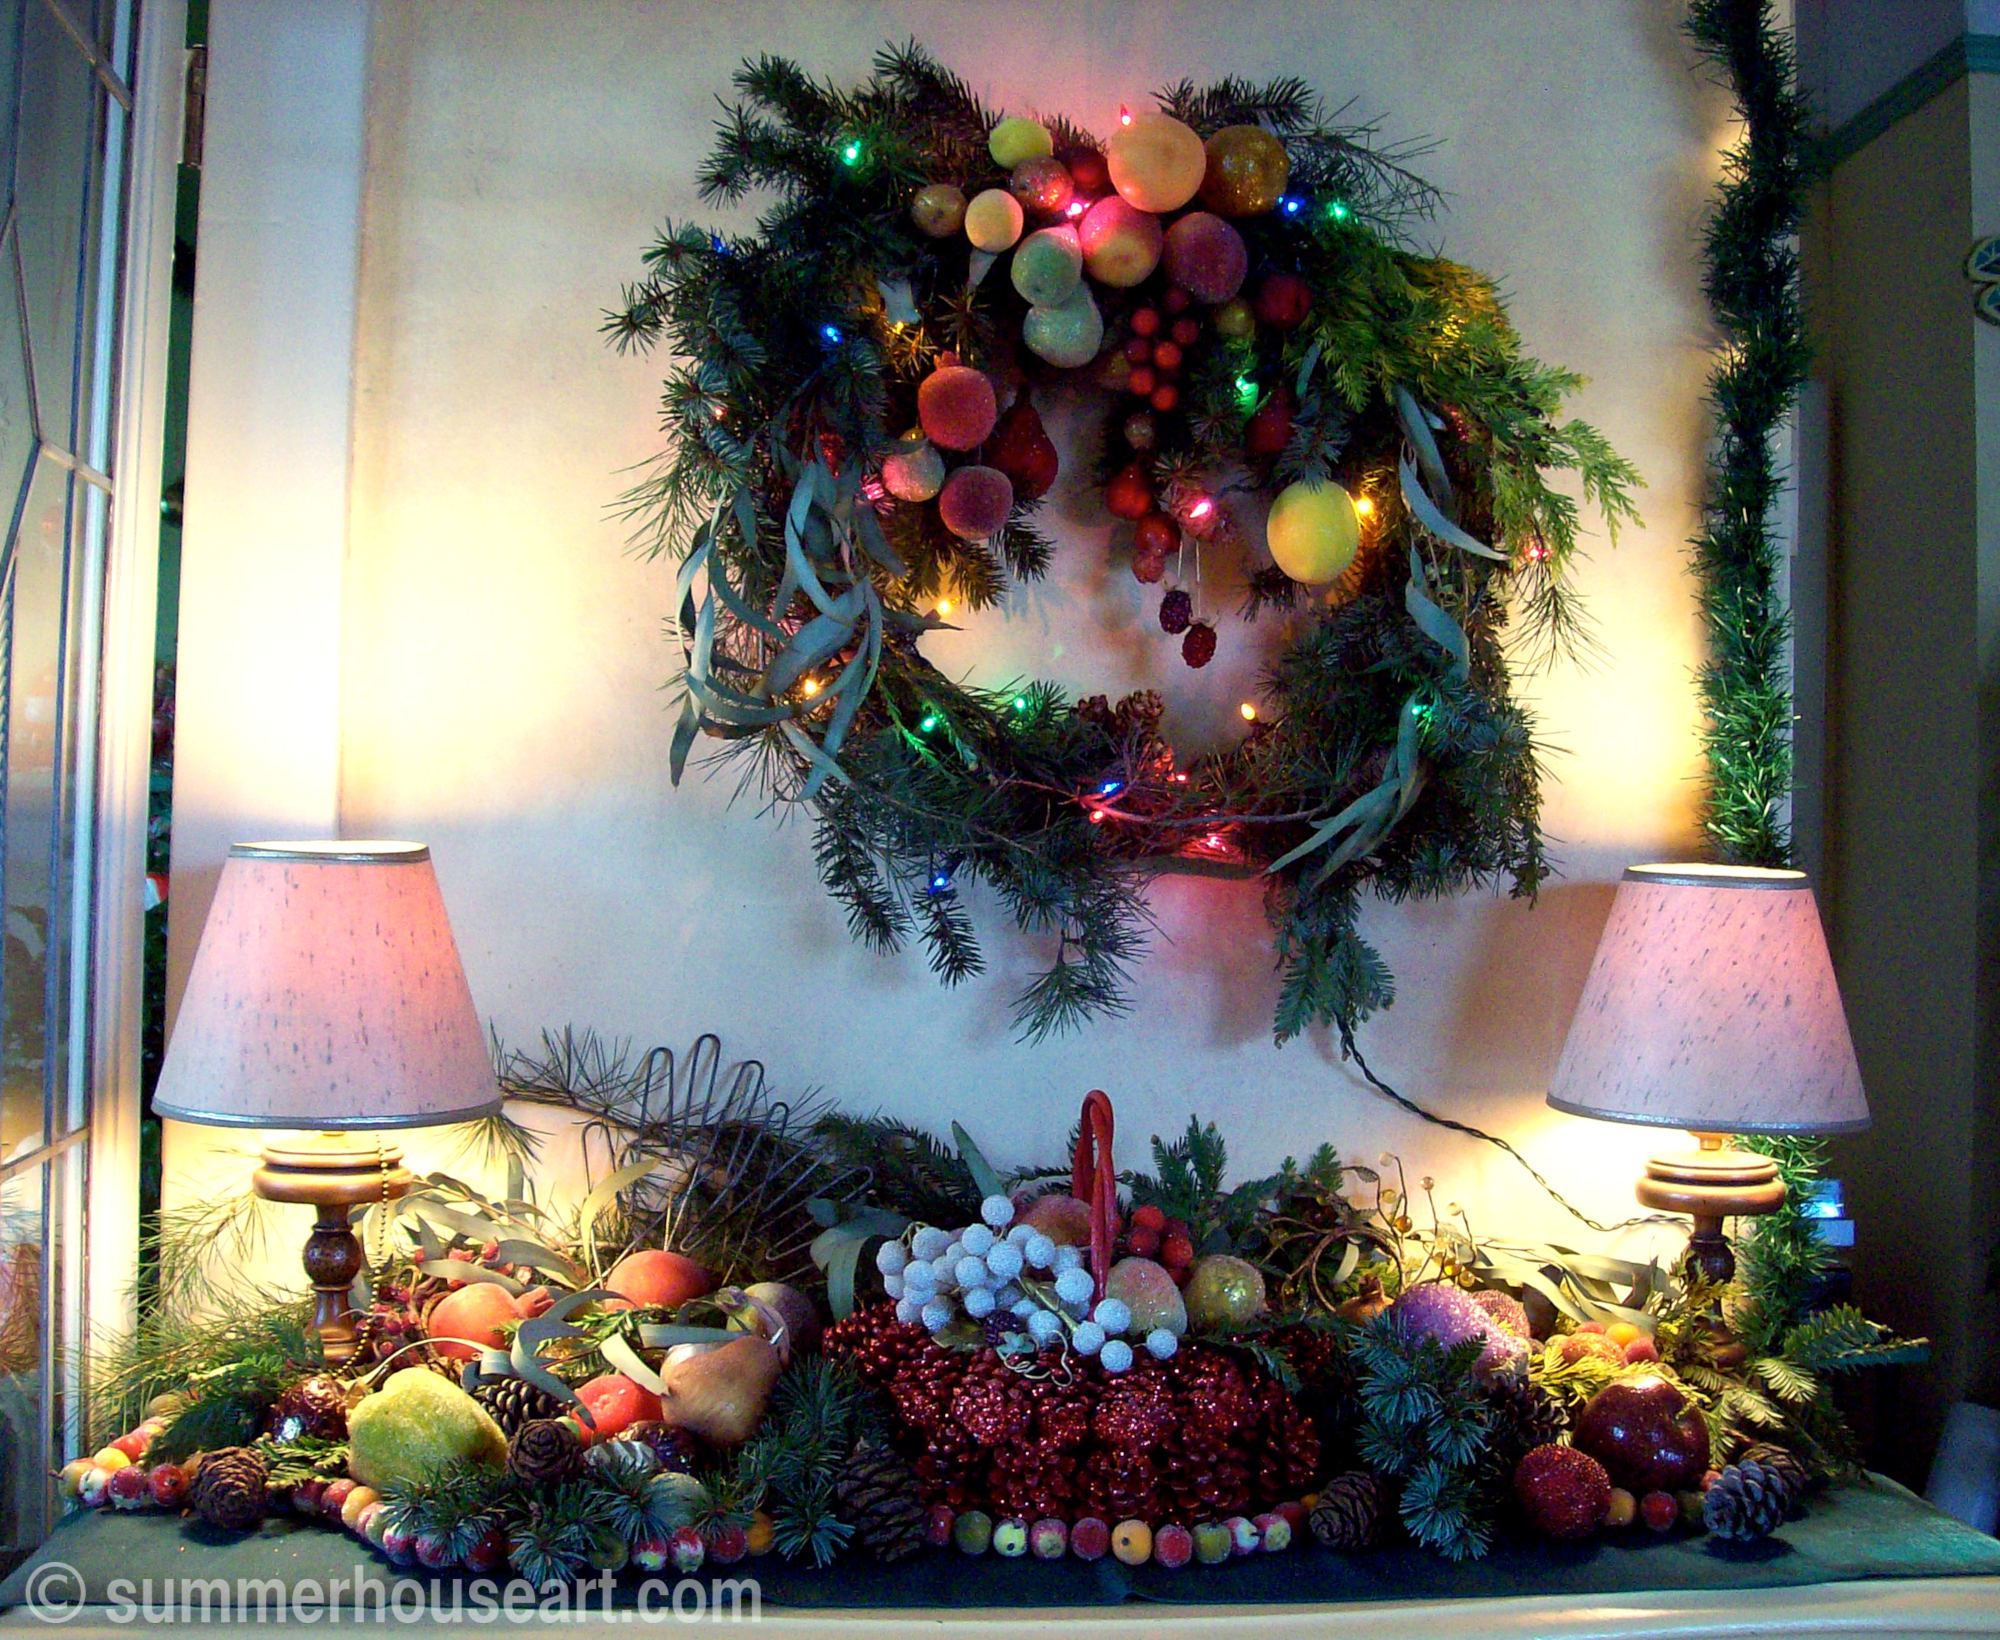
And I created the extravagant display on the top of the sideboard. It was supposed to have candles in repurposed globes from a junk find chandelier but that just didn’t work and finally we settled on the two matching lamps shown here.

Evergreen Christmas display, summerhouseart.com

It’s a bit more traditional looking than I would usually have done, but if you look carefully you’ll see the old glove stretchers poking up on the left. To me these displays are all about a exuberant sense of Abundance. Well, you must admit both displays are definitely a feast for the eyes!

Share

More Thoughts on a Green and Abundant Christmas

The other day I wrote about my abundant Christmas Music collection, almost all found used at garage sales and thrift stores. To me there is just no reason not to have it all when it comes to Christmas, especially when there is an abundance of everything available second hand. It’s guilt free Christmas, it’s recycled, it’s green and hey it’s fun.

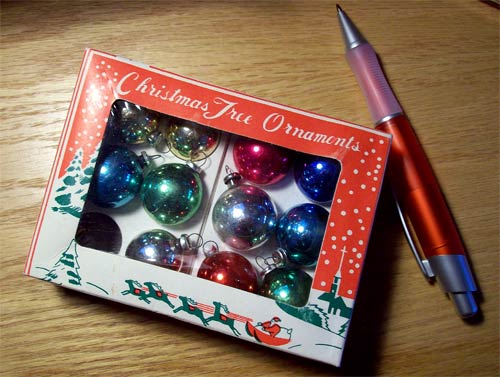
Most of our ornaments and decor are recycled goodies. Every now and then I find some great things that I just can’t wait to use, something in an old fashioned box, something just a little bit different. I just loved these little ball bobbles still in their original box with the little Santa and sleigh, so small and cute.

tiny-balls

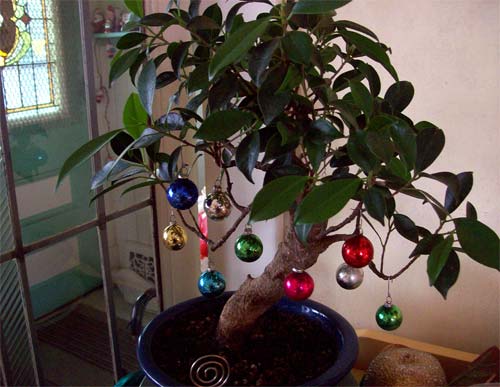
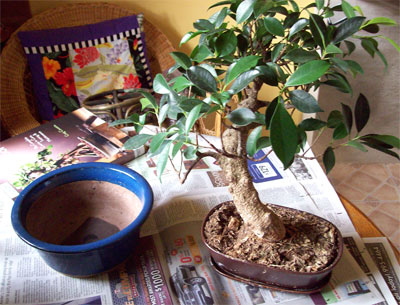
And I had just the right little tree in mind for them! Perfect!

bonsai-wballs

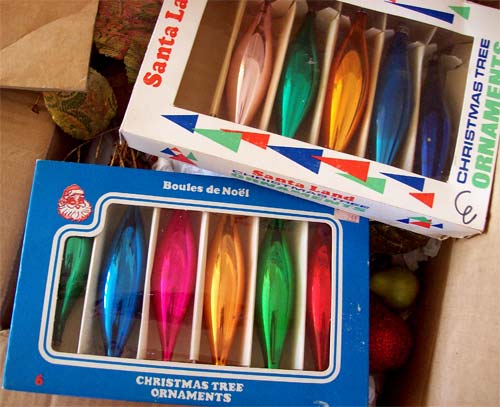
And then there were these wonderful drop ornaments, all in colors that I love, old and maybe collectible and definitely a bit “used”.

drop-ornaments

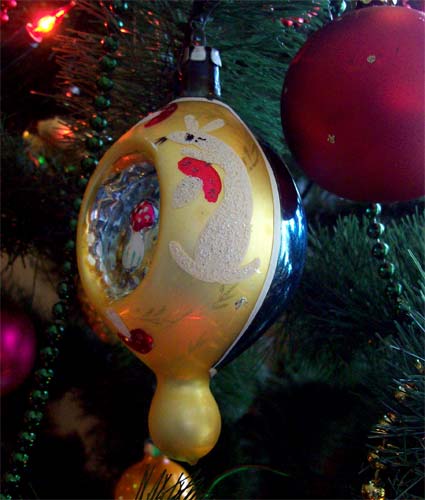
They fit right in with the old old ornaments from the 40’s or 50’s that were passed on to us from Will’s parents years ago.

kangaroo-ornmt

You can just see on the left one of the ornaments that Will and I adorned with gold leaf and gold paint years ago.

treeornaments

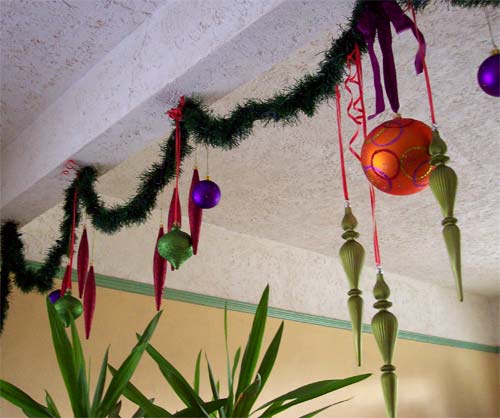
But all is not used. I do make exceptions to the recycled/used rule. And, as you may have surmised, I don’t like rules much anyway. Last year I found these wonderful ornaments at a sale in January. The colors were perfect with my big orange globe ornament with the glitter circles that I found at a garage sale one summer. It all looks great on the garland (yup it’s used too).

garland

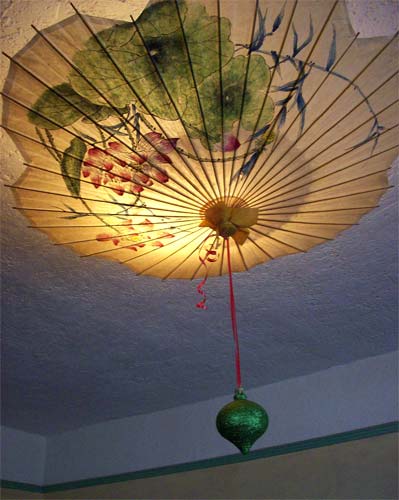
Will took one of the green glitter balls and strung it on a curly red ribbon from our paper umbrella light shade. I like it so much I think I just might leave it there after Christmas.

lit-umbrella

Share

Some thoughts on a Green and Abundant Christmas

geneautry

Way back in April when I started this blog I wrote about abundance in a recession. And today, thinking about Christmas, my fave time of year, I’m reminded of abundance. Our Christmases are full of abundance! As I always love to say the world is an abundant place as long as you like second hand.

Just the other day I was again reminded of groups of people taking a pledge not to buy anything new for a year. And I even looked at a few web sites and blogs about it. And although I applaud the enthusiasm, I also noted how difficult they made it for themselves. No bending allowed on the pledge. And it seemed as though the pledge was abandoned after the year was up in a few cases. Everyone tired of the sacrifice, maybe?

This is just not the way we approach it. What started as way to survive tough times as students in the 60’s and to get us through other bouts of tough economic times, has now become a way of life. But it’s really not difficult for us, it’s fun and easy. I really believe that anything we do to be a little greener is helpful. So every effort counts. If we absolutely need to get something new, and after trying to find it used, well ok, buy it. No guilt. But this is so offset with all that we buy used, we feel ok with it. And anyway, part of our plan is to buy new stuff from artists and others who produce hand made and original when we can, as well.

Which brings me to Christmas. The cost of Christmas, the news is full of it, credit cards maxed, too many presents, worry over money and all that that entails. But why not resolve to have some of your Christmas recycled and reused?

So I thought as well as sharing my obviously “abundant” collection of thrift store, garage sale Santas I’d also share some of the other things we have in abundance for the season. And one of the best is music. We have a huge collection of music mostly because we still have our turntable, and our tape deck as well as a couple of used CD players. So we can buy all the good old stuff and now we’ve amassed a pretty eclectic and funky collection of Christmas music. At the top of this post is a great selection from Johnny Mathis, Nat King Cole and Gene Autry, all actually a gift from our great friend Hart.  Don’t you just love that Gene Autry album cover? And as I bake for Christmas I love to play the oldies from my childhood like Perry Como, Bing Crosby which we heard always for Christmas. Would you believe most of these records and tapes we bought for anywhere from 25cents to just over $2?

comocsby

How much more eclectic can you get than this selection of Loreena McKennet  “a Winter Garden”, “A Very Special Christmas” which has the most wonderful piece by Sting, “Gabriel’s Message”,   The Masterworks Dinner Album and even Connie Francis who has “Christmas in My Heart”?

connief-tapes

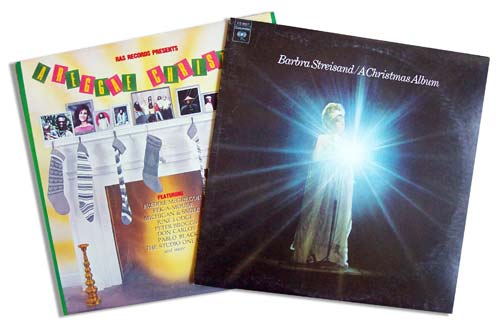
And we’ve got some odd stuff too that we’ve found over the years like “A Reggae Christmas”. Always good to listen to while baking Christmas goodies.

reggae

And then for those classical moments we’ve got Luciano Pavarotti with a boys choir with my favourite Panis Angelicus. A real treasure found at the local second hand store was Christmas in Venice, full of just gorgeous classical favourites.

pavartti

We always find CD’s when we’re out garage sailing and all of our collection is used. And then there are the ones I’ve collected just for fun like “Christmas at Liberace’s”, Or the “Doris Day Christmas Album”. Then a real fave is Boney M Christmas Album with Feliz Navidad to really get dancin’. So far my all time fave CD is World Christmas which has not only the Gypsy Kings on it, and Deep Forest but also Papa Wemba and Mono Cinelu.

boneym-tape1

So what am I saying here really? Christmas can be about abundance with out spending lots of money. And boy have we got an abundance of music! And it’s all used, recycled and we’re feelin’ green too.

Share

The Repotting of the Bonsai Tree

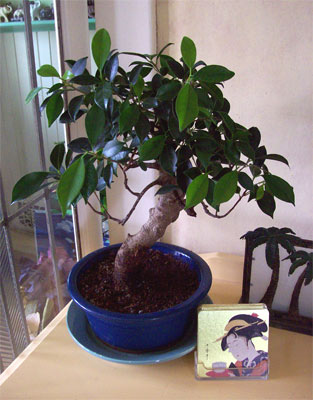
Last year, for my birthday, Eric gave me a Bonsai tree, a really cute little Ficus. Growing Bonsai was something entirely new for me. Everything about growing a Bonsai is quite contrary to my experience with houseplants.  My aim with houseplants is to get them to grow as large as possible, have lots of leaves, and live in ever larger pots.

Bonsai, on the other hand, are meant to live in small pots, get pruned a lot and stay small. Hmm. I have problems pruning bushes and trees outside. I’ve lived most of my life in Alberta, where you stand back and cheer if things grow and you hardly ever have to, in my opinion, prune. Now here I had a plant that you actually had to not only prune stems but also roots! I have to admit that to me it seemed cruel and nasty, unnatural, sort of like foot binding. But having one of my own, has made me start to appreciate the “art of Bonsai”. That is creating the look of a large tree in a small pot, a vignette so to speak, of a larger natural beauty.

But the time came when I realized that Bonsai or not this little plant needed a bigger pot or needed to have it’s roots pruned. My way of doing anything new is to look up everything at the library. So off we went and back we came with lots of books on Bonsai, care of and growing, pruning, training, etc.

before-old-pot

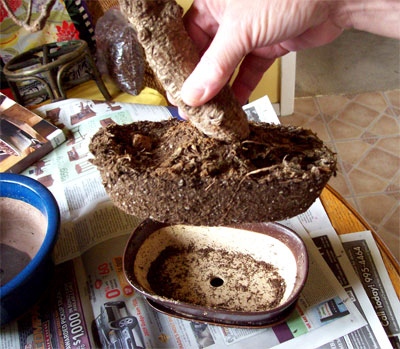
Now this poor little plant was so root bound that my method of checking to see if it was watered enough was just to pick up the plant, roots and all, out of the pot and check.

out-of-pot1

Between the three of us, Eric, Will and I, it was decided after much studying of various books, that rather than attempting to prune roots, that it would be better to move it into a larger bonsai pot. Luckily, as garage sailors, we had a little supply of recycled bonsai pots. After a bit of consideration, one was chosen.

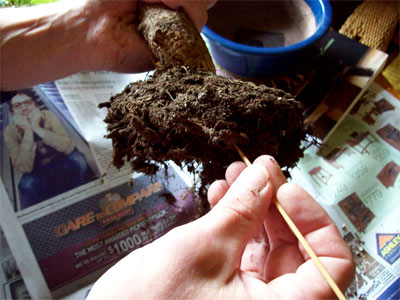
Eric, took on the task of loosening the old dirt from the roots with a little bamboo skewer, amidst worried remarks from me admonishing him not to tear the roots or hurt the poor thing. Eventually it was ready to re-pot.
loosening-dirt

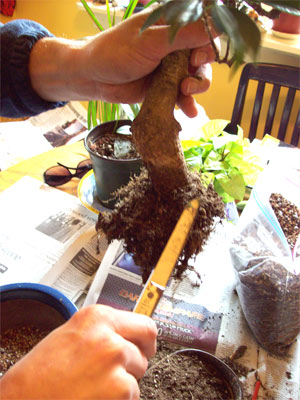
Eric also trimmed the roots from a little lower root that would become a root feature near the bottom of the trunk. Following instructions from our many books, the scissors had been sterilized with alcohol.

trimming-roots

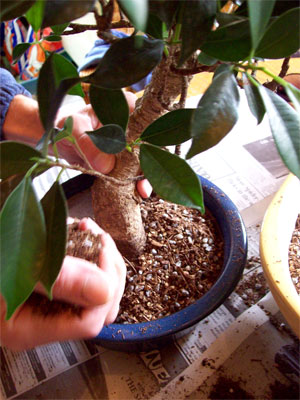
At the Glendale Garden Show, on one of my many jaunts around the other exhibitors, I‘d picked up a bag of Bonsai mix at a Bonsai Garden Exhibit. This was basically a mixture of bark mulch, turface (still don’t know what that is), sand, gravel, grit, vermiculite and perlite. To this I added a bit of regular bagged houseplant dirt. This was added carefully around our little plant in the new pot.

planting

Then our little plant was watered and the new dirt gently tamped down around it. It has, for the last few weeks, resided happily in it’s new pot on the sideboard in the living room. I’m happy to report that it survived the move to the new pot very well.

potted-up

New leaves are coming and only one leaf was lost. And doesn’t it look very very Japanese with it’s display of Japanese coasters, also a garage sale find, set prettily but minimally, of course, in front?

Share

Will’s Driftwood “Chair” Sculpture and Other Found Garden Art Whimsies

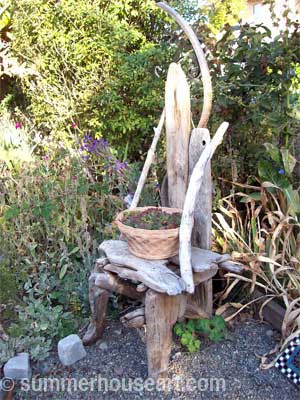
One day this summer, on a whim, Will suddenly built this driftwood chair. It’s not exactly sit-able so I think of it as being more of a sculpture. I’ve put off posting it because he keeps adding to it. But for now, it appears to be done… at least until he finds something new for embellishment.

chair2wm

henchickswm

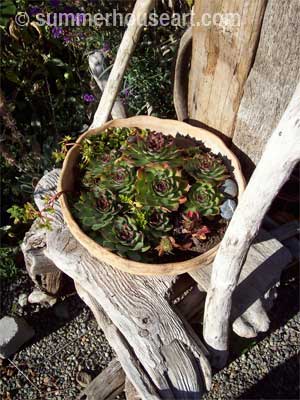
The seat creates a nice spot for my little dish of Hen and Chicks.

chairdetailwm

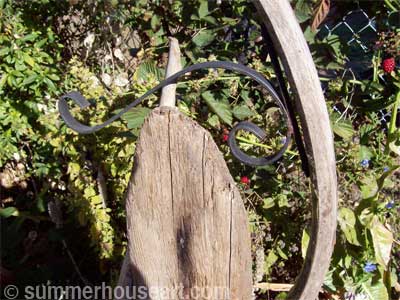
Right now we are trying to decide if his latest embellishment, a spiral hanger attached to the back, should be painted something colorful. I’d like that since it would relate to the mosaic chimney in the herb garden.

chimneywm

More color, I always say.

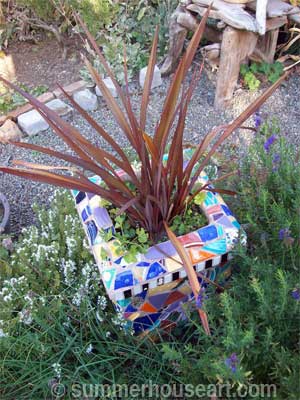
We have these bits of found art all over our garden that, to us, add a great sense of whimsy to the place.

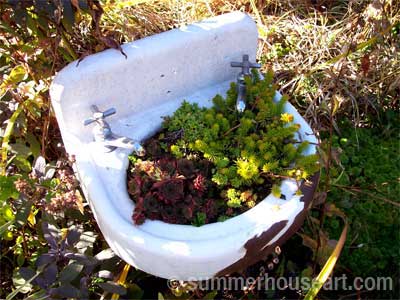
basinwm

We found the old basin at a demo site years ago, and it’s nicely weathered. It’s a great place to grow succulents and we love it. So do the succulents.

One day, while out walking, Will found this rock tangled up in a piece of rusty wire and it hung on the wall for a long time before we found the perfect circle of rusty wire from an old pot, to pull the whole thing together.
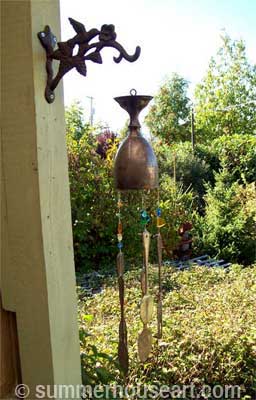
The chime came together last year, oddly enough just before our wedding anniversary. The silver goblet found that day at a garage sale, where else, celebrated some other couples long ago anniversary.

chime2wm

Will put the whole thing together that day as a special gift for me. Friends and relatives have loved it too and he’s made quite a few now from bits and pieces. Seems we’re always looking for good old silverware for another one.

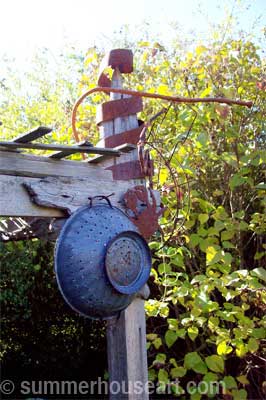
Some of these serendipitous sculptures never really get finished. Will just keeps adding to them.

colanderwm

I like to call this one his bird playground and one day he added this rusty colander to it. Just the right addition.

Share

My Little Dirt Secret

The other morning I woke up really early and just couldn’t get back to sleep. I’m talking 4:30 AM. By 5:30, I gave up going back to sleep and sat out on the deck sipping hot chocolate. It was just so wonderful out, cool, green and quiet. The light is totally different at 5:30 AM. I should do something with this time, I thought. I should use this time to do something I really like.

You’ll never guess what I really like to do in the garden. I love to make compost.

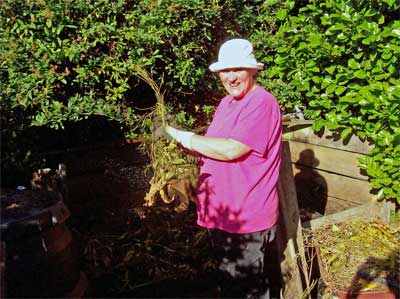
A gardening fashion statement
A gardening fashion statement?

There’s something about clomping about in my gumboots, layering all the ingredients of my compost that is quite satisfying. Well, there’s something about clomping about in wellies that makes me like to pretend that I’m Barbara Good in the Good Life.

If you have never heard of The Good Life, you are too young. If that’s possible. Anyway, this was a very popular British TV series back in the 70’s that featured a couple determined to be self-sufficient on a 50 by 100 foot lot in a trendy area of London.

Anyway this couple, Tom and Barbara Good, had a veggie garden , chickens, even a pig at one point, instead of a lawn and flowers and a wood stove in the kitchen. This was all much to the consternation of their trendy Yuppie neighbours. Anyway, if you can, rent it. It’s even rumoured that the Queen of England plopped herself down on the couch every Tuesday evening to watch it.

We get everything second hand, we’re into sustainability, conservation and all that.

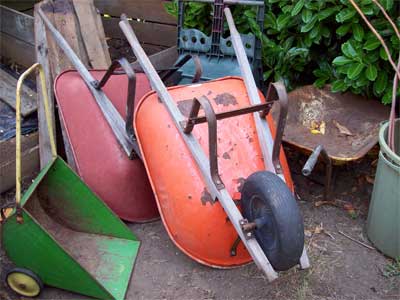
Actually five wheel barrows, if you count the handy little green weed barrow

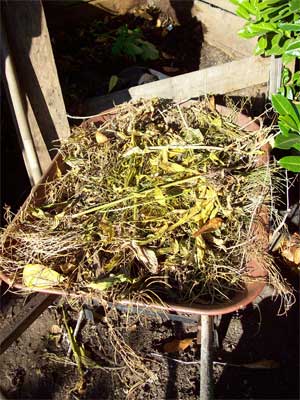
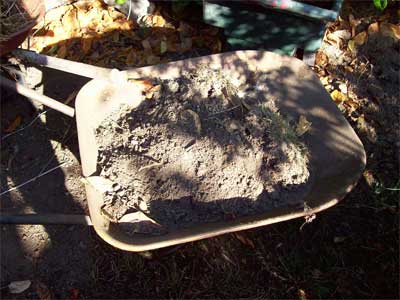
We have about four old wheel barrows, all for free, giveaways. Now you may wonder how does a couple on a 50 by 100 foot lot possibly use 4 wheelbarrows? Well, we do use them. Mostly to store all the weeds that we pull and the finished flowering plants. We don’t always have time to do the compost so basically I just store the stuff in the wheelbarrows and let it get sort of pre -composty. Then when I can, I “do” the compost.

Now, if you’ve been searching the internet for all kinds of ways to make compost , you’ll know there are many ways to do it. Then there’s my way. And here is my little dirt secret. I cheat a bit.

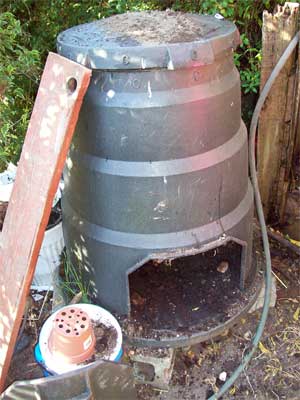
Our free black composter

For instance we have one of those big black composters, which I got free, by the way, given away by a neighbour. I like to use that one for all the kitchen stuff like tea bags, coffee grounds with the filters (unbleached of course), peelings from fruit and veggies, egg shells (I crush them usually). I save all this stuff in two plastic recycled containers on the kitchen counter. As soon as they get full they get emptied out into the black composter, but, and this is where the cheating comes in, with each load I add a few trowels of dirt from the compost already made.

In winter I leave a pile of this finished compost close by so I can scoop it easily. I like to think that I’m adding some good bacteria and worms to get to work on all this bounty. Putting the kitchen scraps in the black composter until its composted, keeps it away from the rodents. We do have rats in Victoria.

Then we also have a pile of sod, from making new flower beds. This is the dirt I talked about in a previous blog, that is hard, dry and no self-respecting earthworm will touch. So there you have the ingredients, the old sod, the kitchen scraps from the black composter, and the wheel barrows full of decaying weeds and the secret ingredient, finished compost added to the mix.

The pre-composted weeds

Dirt for the backyard lasagne
The old sods for the backyard lasagne

Now I like to think of lasagna. That is layers. I put a layer of sods which I break up into the smallest bits I can by hand. I water that really well. In fact, my latest trick is to keep the hose going on a fine spray pointed at the compost

Keeping things wet
Keeping things wet

while I layer to keep the dust down and wet the stuff as I go. Then on top of that I put a layer of weeds, also broken up as much as possible. Then I add a layer of composted kitchen scraps from the black composter. All of these layers get thoroughly watered down, since the compost needs to be wet to work. Then back to a layer of sod, then weeds, then kitchen compost with some finished compost added.

We have two bins next to each other. We usually empty them both on to the garden in the spring but we save a bit for the cheating. That is we save some good finished compost full of worms and wigglers to seed the new layers with.

A layer of black plastic keeps the moisture in

The last thing we do is also a bit of a cheat. We put black plastic over the working compost to increase the heat and keep it wet. A dried out compost won’t work.

Then by the next spring we have “black gold” as we like to call it. All for free, all natural and the garden loves it. Barbara and Tom would be proud.

Share

How to Create a Pique Assiette Mosaic Stepping Stone – Helen’s Way

There are probably lots of ways to do stepping stones. I have my way and it works for me. There are lots of things you can put on stepping stones for your garden, like dishes, stones, marbles, keys, whatever you think will look good in a stepping stone.  This type of mosaic is actually called Pique Assiette, which roughly translates to “stolen dishes”. The beauty of doing a stepping stone is that the same method works for most outside mosaic projects.  Check out more of our garden stepping stones.
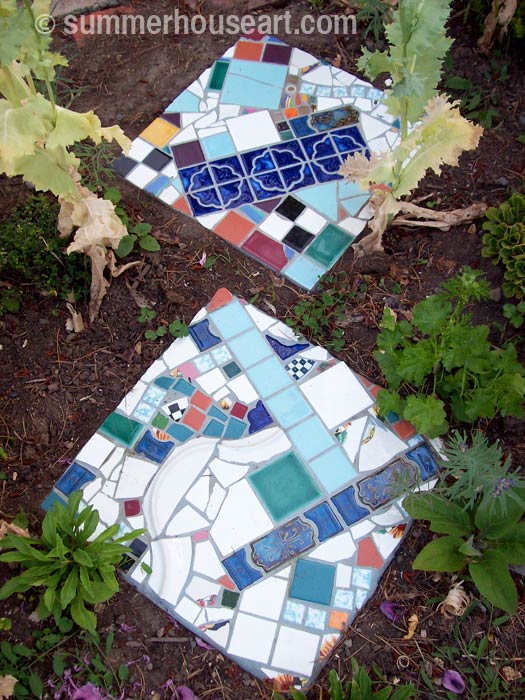
Tutorial, Pique Assiette Stepping Stones, summerhouseart.com

I’m not a big fan of really orderly designs, with symmetrical elements or tidy circles of pieces arranged in a regimented way. No, I tend to go for the intuitive and fast method of working.

First of all, although I’ve seen lots of sites that say otherwise, this is not suitable for children. It has sharp shards from dishes, it has caustic cement and requires some strength and lots of common sense. I am cutting myself all the time and keep bandages handy and I’m way past childhood.

Secondly, I’d like to say, if you are going to make these, use the proper precautions with mortar and grout. These are caustic materials, they require that you use dust masks when mixing to avoid breathing in the caustic dust. They require that you use rubber gloves to avoid getting the caustic mortar on your skin. That said, read the package, note the cautions. Please don’t go leaving this stuff around children and pets! Please remember to clean up as soon as you are done and make sure not to leave this stuff in bowls to harden into cement that you will never ever get off.
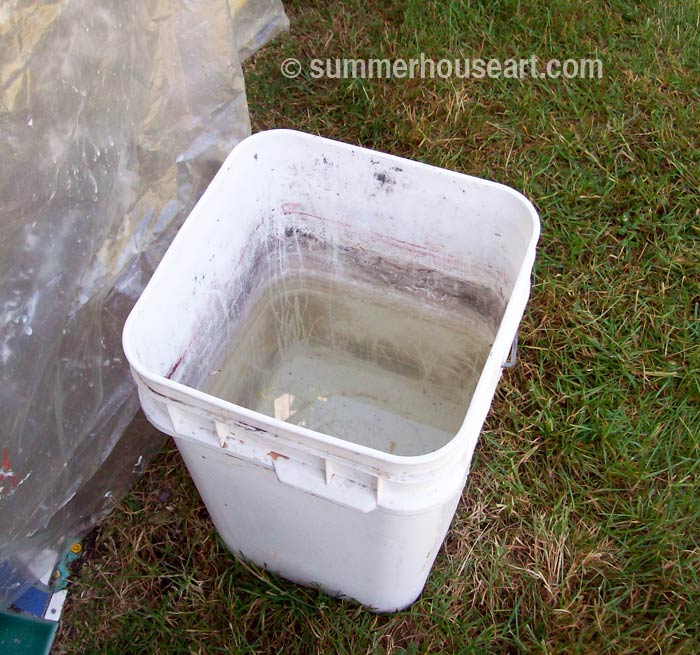
Process, Stepping Stone Tutorial, summerhouseart.com

You may wonder why I have a photo of a pail of water? Well, the next precaution is NEVER NEVER rinse off anything with cement on it down a drain. It will set and your drains will be plugged! Ok, so why the pail? That’s where I do all my rinsing of gloves, mixing bowls and implements. I let the cement settle for a day or so and then gently pour off the water into a garden path and scrape the cement that settled into the bottom of the pail into a bag and put it in the garbage. There won’t be much but, hey, better in the bag than in your drain.  Both mortar and grout have cement in them.

An important note about dishes and tile to use. If you use tile that is meant for indoor use or dishes that are porous under the glaze you will have this nasty thing happen.
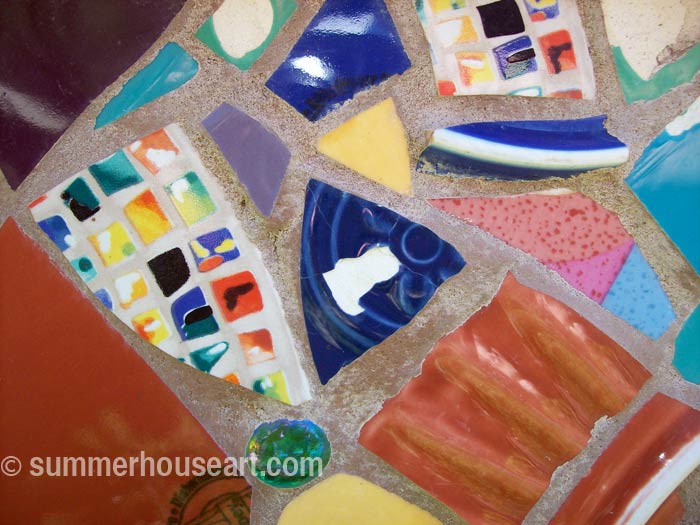
Process, Mosaic Stepping Stone Tutorial, summerhouseart.com

The moisture will seep under the glaze and when it’s cold the water will expand and pop the glaze right off the dish or tile. I know, because it’s happened to us. So make sure the dish is really dense and not porous and use tile that is very dense and meant for outside use.

The last important note. Wear goggles when snipping dishes. Broken pieces have a way of flying out and hitting someone. Be careful, for obvious reasons with shards. Don’t wipe away little shards with your bare hands, use a dust brush.

OK enough warnings. On to the fun stuff. As I said, I like the intuitive way of creating stepping stones. But having said that I don’t judge what others may like. Creativity is self-expression after all.

You will need:
A concrete stepping stone
Dishes and/or tile
a work table
a pail of water
rubber gloves
dust mask

old cotton socks

Gray or White Mortar or thin set ( I use it in powder form and add water)
a jar of clean water
a bowl for mixing mortar and grout in ( I use old stainless steel mixing bowls)
a trowel for applying the mortar
something to scrape between the pieces to remove too much mortar, like an old knife.
two-wheeled glass cutter or tile nippers
tile cutter
sanded grout ( it comes in colors, so have fun)

Step 1- Getting ready to start
I buy concrete stepping stones from the local home building supply store. We used to make our own, but honestly, it wasn’t worth the effort. Stones are about $2 or $3 to buy. They come round or square.

Put a concrete stepping stone on a work table so you don’t have to be bent over the whole time while creating it. You’ll thank me later. I like to cover the work table with plastic first to save it for other uses. Also, it’s a good idea to put the cement stepping stone up on a few little blocks of wood to raise it off the table surface. It’ll make it easier to get your fingers under when you finally pick it up to move it.
Process, Mosaic Stepping Stone Tutorial, summerhouseart.com

Step 2- Cut up the dishes and tiles
Please put on your eye protection! I wear glasses anyway so that’s mine but really protective goggles are worth it.

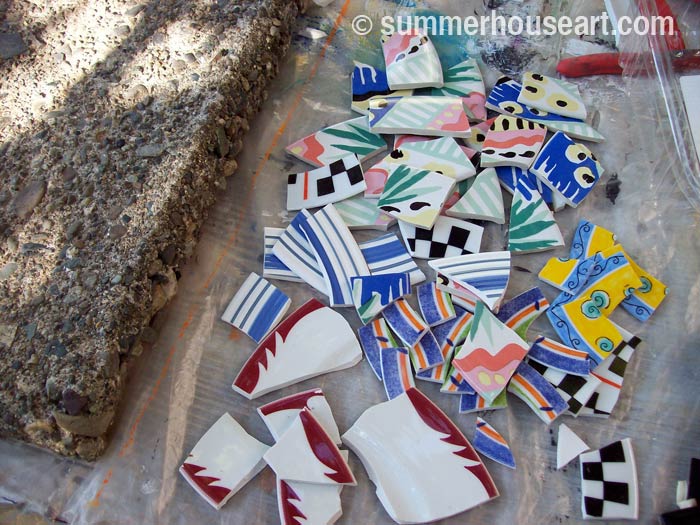
Cut up the dishes into bits and pieces using nippers or two-wheel cutters or tile cutters. For cutting up tile, use the scoring wheel on the tile cutters to score the tile and then break it with the tile cutters. If you don’t know how to use one ask the clerk in the tile store, they’ll usually be happy to demonstrate.
Play around a bit with the arrangement. You could arrange them all before hand on an area approximately the same size as the stepping stone. More about this later.

Since mortar sets in about 20 minutes max, laying out your pieces on another surface will cut down on the time it takes.  Or you could do it my way and just arrange them right on the mortar and wing it.  Keeping in mind that the mortar loses its stickiness and you may have to make a little new mortar to finish sticking down pieces.
Process, Mosaic Stepping Stone Tutorial, summerhouseart.com

Step 3- Mixing the mortar
Put on your Dust mask! Put on your Rubber gloves! Seriously!
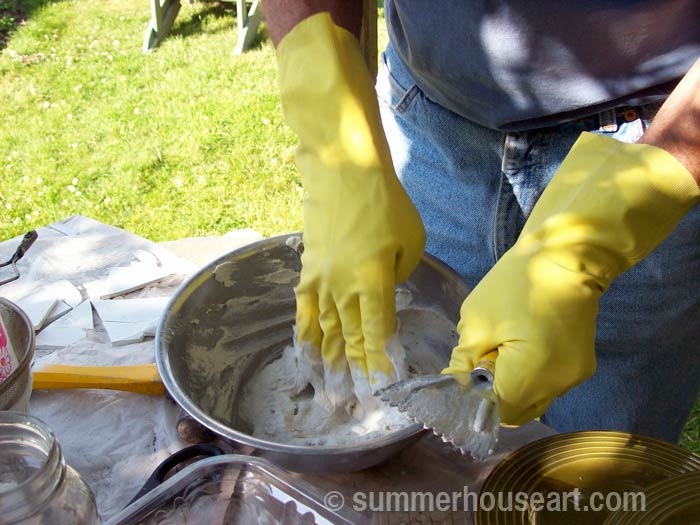
Wear your rubber gloves! I like to mix with my hands, encased in rubber gloves of course. Don’t do this bare handed! It’s caustic. see warnings above!

Put the powdered mortar in the mixing bowl. You will have to guess-timate here for the amount of mortar. Add water from the clean water in the jar, a tiny bit at a time. Mix up the mortar to a peanut butter consistency.

I like to use stainless steel mixing bowls that I find in thrift shops, they work well, and are reusable.

Get it to a peanut butter or just slightly thinner consistency by adding the water to the mortar ( this applies to grout also) very slowly as it will become too thin very quickly if you add too much.
Process, Mosaic Stepping Stone Tutorial, summerhouseart.com

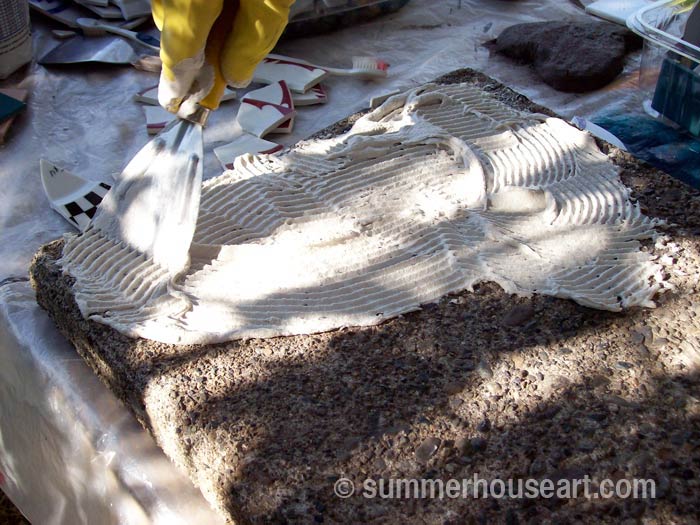
Spread the mortar over the stone using a toothed trowel.
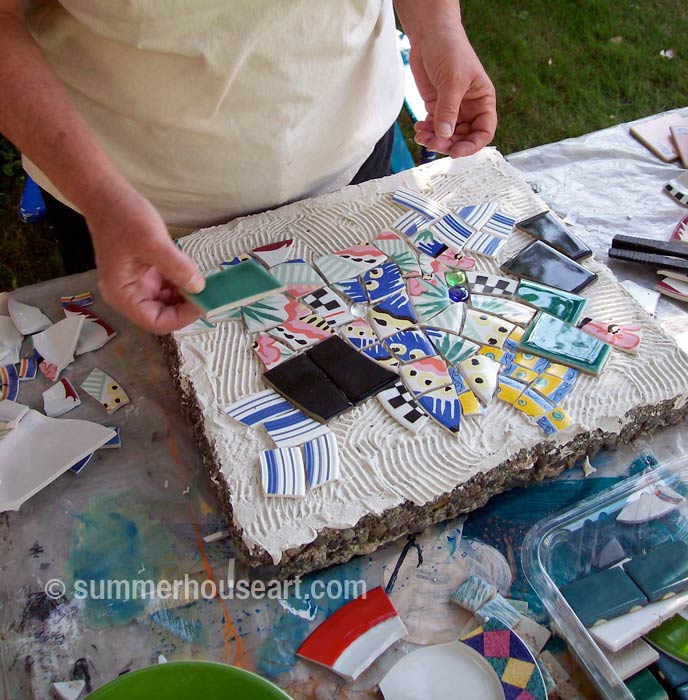
Process, Mosaic Stepping Stone Tutorial, summerhouseart.com

Lay each piece on the mortar and try not to squish up mortar between the pieces. You’ll need that space to put grout in later. If it happens, and it will, just remove it with a blade like tool. I cut and fit dishes as I need to as I go along.

You’ll have to move fast, mortar sets up on a hot day really fast, you’ll have only about 20 minutes! In fact I wasn’t fast enough on this one and it started to dry out and nothing stuck. So I scraped off the dry mortar and just buttered a bit on, for each section I had left to finish. Ok, it’s cheating a bit, but it did work.

BIG NOTE: watch out that when you put pieces down on the mortar that you don’t leave nasty points sticking up. You’ll know you did, painfully, later when you are smoothing grout over the pieces and snag your fingers on a point. And you wouldn’t want to step on a point later.

Be careful, this stuff is sticky and keep the top of your dish pieces clean and wiped off.  Once mortar sets it’s cement and you won’t be able to remove it from the surfaces of the dishes!

NOTE FOR BIG PROJECTS: When we are doing a big project, or if we want to take our time designing a piece, we work a bit differently.  We glue down each piece with a bit of mortar buttered on to the back of each piece.  We just mix up tiny amounts of mortar at a time in a small bowl and apply it to each piece as we stick it down. When the mortar gets too hard, we just clean out the bowl and mix up another fresh tiny amount. 
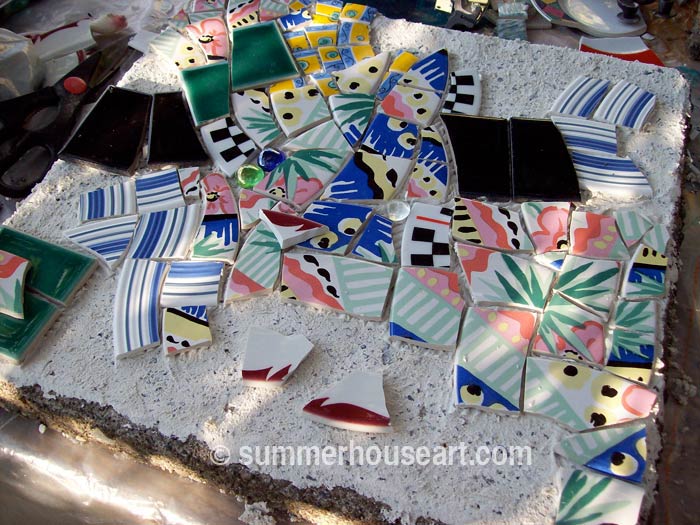
Process, Mosaic Stepping Stone Tutorial, summerhouseart.com

Process, Mosaic Stepping Stone Tutorial, summerhouseart.com

Step 4 -Take a break
Now that you have all the pieces mortared down, take a break and enjoy a cool iced tea. When you can’t move the pieces with your fingers, the mortar has set. We’d actually done the mortaring in the evening after a long day and stopped altogether to go in and watch movies. Of course, we cleaned up all the mortar mess like the bowls and implements first in the bucket of water! Then the next morning I was ready to grout.
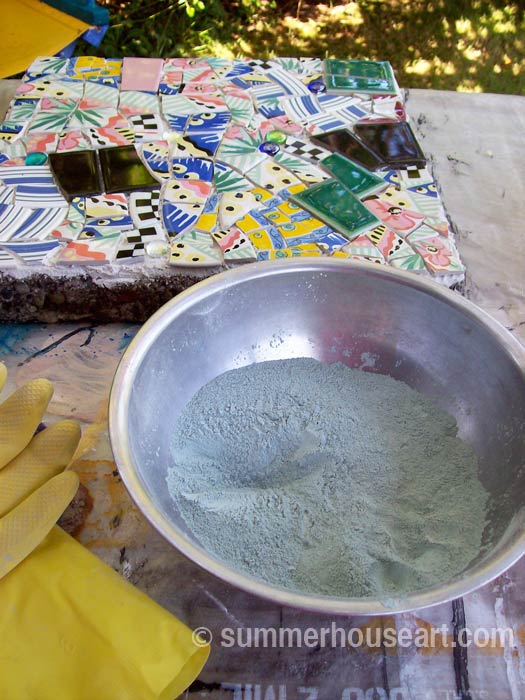
Process, Mosaic Stepping Stone Tutorial, summerhouseart.com

Step 5 -Grouting
Put on your dust mask and rubber gloves!! Mix the grout in a bowl adding just a little bit of water from the jar at a time. Again I like to mix with my hands.

Get it to a peanut butter or just slightly thinner consistency.
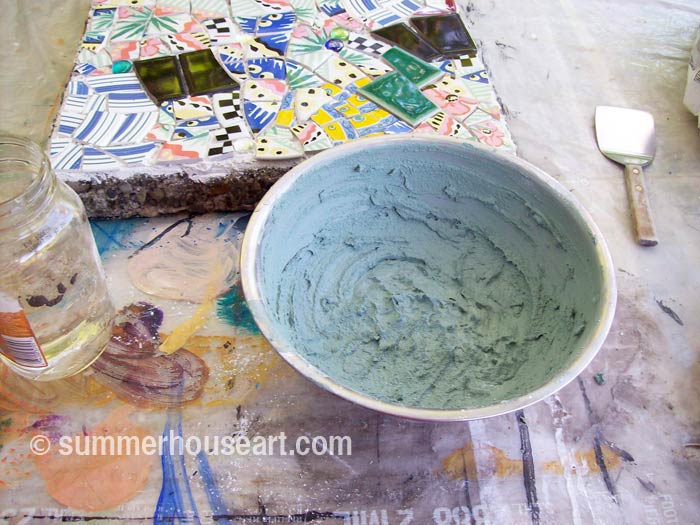
Process, Mosaic Stepping Stone Tutorial, summerhouseart.com

Let the grout “slake” for a few minutes, no more than 5 and with your gloves on still from mixing it by hand pick up a handful and start “smushing ” it all over the surface.
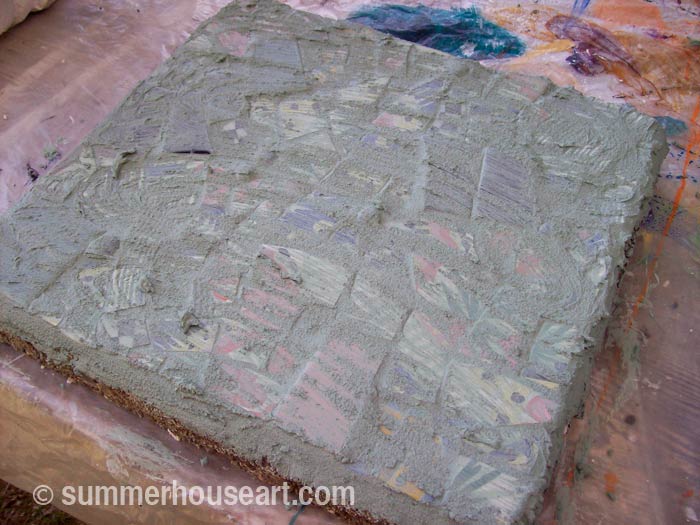
Process, Mosaic Stepping Stone Tutorial, summerhouseart.com

Be sure to fill in each space between the pieces well. I use sanded grout always.

Step 6, or Why should I save old cotton socks?
I like to use old cotton socks to remove the grout from the surface. Some people like to use old sponges but I’ve found it’s just too easy to remove the grout from between the pieces with sponge. Dry old socks work well and you can turn them inside out and use the inside too. Once you have most of the grout removed from the surface leaving only a bit of hazy layer, let it sit. Break time again! Not too long, just 5 minutes and then back to work! Come back and with a clean sock shine up the pieces.
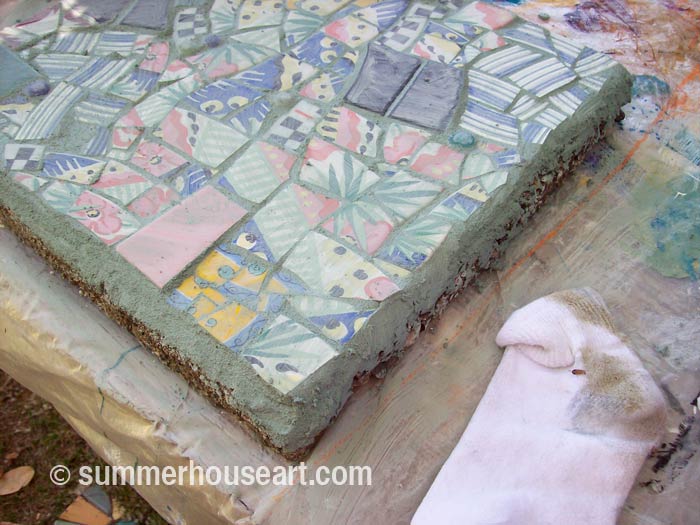
Process, Mosaic Stepping Stone Tutorial, summerhouseart.com

Step 6, Enjoy!
Enjoy the work you’ve just produced. Sit back and tell yourself what a genius you are! Then after your new wonderful stepping stone has had overnight to set and cure, dig it in to your chosen spot in the garden path. Hope you’ve enjoyed my tutorial.  You can use this method for other outdoor projects like bird baths too.  Check out our Mosaic bird baths too, if you’re interested.   you can find them here:  A Serendipitous Mosaic Bird bath  and also A Beach Pottery Bird Bath.   Bird baths are done a little differently.  We create small batches of mortar and butter each piece as we go along.  We set up under a pergola and make a summer project of it.  They do take some time, so be patient and enjoy.

Mosaic Stepping Stone Tutorial, summerhouseart.com

(BTW, if you’d like to make a comment, just click on the title.  It’ll take you to comments….and we do appreciate comments )

Save
Share

The Creeping Jaguar, Jazz, Brides and a Crimson Dragonfly

Saturday was one of those days that dawns with cloudless blue skies, warm breezes and the whole day ahead of us to enjoy. We had our cereal on the deck while surveying our wild garden. Just a couple of days before a hummingbird had come right up on the deck to drink nectar from a flowering succulent right before our eyes, oblivious of our presence. I had to take a memory shot, hoping to keep this forever in my memory, since as is usual when something like this happens, no camera at hand.

The day was planned, garage sailing in the morning and Jazz in the Park in the afternoon and maybe a little gardening as the top off at the end of the day.
Garage sailing started off well. Free stuff! Got a nice big basket to hide an ugly plant pot in the green house that houses what I like to call the Avocadon’t, an avocado plant grown froma sprouted avocado pit that Will had rescued from the compost heap. It is now about 4 feet tall! No avocados though. Just this big hulking plant that requires lots of water.

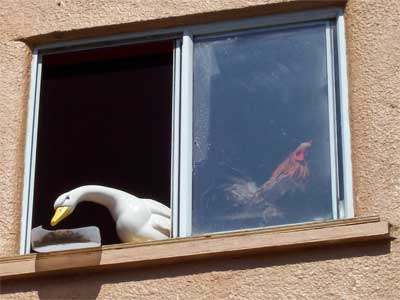
Then on to Esquimalt to find more good stuff at other sales. On the way, while stopped at a little store, I spied this odd assembly in a window.

The goose ornament and it's rooster buddy
The goose ornament and it’s rooster buddy

A large goose ornament almost tipping out of the window, seemed to be enjoying the day, with a rooster inside next to it.

Odd graffiti in an odd spot

And on the wall outside, for some unknown reason, a graffiti artist had chosen this spot to do some work which was colorful and oddly funny.

Picked up our good friend Mary Lou whom I’d convinced to leave her work behind and enjoy some good garage sailing.

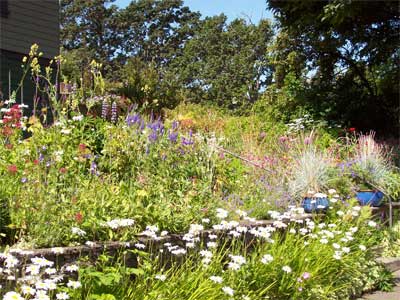
This garden may be even wilder than mine

While waiting for her to join us I spied this rampant garden, which may be even wilder than mine, I think.

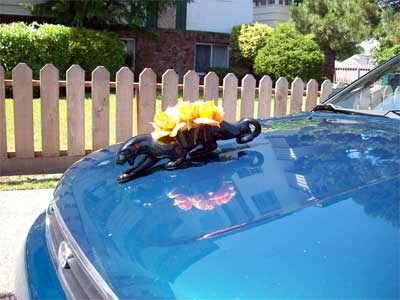
Our little Subaru always wanted to be a Jaguar

In James Bay we found this stealthy black jaguar ornament with plastic orange roses that got my kitsch radar going. Had to have it. Decided to give our car a little transformation. For a few moments it was a kitschy jaguar complete with hood ornament. Ah we’re flying high now.

Later, we scarfed down a quick deli lunch complete with Nanaimo bars for dessert (Hey only one calorie, ok one very big calorie) while listening to the great jazz of Paul Wainright and his group.

Paul Wainright and the band on Stage in the park

This Jazz in the Park is free and can be enjoyed every Saturday afternoon at the Beacon Hill Park Bandshell. We enjoyed this immensely last summer and never heard a band we didn’t like. If you live here or are visiting, you must check this out as well as other events.

The park seemed to be full of weddings. The band had apparently been asked to stop playing jazz for 15 minutes at a certain point so that wedding vows given near the bandshell would not be overwhelmed by the concert. Before this intermission they’d jokingly played the theme to ‘Mission Impossible”.

Strolling, while the band took their break,

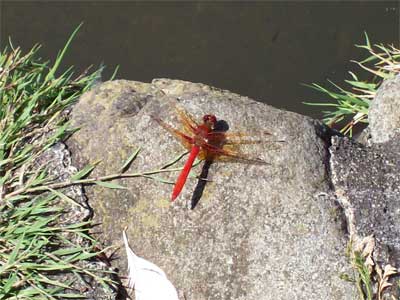
A beautiful crimson dragonfly by the lagoon in Beacon Hill Park

we came upon this stunningly gorgeous crimson dragon fly. Beautiful, isn’t it?

Then hot and tired, we headed home, ostensibly to do some gardening, but decided instead to indulge in what those who live in hot countries do, siesta.

Sunday morning found us in the garden at last. It’s amazing how good you feel after a few hours of gardening on a cool morning. Doesn’t matter what is on your mind or what aches and pains you have, somehow being out in the garden, just makes you feel great, better than any antidepressant. All in all, a very, very good weekend!

Share

A Clutter of Hearts

I’m looking forward to this weekend. We’ve had quite a busy time for the last few weeks and have missed our usual garage sailing. We’re feeling the effects of withdrawal I think. So tomorrow we’ll be off and out of here, ready to roll. The weather is beautiful, sunny, with a breeze.

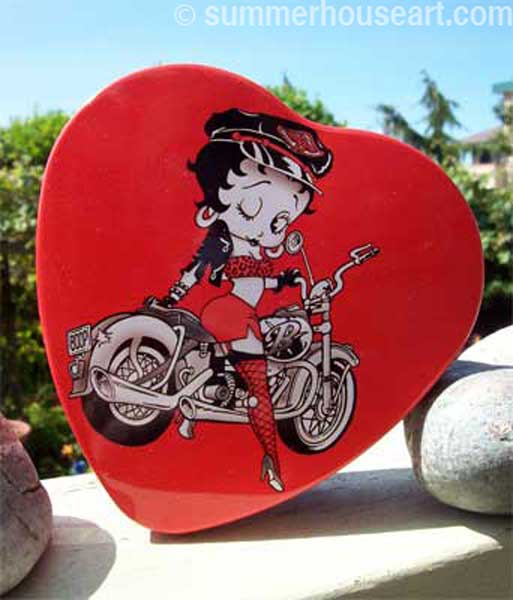
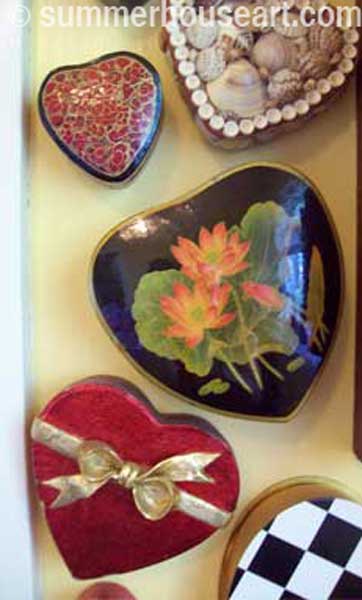
The last time we went out garage sailing I found this little heart box with Betty Boop on a motorcycle.


bettywm

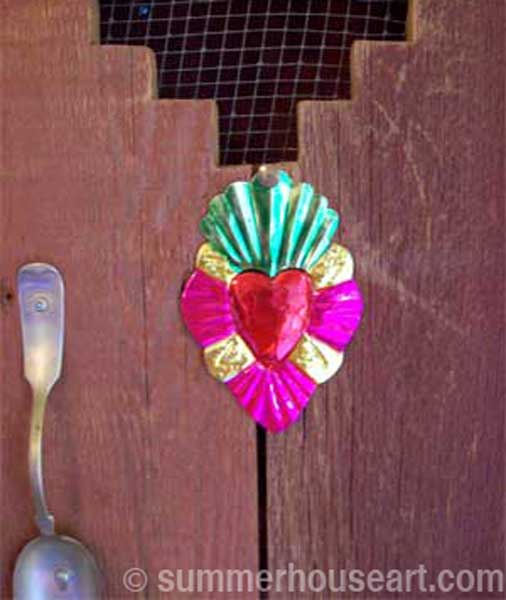
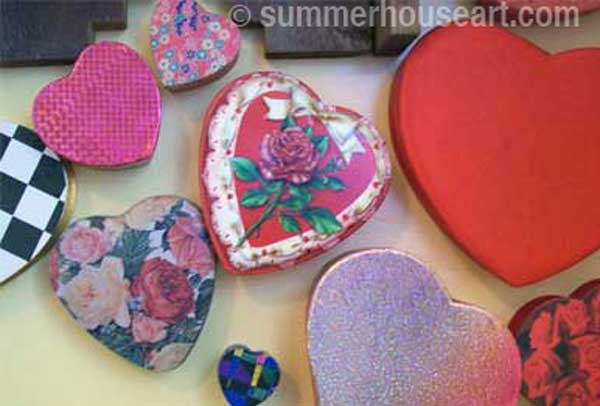
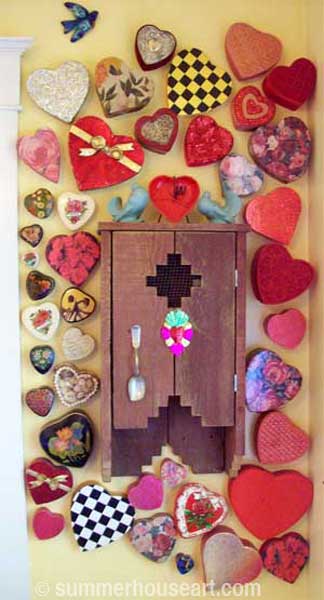
She’ll get a top spot in my collection of heart shaped boxes. Which brings me, nice little segue here, don’t you think, to collecting. Now, we have a few collections. We have collection of elephant ornaments, decorative tins, boxes and fans, just to name a few. I even have a ridiculous amount of Santa Clauses, which I lovingly unpack every year at the appropriate time and display. Then I lovingly repack them in tissue and old plastic grocery bags in about 5 or 6 boxes all marked “Santas”. But you’ll have to wait till Christmas to see those. The other collections I’m planning on sharing before too long. As I said to my sons, one day this will all be yours. Not sure if they were impressed but at least they got the humour.


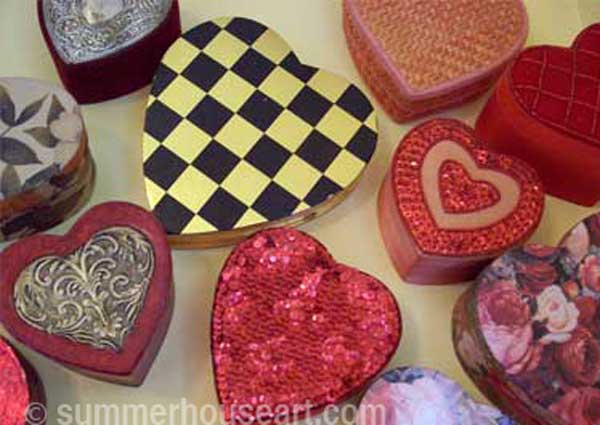
checkerheartwm

Why do I have a collection of hearts? I really don’t know. They aren’t worth anything, and even as collectibles will probably never be worth much. Most are thrift shop and garage sale finds.


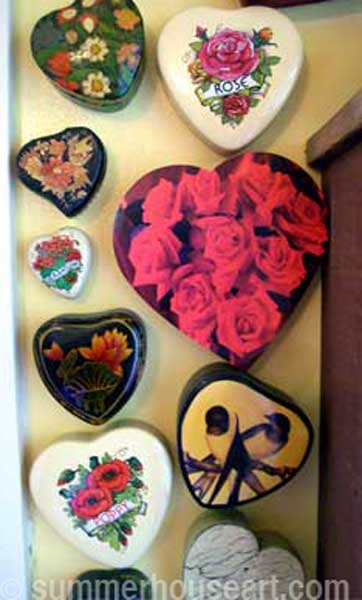
flowertinswm

lilyheartwm


Like most collections you start with one thing and like a magpie you find yourself attracted to another thing and that leads to finding another thing and another and another and before you know it, you have a collection. No real reason. Just fun. Am I just an accumulator in this world where “clutter” is a dirty word? Probably. Or is it because I just enjoy something beautiful or even kitschy? Or is it because I am an artist and I can appreciate all this art on odd little things like tins and boxes. Or maybe is it because I can appreciate all the different ways you can sculpt an elephant ornament? Yup to all of those, I think.


mexiheartwm

tinyheartwm


The heart boxes are all displayed in one corner of our kitchen. Now there is a reason why they are displayed there. That corner, according to Feng Shui, when I was into Feng Shui, is the part of the house that is for the relationships, marriage and friends. It just seemed fitting to put hearts there, the time honored symbol of love. And many of these heart boxes have been given to me by people I love and who have enjoyed a bit of the thrill of collecting, just for me.

My usual chair in the kitchen is opposite this wall so I can look over my collection of hearts everyday. I never tire of it. It gives me a sense of happiness, pure joy. I love seeing the way they all relate and yet are all so different. I still enjoy studying each one. It’s like celebrating Valentine’s Day every day.  And why not?

Visitors fall into two groups when it comes to our collections. Those who think life should be lived minimally with no clutter and disapprove and those who enjoy the crazy interesting things that they can look at and enjoy. Or to put it more simply those who care about dust and those who don’t. Unfortunately, some people only see collections as dust collectors, clutter and mess. All I can say is, you don’t know what you’re missing. And as for dusting, well, I dust if I have to, but I’d rather be making art or enjoying my collections.


allheartswm

Share

Bird Playgrounds

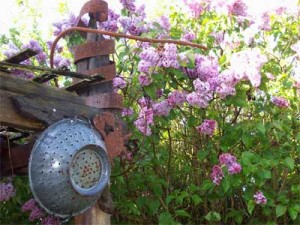
The lilac is in bloom in all its glory. The breezes carry the perfume and you have these little moments of pure joy as you lift up your face to catch that wonderful scent.

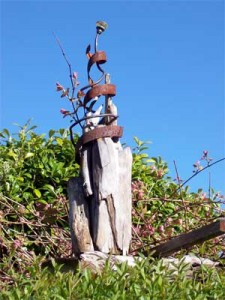
arbor sculpture
arbour sculpture

I just had to take a photo of one of Will’s found art sculptures with a background of lilac blooms to set it off.

We have a couple of arbours in our garden. One is to hold the clematis and the other in the far corner of the garden carries the grape vines. Each one of these was made with all found materials. As a finishing touch Will and I went beach combing, not exactly a hardship for us, to find the embellishments. These arbours are projects that never really finish. Will works on them as he finds time and inspiration. We have stacks of beautiful driftwood piled up ready at hand for him to create with.

A door knob on high
A door knob on high

I personally love the spirals he’s created with recycled,rusted barrel hoops. The one on the grape arbour has as it’s crowning glory an old glass doorknob. There is really something magical that happens when the sun hits that doorknob just right and it glows and sparks as the sunlight streams through.

We like to joke that these sculptures serve a much more distinctive and important purpose. They are not just art, or as I like to think of them, three dimensional drawings of curves and lines. No, these are bird playgrounds. Little sparrows and wrens love to play on them, ducking up and under and chasing each other and happily chirping. It’s a sight to see.

And I love to tell Will that he has real purpose as an artist, not just to create lovely bits of sculpture, but more importantly he has a definite role as a bird playground creator. What more could he want?

Share