Summers End and Thoughts About Time and Energy

I wonder if everyone feels just a bit disappointed every year at the end of the garden season. I know I do. So many things that I had planned to do never actually happened. No time. Not enough energy either.

The hostas are wrapping it up for another year

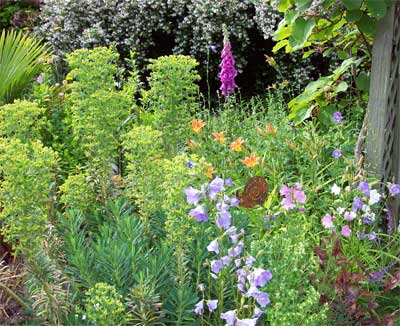
Last night as I watered I noticed the hostas are starting to fade. Summer has rushed by as though on fast forward. But for the most part we have enjoyed our little garden.

The Fuschia is in it's prime
The Fuscia is in it's prime

The fuscia is gorgeous now, the grapes are starting to turn and the gooseneck loostrife is the best it’s ever been.

The gooseneck loostrife
The grapes are beginning to ripen

The grapes are beginning to ripen

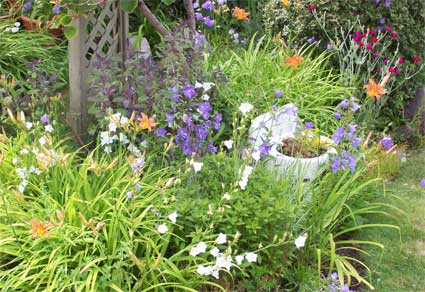
The day lilies, now almost finished and slumping, flower stalks dried out, were beautiful in their prime back in July. The unknown groups of purple flowered plants are now standing sporting only seed pods.

Earlier they were a riot of purple around the garden
Now spent and ripened to seed

I am of two minds as to what to do about spent plants. On one hand I want to have a tidy garden and cut out or pull out all of this spent plant life. But I have noticed in past years that the birds do enjoy eating these seeds throughout the winter, benefitting from my negligence.

We had plans to find more plants that flowered all the way to September. Unfortunately, only the solitary dahlia survived the winter here, which had us lose quite a few plants, like the hebe. Somehow we never got around to finding all those plants although we did find a few like the maidenhair fern.

The
The maidenhair fern

But now our inexperience and lack of time have caught up with us.

I know I have to accept the fact that summer is almost over. Plants set seed, die off, they have no regrets. They have done their jobs. But I, not ready for it to end, still wish for a green and flowering garden. Ah well, time to accept reality.

And maybe it’s also time, if we had any, to start thinking ahead to next summer and make some solid plans to get the plants we didn’t get this summer. After all we’ll have all winter to make plans. Or so we hope.

But time, time and energy, those are harder things to get. By the time summer is over I have generally run out of energy. I’ve come to the conclusion that the only people who have those wonderful luxuries of time and energy to spend extravagantly on their gardens don’t have so many other things they also want to do. Like teaching mosaics, making art projects and sculptures, participating in and preparing for art shows, or building a business, not to mention reading, dinner parties with friends, garage sailing, too much to list.

Maybe I should spend some time this winter thinking about how to have a garden that looks green and wonderful all summer without needing so much time and energy. Should I should switch to more bushes? Or more perennials? But I know what we really need are perennials that bloom at different times over the length of summer.

Or maybe I need to think about the fact that energy and time are limited, especially if you want to do other things besides garden. I’m one of those people who wants it all. But the end of the summer in the garden is teaching me that I must prioritize, compromise and reassess what I really need against what I want. Ah, maybe that’s the answer or at least a path to explore.

Share

My Little Dirt Secret

The other morning I woke up really early and just couldn’t get back to sleep. I’m talking 4:30 AM. By 5:30, I gave up going back to sleep and sat out on the deck sipping hot chocolate. It was just so wonderful out, cool, green and quiet. The light is totally different at 5:30 AM. I should do something with this time, I thought. I should use this time to do something I really like.

You’ll never guess what I really like to do in the garden. I love to make compost.

A gardening fashion statement
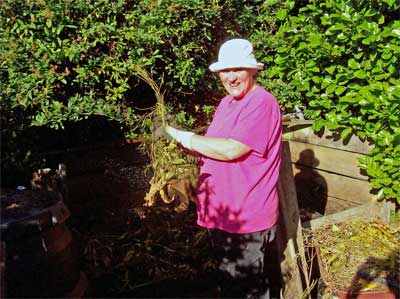
A gardening fashion statement?

There’s something about clomping about in my gumboots, layering all the ingredients of my compost that is quite satisfying. Well, there’s something about clomping about in wellies that makes me like to pretend that I’m Barbara Good in the Good Life.

If you have never heard of The Good Life, you are too young. If that’s possible. Anyway, this was a very popular British TV series back in the 70’s that featured a couple determined to be self-sufficient on a 50 by 100 foot lot in a trendy area of London.

Anyway this couple, Tom and Barbara Good, had a veggie garden , chickens, even a pig at one point, instead of a lawn and flowers and a wood stove in the kitchen. This was all much to the consternation of their trendy Yuppie neighbours. Anyway, if you can, rent it. It’s even rumoured that the Queen of England plopped herself down on the couch every Tuesday evening to watch it.

We get everything second hand, we’re into sustainability, conservation and all that.

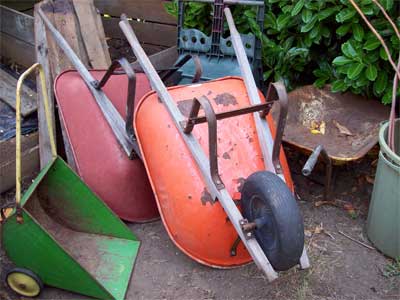
Actually five wheel barrows, if you count the handy little green weed barrow

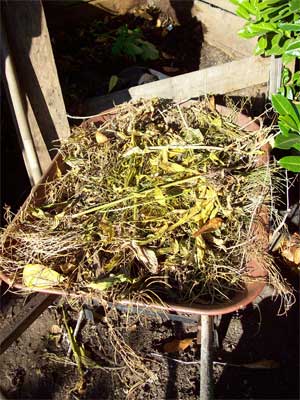
We have about four old wheel barrows, all for free, giveaways. Now you may wonder how does a couple on a 50 by 100 foot lot possibly use 4 wheelbarrows? Well, we do use them. Mostly to store all the weeds that we pull and the finished flowering plants. We don’t always have time to do the compost so basically I just store the stuff in the wheelbarrows and let it get sort of pre -composty. Then when I can, I “do” the compost.

Now, if you’ve been searching the internet for all kinds of ways to make compost , you’ll know there are many ways to do it. Then there’s my way. And here is my little dirt secret. I cheat a bit.

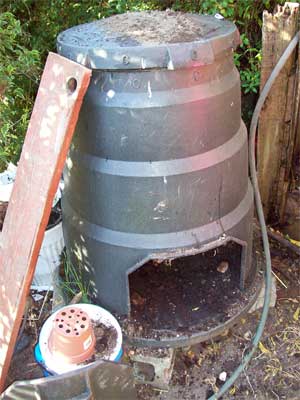
Our free black composter

For instance we have one of those big black composters, which I got free, by the way, given away by a neighbour. I like to use that one for all the kitchen stuff like tea bags, coffee grounds with the filters (unbleached of course), peelings from fruit and veggies, egg shells (I crush them usually). I save all this stuff in two plastic recycled containers on the kitchen counter. As soon as they get full they get emptied out into the black composter, but, and this is where the cheating comes in, with each load I add a few trowels of dirt from the compost already made.

In winter I leave a pile of this finished compost close by so I can scoop it easily. I like to think that I’m adding some good bacteria and worms to get to work on all this bounty. Putting the kitchen scraps in the black composter until its composted, keeps it away from the rodents. We do have rats in Victoria.

Then we also have a pile of sod, from making new flower beds. This is the dirt I talked about in a previous blog, that is hard, dry and no self-respecting earthworm will touch. So there you have the ingredients, the old sod, the kitchen scraps from the black composter, and the wheel barrows full of decaying weeds and the secret ingredient, finished compost added to the mix.

The pre-composted weeds
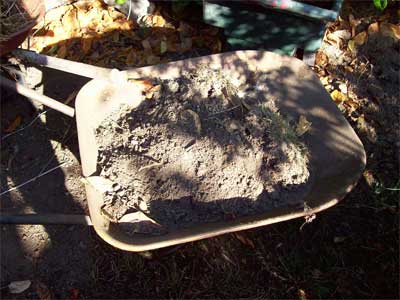
Dirt for the backyard lasagne
The old sods for the backyard lasagne

Now I like to think of lasagna. That is layers. I put a layer of sods which I break up into the smallest bits I can by hand. I water that really well. In fact, my latest trick is to keep the hose going on a fine spray pointed at the compost

Keeping things wet
Keeping things wet

while I layer to keep the dust down and wet the stuff as I go. Then on top of that I put a layer of weeds, also broken up as much as possible. Then I add a layer of composted kitchen scraps from the black composter. All of these layers get thoroughly watered down, since the compost needs to be wet to work. Then back to a layer of sod, then weeds, then kitchen compost with some finished compost added.

We have two bins next to each other. We usually empty them both on to the garden in the spring but we save a bit for the cheating. That is we save some good finished compost full of worms and wigglers to seed the new layers with.

A layer of black plastic keeps the moisture in

The last thing we do is also a bit of a cheat. We put black plastic over the working compost to increase the heat and keep it wet. A dried out compost won’t work.

Then by the next spring we have “black gold” as we like to call it. All for free, all natural and the garden loves it. Barbara and Tom would be proud.

Share

How to Create a Pique Assiette Mosaic Stepping Stone – Helen’s Way

There are probably lots of ways to do stepping stones. I have my way and it works for me. There are lots of things you can put on stepping stones for your garden, like dishes, stones, marbles, keys, whatever you think will look good in a stepping stone.  This type of mosaic is actually called Pique Assiette, which roughly translates to “stolen dishes”. The beauty of doing a stepping stone is that the same method works for most outside mosaic projects.  Check out more of our garden stepping stones.
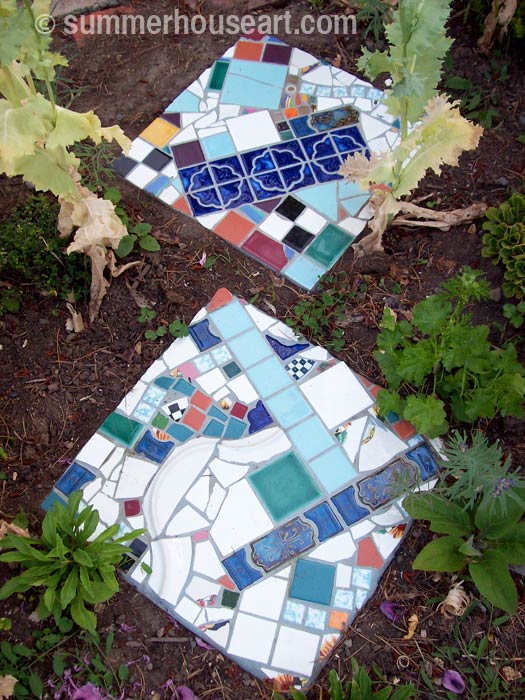
Tutorial, Pique Assiette Stepping Stones, summerhouseart.com

I’m not a big fan of really orderly designs, with symmetrical elements or tidy circles of pieces arranged in a regimented way. No, I tend to go for the intuitive and fast method of working.

First of all, although I’ve seen lots of sites that say otherwise, this is not suitable for children. It has sharp shards from dishes, it has caustic cement and requires some strength and lots of common sense. I am cutting myself all the time and keep bandages handy and I’m way past childhood.

Secondly, I’d like to say, if you are going to make these, use the proper precautions with mortar and grout. These are caustic materials, they require that you use dust masks when mixing to avoid breathing in the caustic dust. They require that you use rubber gloves to avoid getting the caustic mortar on your skin. That said, read the package, note the cautions. Please don’t go leaving this stuff around children and pets! Please remember to clean up as soon as you are done and make sure not to leave this stuff in bowls to harden into cement that you will never ever get off.
Process, Stepping Stone Tutorial, summerhouseart.com

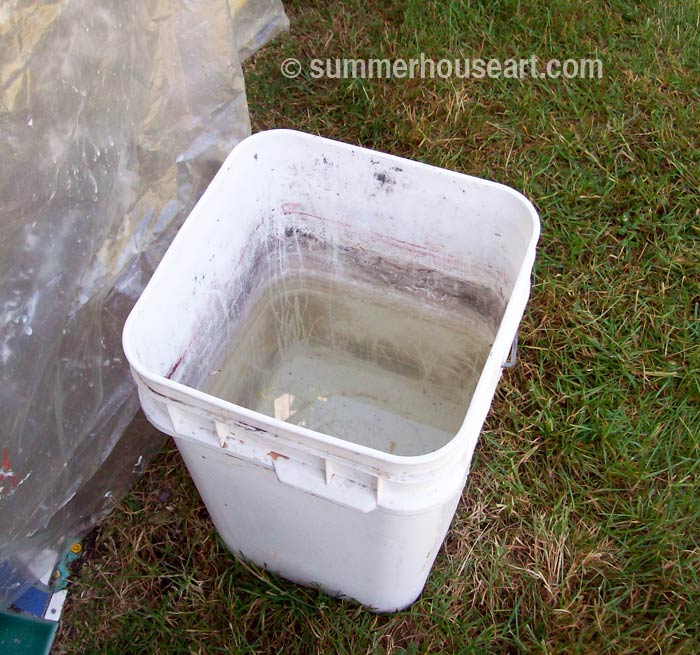
You may wonder why I have a photo of a pail of water? Well, the next precaution is NEVER NEVER rinse off anything with cement on it down a drain. It will set and your drains will be plugged! Ok, so why the pail? That’s where I do all my rinsing of gloves, mixing bowls and implements. I let the cement settle for a day or so and then gently pour off the water into a garden path and scrape the cement that settled into the bottom of the pail into a bag and put it in the garbage. There won’t be much but, hey, better in the bag than in your drain.  Both mortar and grout have cement in them.

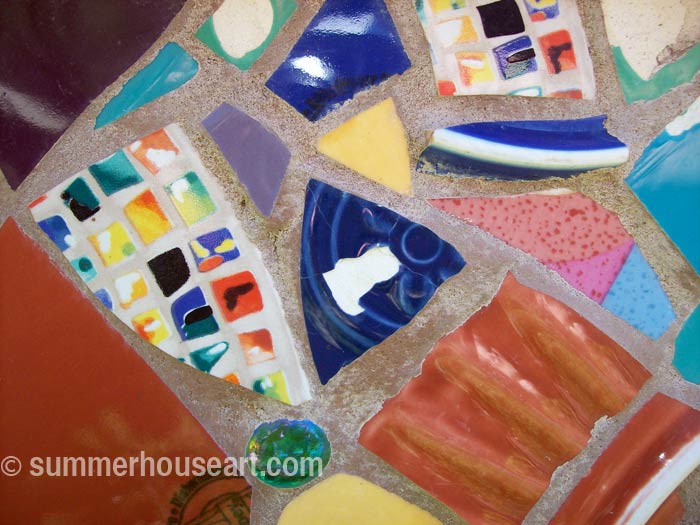
An important note about dishes and tile to use. If you use tile that is meant for indoor use or dishes that are porous under the glaze you will have this nasty thing happen.
Process, Mosaic Stepping Stone Tutorial, summerhouseart.com

The moisture will seep under the glaze and when it’s cold the water will expand and pop the glaze right off the dish or tile. I know, because it’s happened to us. So make sure the dish is really dense and not porous and use tile that is very dense and meant for outside use.

The last important note. Wear goggles when snipping dishes. Broken pieces have a way of flying out and hitting someone. Be careful, for obvious reasons with shards. Don’t wipe away little shards with your bare hands, use a dust brush.

OK enough warnings. On to the fun stuff. As I said, I like the intuitive way of creating stepping stones. But having said that I don’t judge what others may like. Creativity is self-expression after all.

You will need:
A concrete stepping stone
Dishes and/or tile
a work table
a pail of water
rubber gloves
dust mask

old cotton socks

Gray or White Mortar or thin set ( I use it in powder form and add water)
a jar of clean water
a bowl for mixing mortar and grout in ( I use old stainless steel mixing bowls)
a trowel for applying the mortar
something to scrape between the pieces to remove too much mortar, like an old knife.
two-wheeled glass cutter or tile nippers
tile cutter
sanded grout ( it comes in colors, so have fun)

Step 1- Getting ready to start
I buy concrete stepping stones from the local home building supply store. We used to make our own, but honestly, it wasn’t worth the effort. Stones are about $2 or $3 to buy. They come round or square.

Put a concrete stepping stone on a work table so you don’t have to be bent over the whole time while creating it. You’ll thank me later. I like to cover the work table with plastic first to save it for other uses. Also, it’s a good idea to put the cement stepping stone up on a few little blocks of wood to raise it off the table surface. It’ll make it easier to get your fingers under when you finally pick it up to move it.
Process, Mosaic Stepping Stone Tutorial, summerhouseart.com

Step 2- Cut up the dishes and tiles
Please put on your eye protection! I wear glasses anyway so that’s mine but really protective goggles are worth it.

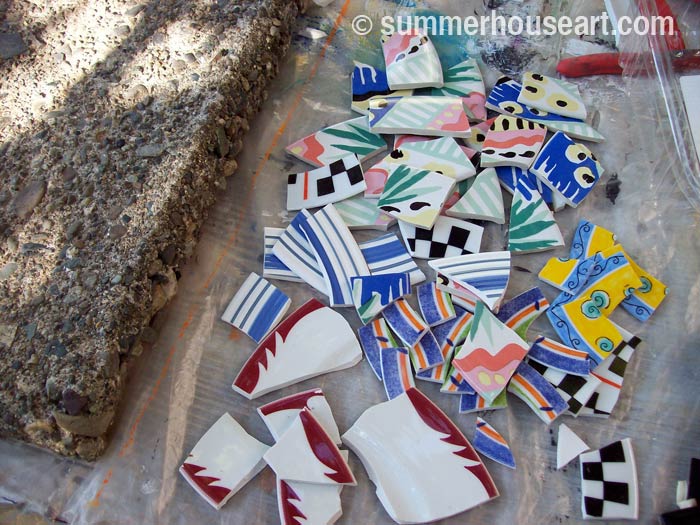
Cut up the dishes into bits and pieces using nippers or two-wheel cutters or tile cutters. For cutting up tile, use the scoring wheel on the tile cutters to score the tile and then break it with the tile cutters. If you don’t know how to use one ask the clerk in the tile store, they’ll usually be happy to demonstrate.
Play around a bit with the arrangement. You could arrange them all before hand on an area approximately the same size as the stepping stone. More about this later.

Since mortar sets in about 20 minutes max, laying out your pieces on another surface will cut down on the time it takes.  Or you could do it my way and just arrange them right on the mortar and wing it.  Keeping in mind that the mortar loses its stickiness and you may have to make a little new mortar to finish sticking down pieces.
Process, Mosaic Stepping Stone Tutorial, summerhouseart.com

Step 3- Mixing the mortar
Put on your Dust mask! Put on your Rubber gloves! Seriously!
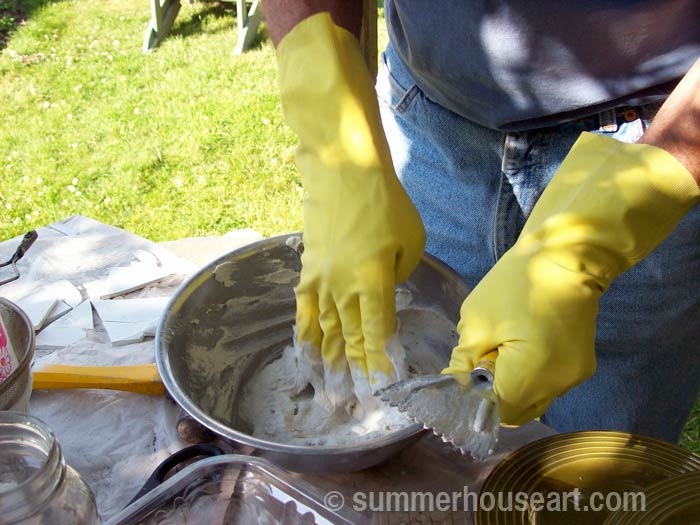
Wear your rubber gloves! I like to mix with my hands, encased in rubber gloves of course. Don’t do this bare handed! It’s caustic. see warnings above!

Put the powdered mortar in the mixing bowl. You will have to guess-timate here for the amount of mortar. Add water from the clean water in the jar, a tiny bit at a time. Mix up the mortar to a peanut butter consistency.

I like to use stainless steel mixing bowls that I find in thrift shops, they work well, and are reusable.

Get it to a peanut butter or just slightly thinner consistency by adding the water to the mortar ( this applies to grout also) very slowly as it will become too thin very quickly if you add too much.
Process, Mosaic Stepping Stone Tutorial, summerhouseart.com

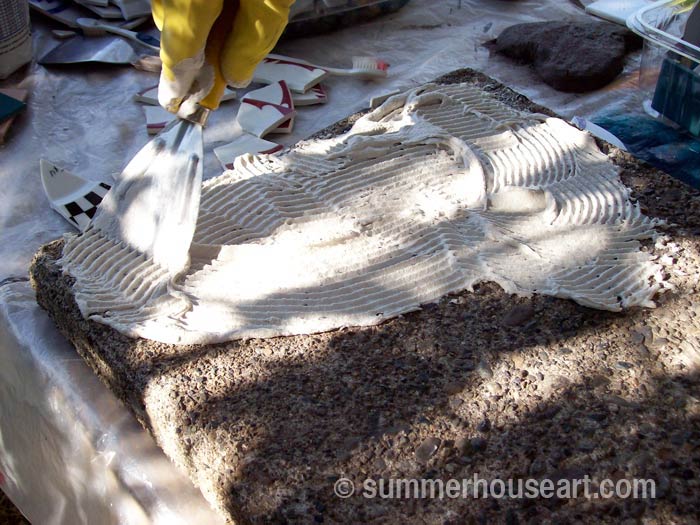
Spread the mortar over the stone using a toothed trowel.
Process, Mosaic Stepping Stone Tutorial, summerhouseart.com

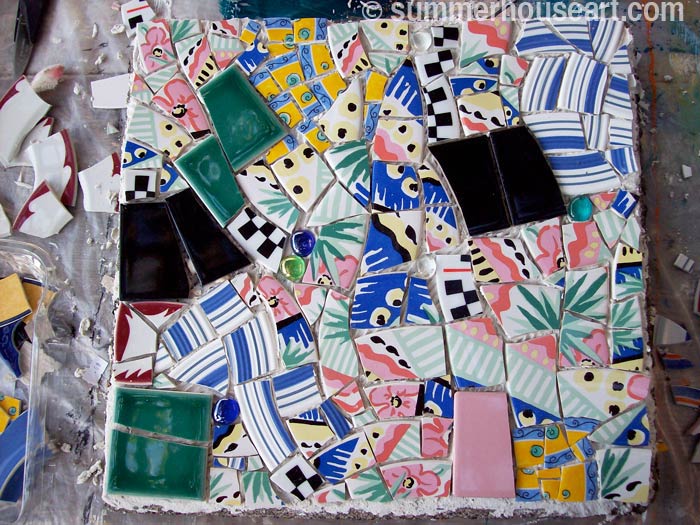
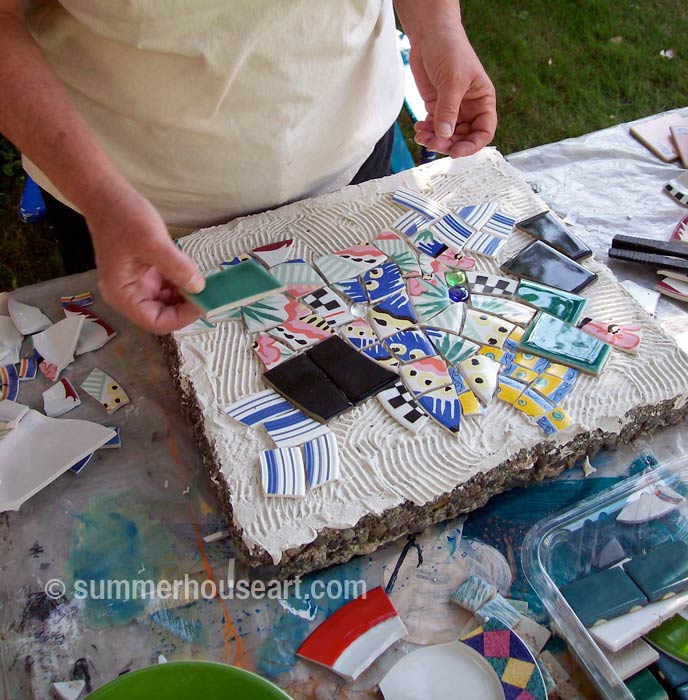
Lay each piece on the mortar and try not to squish up mortar between the pieces. You’ll need that space to put grout in later. If it happens, and it will, just remove it with a blade like tool. I cut and fit dishes as I need to as I go along.

You’ll have to move fast, mortar sets up on a hot day really fast, you’ll have only about 20 minutes! In fact I wasn’t fast enough on this one and it started to dry out and nothing stuck. So I scraped off the dry mortar and just buttered a bit on, for each section I had left to finish. Ok, it’s cheating a bit, but it did work.

BIG NOTE: watch out that when you put pieces down on the mortar that you don’t leave nasty points sticking up. You’ll know you did, painfully, later when you are smoothing grout over the pieces and snag your fingers on a point. And you wouldn’t want to step on a point later.

Be careful, this stuff is sticky and keep the top of your dish pieces clean and wiped off.  Once mortar sets it’s cement and you won’t be able to remove it from the surfaces of the dishes!

NOTE FOR BIG PROJECTS: When we are doing a big project, or if we want to take our time designing a piece, we work a bit differently.  We glue down each piece with a bit of mortar buttered on to the back of each piece.  We just mix up tiny amounts of mortar at a time in a small bowl and apply it to each piece as we stick it down. When the mortar gets too hard, we just clean out the bowl and mix up another fresh tiny amount. 
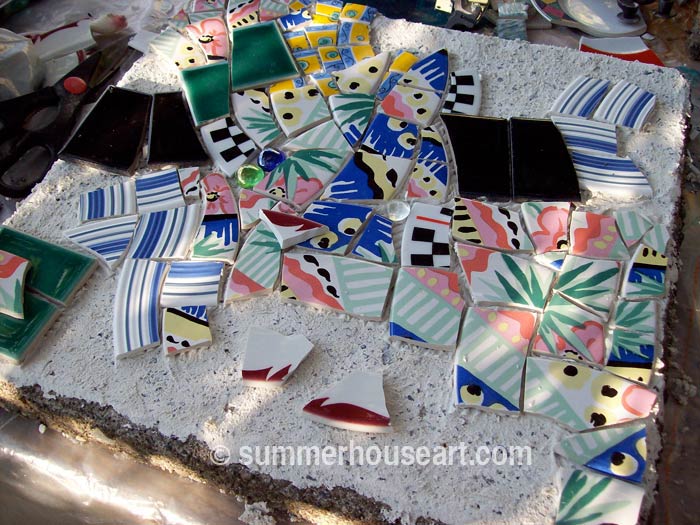
Process, Mosaic Stepping Stone Tutorial, summerhouseart.com

Process, Mosaic Stepping Stone Tutorial, summerhouseart.com

Step 4 -Take a break
Now that you have all the pieces mortared down, take a break and enjoy a cool iced tea. When you can’t move the pieces with your fingers, the mortar has set. We’d actually done the mortaring in the evening after a long day and stopped altogether to go in and watch movies. Of course, we cleaned up all the mortar mess like the bowls and implements first in the bucket of water! Then the next morning I was ready to grout.
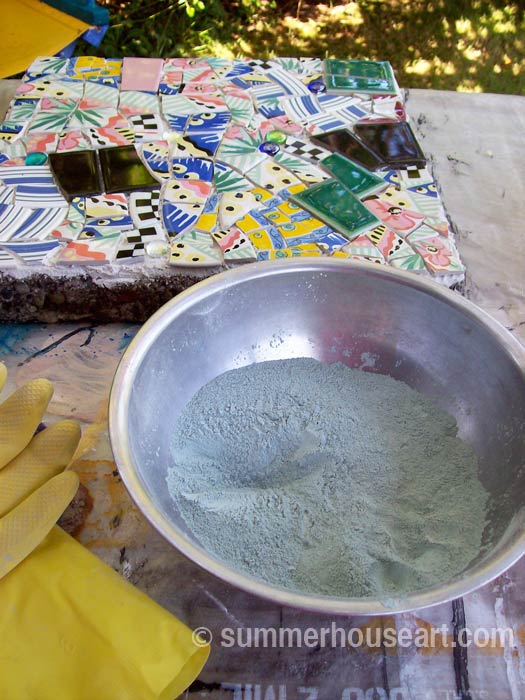
Process, Mosaic Stepping Stone Tutorial, summerhouseart.com

Step 5 -Grouting
Put on your dust mask and rubber gloves!! Mix the grout in a bowl adding just a little bit of water from the jar at a time. Again I like to mix with my hands.

Get it to a peanut butter or just slightly thinner consistency.
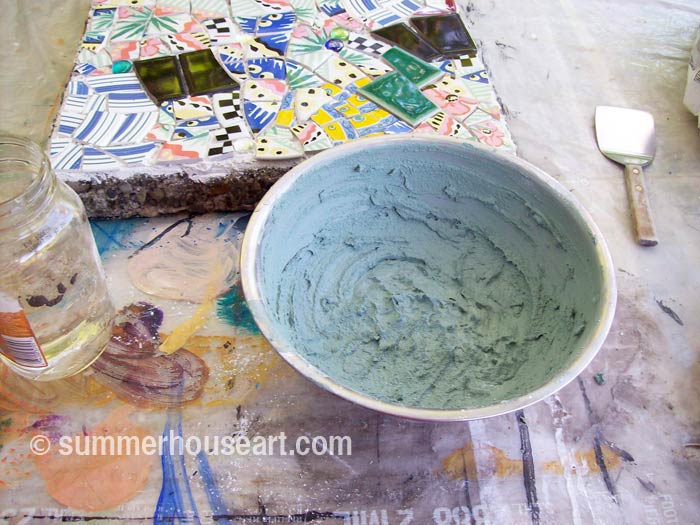
Process, Mosaic Stepping Stone Tutorial, summerhouseart.com

Let the grout “slake” for a few minutes, no more than 5 and with your gloves on still from mixing it by hand pick up a handful and start “smushing ” it all over the surface.
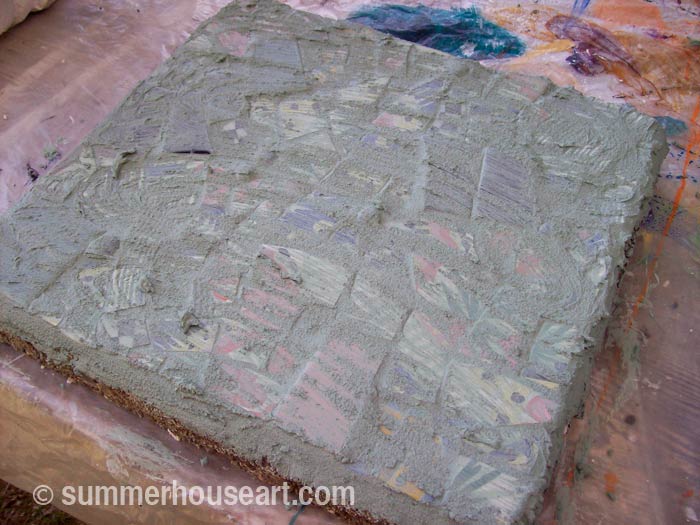
Process, Mosaic Stepping Stone Tutorial, summerhouseart.com

Be sure to fill in each space between the pieces well. I use sanded grout always.

Step 6, or Why should I save old cotton socks?
I like to use old cotton socks to remove the grout from the surface. Some people like to use old sponges but I’ve found it’s just too easy to remove the grout from between the pieces with sponge. Dry old socks work well and you can turn them inside out and use the inside too. Once you have most of the grout removed from the surface leaving only a bit of hazy layer, let it sit. Break time again! Not too long, just 5 minutes and then back to work! Come back and with a clean sock shine up the pieces.
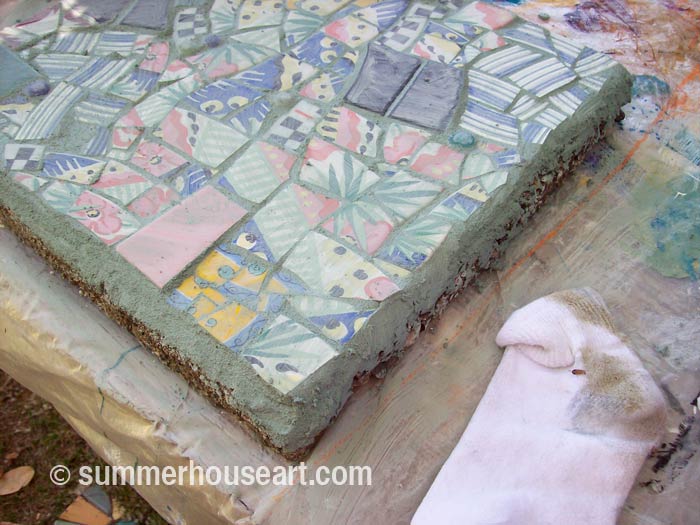
Process, Mosaic Stepping Stone Tutorial, summerhouseart.com

Step 6, Enjoy!
Enjoy the work you’ve just produced. Sit back and tell yourself what a genius you are! Then after your new wonderful stepping stone has had overnight to set and cure, dig it in to your chosen spot in the garden path. Hope you’ve enjoyed my tutorial.  You can use this method for other outdoor projects like bird baths too.  Check out our Mosaic bird baths too, if you’re interested.   you can find them here:  A Serendipitous Mosaic Bird bath  and also A Beach Pottery Bird Bath.   Bird baths are done a little differently.  We create small batches of mortar and butter each piece as we go along.  We set up under a pergola and make a summer project of it.  They do take some time, so be patient and enjoy.

Mosaic Stepping Stone Tutorial, summerhouseart.com

(BTW, if you’d like to make a comment, just click on the title.  It’ll take you to comments….and we do appreciate comments )

Save

Share

Pique Assiette Mosaic Stepping Stones in the Garden

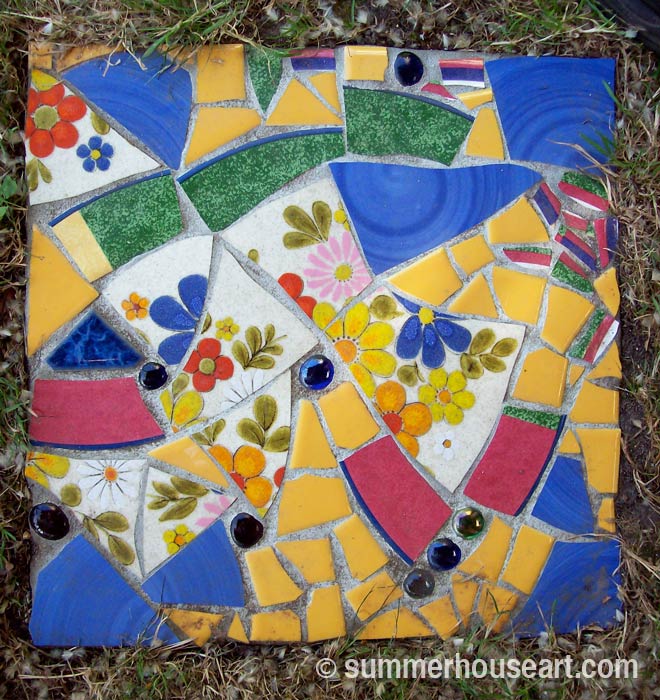
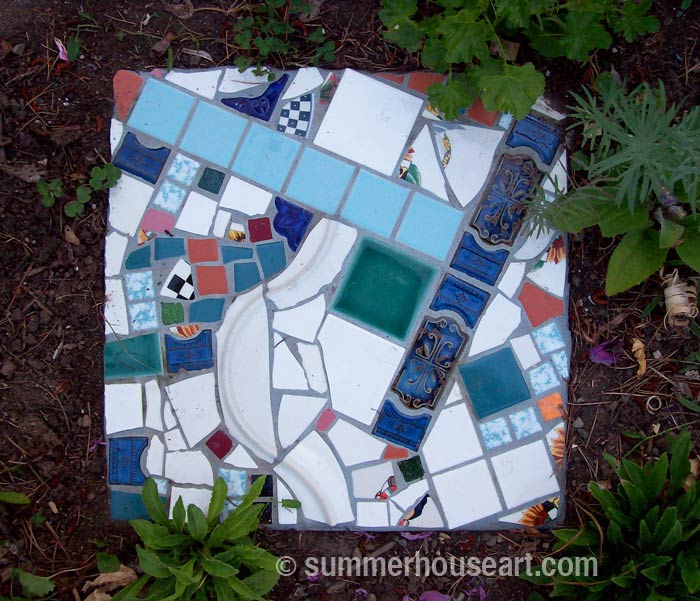
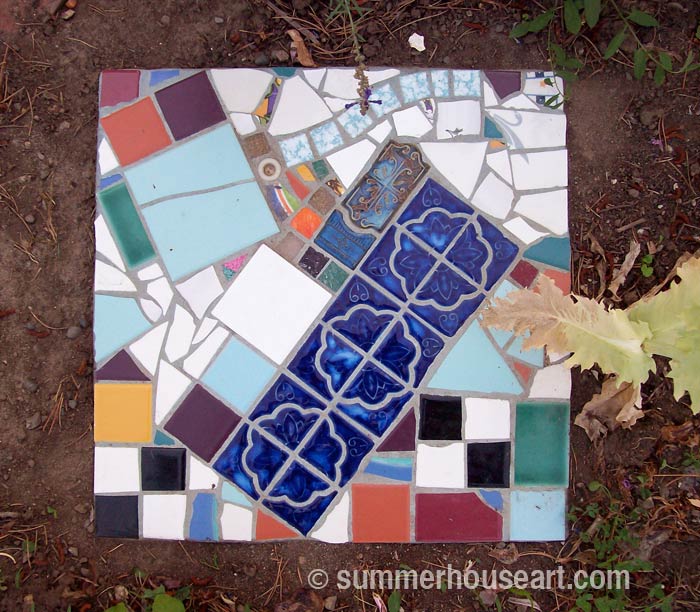
We love making mosaic stepping stones for our garden. They’re fun and easy to do. Well, easy as in low tech. But they do take a bit of work. It’s a chance to use some dishes and tile and sometimes other objects to create some color in the garden. Using dishes and other found objects for mosaic is called Pique Assiette.  I like the whole process of using dishes and found objects, collecting them, finding them and of course breaking them to create new patterns.

Pique Assiette Stepping stone, summerhouseart.com

The other day, instead of grouting inside in the studio, I’d set up a work table under the clematis pergola so my afternoon student could grout her mosaic outside in the garden. After she’d finished, very happy with how her piece had worked out, and had gone home with her mosaic creation, we still had the work table set up. I’d done a quick demo of stepping stones for her on a small chunk of broken cement block while she was there. So we had everything ready, and we turned to each other and almost had the same thought at the same time. Hey, lets make another stepping stone.

Pique Assiette Stepping Stone, summerhouseart.com

So off we went, into the studio, to gather up some dishes and tiles to use. We mixed up some more mortar and started. Before we knew it was 8 pm and time to stop and have a quick supper. We still hadn’t grouted but the stepping stones were done. I got out there this morning and grouted mine. So another stone for the garden.

Pique Assiette Stepping Stone, summerhouseart.com

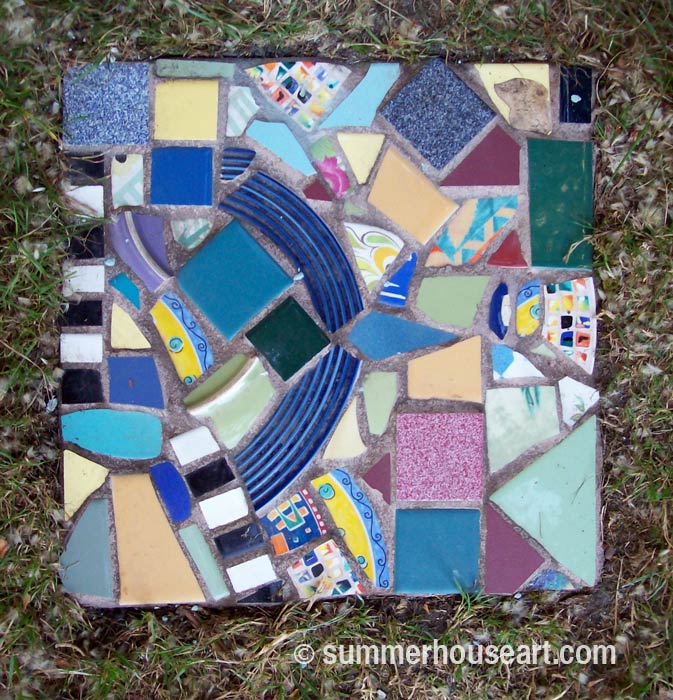
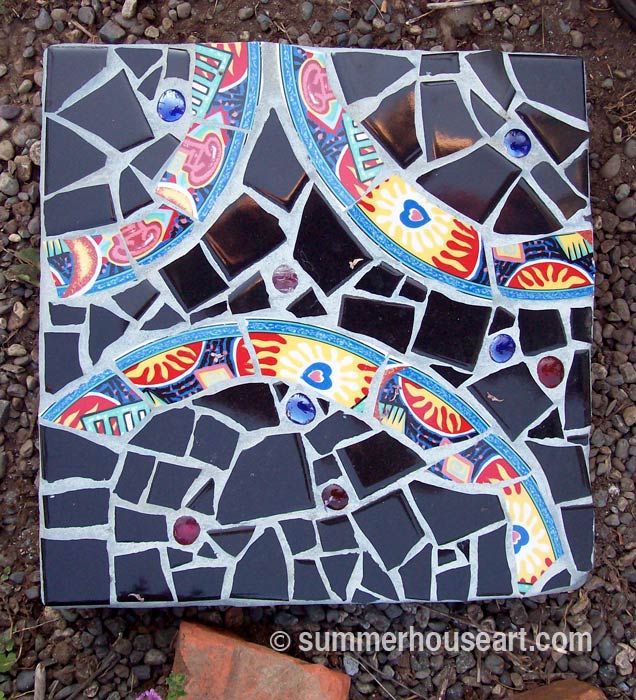
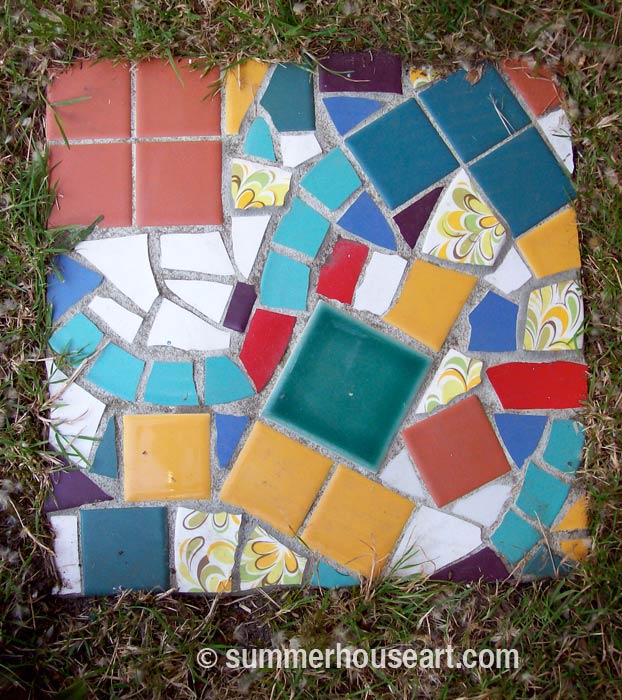
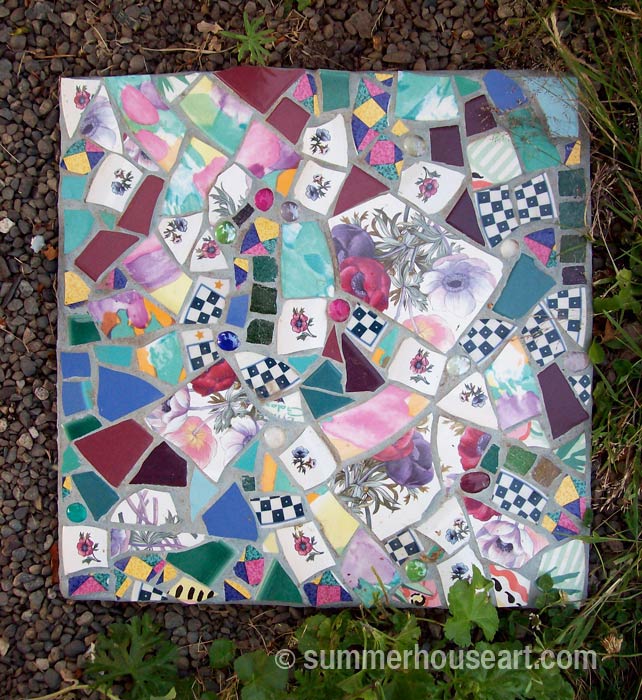
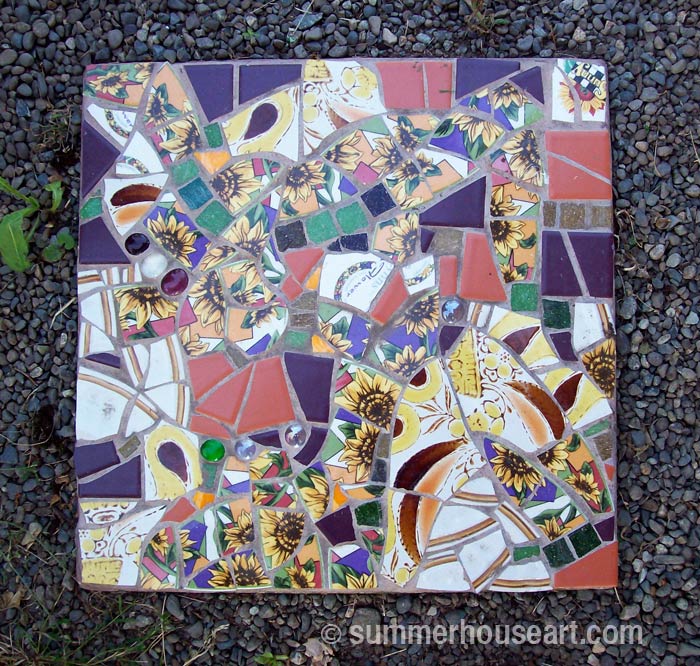
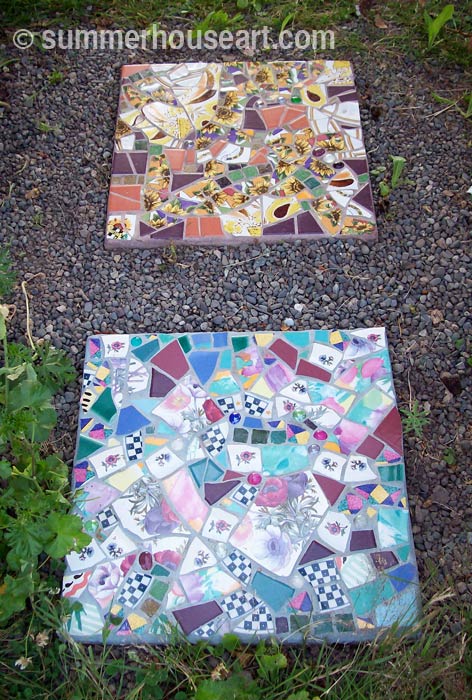
We enjoy the look of these little art pieces. Each one is different and unique. We have some laid into the lawn under the pergola, to create a sort of patio area. Others become entrance art at the gate, or as a way to step through the garden to the car, or as a bottom step from the deck.

Pique Assiette Stepping Stone, summerhouseart.com

Will and I work totally differently. He likes to create much more minimal abstract compositions. I tend to use dishes with either floral patterns or just basically colorful dishes laid out in an overall sort of crazy quilt manner. We work quickly and without too much thought, counting on our innate sense of composition to work for us. We just relax and enjoy the time.

Pique Assiette Stepping Stone, summerhouseart.com

Pique Assiette Stepping Stone, summerhouseart.com

Pique Assiette Stepping Stones, summerhouseart.com

There’s something about mosaic sparkling in the sunshine and greenery of the garden that makes you enjoy having it underfoot.

Pique Assiette Stepping Stone, summerhouseart.com

Pique Assiette Stepping Stone, summerhouseart.com

Pique Assiette Stepping Stones, summerhouseart.com

If you are interested in creating some stepping stones for your garden and don’t know how, you are in for a treat. My next post is all about how to create mosaic stepping stones. There are lots of ways to do this, but this is my way.

Now you may have noticed that we didn’t tell you which of us created all of the stepping stones in this blog.  So, which ones do you think are mine and which ones are Will’s?

(BTW, if you’d like to make a comment, just click on the title.  It’ll take you to comments….and we do appreciate comments )

Save

Share

The Mystery of the Poppies

Are my titles starting to sound like they could be Nancy Drew Mysteries? Hmm. Never mind. A while ago I posted a story about our Accidental Poppy Garden. We’ve been enjoying this poppy garden for a few weeks now and actually gotten quite a few positive comments on it from people passing by, on their way to the park next to us. It’s nice to know that other people can appreciate the disarray of a surprise garden.

Each time we go out in the car or out for a walk we have been making our way through this bountiful poppiness and have glanced at them, maybe making a passing remark about how many different ones there were. But one day, we really looked at them. Really noticed them. And then we started to count just how many different types of poppies that had actually sprung up in our accidental garden. What we found was amazing, really, and just a bit mysterious.
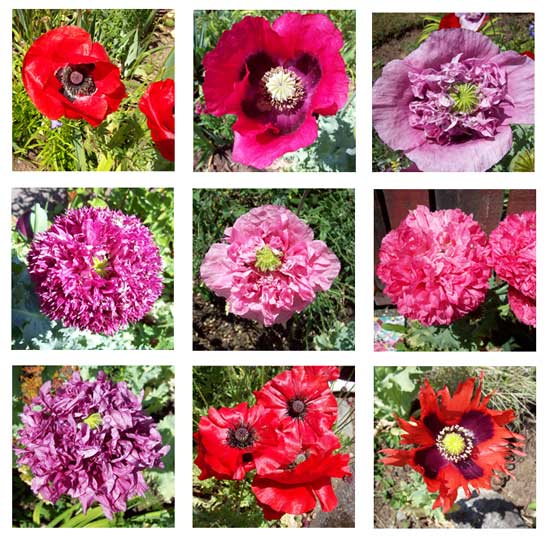
We counted 11 different poppies! Ok some were just different colors but others were quite original. Now neither Bill and I know the exact names of plants and often get creative and give them our own names. Some were just subtle differences, like the color among the single petal ones. Others were what we had referred to as “double poppies” or “poms” as in pom poms, in that they were much like peonies or a rose with many petals. A few seemed to be a mixture of the single and double in that there was a ring of single flatter petals surrounding a nucleus of many petals packed in tightly curled pom poms. Bill called those Pom Combinations. One little poppy was a single petal pattern with a sawtooth edge, that sported a dark center, that he called Red Rag. Another was named Red Floppsy since it’s inner petals flopped. No, it’s too hard to explain them. Why not show the photos?

Nine of the eleven varieties that mysteriously appeared

Which brings me to the mystery. Bill says when he went out to sow the seeds he only had about 4 or 5 poppy pods of seeds in his hand. How did we end up with so many varieties? Had some cross pollinated in the back garden? Where did the Purple Pom, as we called it, come from? Neither of us remember it from the back garden, which is where all the seed pods had originated. Had long forgotten seeds in the compost that we’d spread around gifted us with these other varieties? Who knows?

Curiousity caused us to investigate our poppy plethora. We looked them up and found that the proper names for what we were calling Poms were actually Peony Poppies. The other interesting thing I discovered is that our names are tame next to some. We found names like Drop Dead Gorgeous or White Cloud Peony or Heavenly Angels Peony or even Irish Cream Peony Poppies or the best, Prince of Orange. So from now on when it comes to creating names for plants, I’m going to have a lot more fun.

The only trouble is that now we know there are even more kinds of them out there and it’s going to be hard to resist trying out some others. Will there be room for anything but poppies if we allow this new poppy addiction to grow?

Which brings me to another quote I’m rather fond of, especially when faced with a box of chocolates or for that matter a web site full of irresistible poppy seeds.

“I can resist everything except temptation”. – Oscar Wilde

Share

The Accidental Poppy Garden

Sometimes, when we design a new garden we may have a very loose idea of where we’re going and try to create that. In the case of the front garden it was to make a garden that could stand up to the dryness in summer and still survive the wet Victoria winter and solve the dead grass problem. This is a story not just about creating the garden but the something unexpected that happened, another serendipitous garden event.

The old front garden was a short length of flower bed, a tangle of day lilies on one side and lavender on the other, and not much else, that stopped abruptly as it reached the part of the yard that is supposedly owned by the municipality. That area was always a problem. It was hard hard dirt with miserable grass on it mixed with weeds that we poured water on every summer. It looked awful, dried out and ugly, the water couldn’t really sink in and the grass didn’t benefit from all this expensive water. So last fall or maybe it was late summer, Eric and Bill dug up huge portions of it so that we could make a xeriscape garden. They almost broke shovels doing it, the dirt was so hard. There was not an earthworm to be found, finding it impossible to get through this cement-like soil.

Hart (the Lone Arranger) and Bill

We had been saving and finding plants to put into this garden, things that were supposed to do well in a xeriscape or low watering garden. Things like day lilies, yucca, grasses, red hot poker, irises, and crocosmia.

When it was all dug up and ready to plant, Hart, our good friend who has a knack with gardening and arranging plants, was called in to supervise. We like to call him the “Lone Arranger”.

Each plant was put in it’s own hole that was first filled with our own compost. We didn’t have enough compost to do up the whole area so we cheated a bit and just put it in where the plants were going.

So it was all done, everything planted. We only had to eventually move some yuccas that had been planted around the pampas grass and were now hidden by it. We sat back, exhausted and enjoyed our handiwork.

Sometime in November or December, Bill went out and sprinkled poppy seeds around the whole area. The seeds were all mixed up, saved from poppies that had grown in the back garden.

This spring not much showed of these, until about the last month or two. Then we saw all sorts of poppy plants coming up. And being haphazard and ok, maybe a bit time-crunched too, the sprouts of these luckily missed being weeded out.

Poppies popping abundantly

Imagine our surprise and delight this month, when, in this awful clay dirt we had huge poppies of all sorts. They came up in lipstick colors of red, mauve and fuchsia.

Poppies on the harder, dryer side

Double and single flowers popped up (they are poppies after all) amongst all the planned xeriscape we’d worked so hard to create. It was a gorgeous sight! We had expected a few poppies, but nothing like the amount we got. We’d accidentally created a poppy garden.

Poppies of all shapes and sizes

Poppies are a short lived phenomenon. They come up, their gracefully drooping flower pods lift up and burst into bloom, petals like silky tissue paper. And too shortly thereafter, it seems, they are done blooming and set themselves to seed in gorgeous seed pods.

Beautiful at all stages

I swear they are the only flower that looks beautiful in every stage. But you’ve got to be quick and get out there and enjoy enjoy.

Share

Serendipitous Gardening or How We Came to Accept a Wild Gardening Style

I devour garden books. I read them voraciously to learn how to plan a garden, what to plant where, how to design the space, all of that. I admire the well ordered designs, the borders made up of drifts of flowers that I see in those books. But somehow none of this takes.

The foxglove self seeded and the Humming birds love it.

Our garden always ends up being a sort of a wild tumultuous space. I used to apologize my way around the garden when company came over, for it’s messiness, it’s over-grown-ness, it’s haphazardness. Part of me wanted something much neater and organized, like those pretty gardens in the books.

But then, I don’t know when exactly, I started to appreciate the way plants just pop up where ever and to enjoy the delightful surprises. And most of all I came to accept our way of gardening. I’ve decided to call it Serendipitous Gardening.

Why is our garden as it is? I suppose it’s because we hate to pull anything out. If it looks ok, we leave it. And I can’t throw anything out either so if I have to divide plants I’ll just pop them in another spot or we’ll create a new bed to house them. Or it could be because the compost with the seeds of spent flowers gets spread all around in the spring and those seeds just get a chance to grow and have a change of view? Or is it because I can’t say no to some plant or other that I don’t need or even have room for that I find at a garage sale? When I get home the poor thing gets bunged into any available space just before it expires in the pot. Who knows? A bit of all of it I suppose.

The flox among the iris
The phlox among the iris

Sometimes being sort of laissez-faire about it all has it’s rewards. Plants that were seeded somewhere else re-seed themselves in unexpected places. Like the phlox that grew up in and around the iris bed. How did they know they would set off the irises so well?

A bit of the serendipitous garden

Or the bluebells and rose campion that pop up around the orange day lilies creating just the right mix of complementary color.

The mallow can stay, for now.

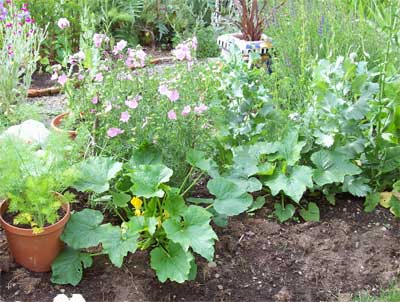
Or the mallow that I left in with the squash plants just to give the veggie garden a bit of color. As artists, I suppose, we have come to appreciate and delight in the serendipitous results.

Share

Making Time

Our fridge is home to many artsy handmade collage magnets and also to many quotes that I’ve found assuring, inspiring or thought provoking. I found a rather thought provoking one about time the other day and slapped it up there.

You will never find time for anything. If you want the time you must make it. – Charles Buxton.

Well Charles sounds rather like an overbearing patriarch but I must admit he has a point. Finding Time seems a bit like wishing for it and Making Time seems so much more solid, like a commitment.

This last long weekend Will and I spent a lot of time in the garden. We had designated this weekend for gardening time for probably the last few weeks. Other weekends had been too busy with the craft show or other considerations. And of course there had been other weekends where time just seemed to slip by as we shopped for groceries or other items on our lists. I suppose you could say we made time for the garden this weekend.

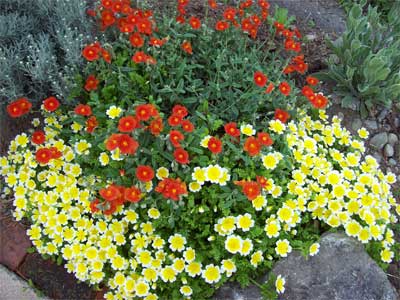
Rock Rose and Fried Egg plants in the front garden

We knew that we needed to spend some solid time in the garden. And this weekend we did manage quite a lot. The shade garden got weeded. The compost was assessed and deemed pretty good, not quite to the “black gold” stage but close enough to give some “fiber” to the soil. We readied part of the garden for squash plants and were planning to finish that up the next day. Then yesterday dawned grey and cool so we took advantage and weeded the front garden. Usually we only work in the front garden in the evening when it’s shaded. But a cool cloudy day had to be taken advantage of. At the end of each of our gardening days we weren’t good for much more than supper on the couch in front of a good movie. In fact, we were actually surprised that we could even move the next day! But we did, ok a little slowly at first, but pretty soon back to normal.

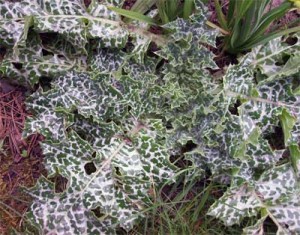
A gift from the birds

We found a couple of gifts planted by the birds in our garden. These varigated thistles are growing in the front garden, very antisocial with their pricking leaves but oh so unusual and beautiful. We decided to let them grow, weeds or not.

Scotland's national flower
Scotland’s national flower

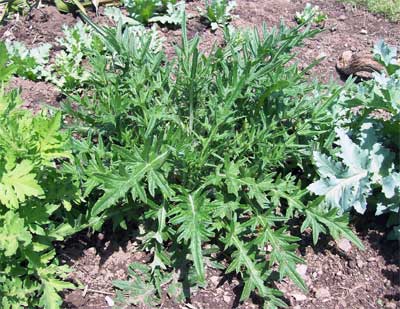
On the other side of the driveway I’m also letting another big thistle keep it’s spot. Ok I know it’s a thistle but it gets some really wonderful flowers on it at the end of the summer when it’s reached gargantuan dimensions. Hey the Scots are keen on them, isn’t it their national flower? And as a weed we already know it’s tough so will fit in well with the xeriscape theme.

On a previous post I mentioned my intention to have fun everyday. And I realized yesterday as I was breaking up the soil and carefully extracting the weeds and their roots from the dirt and gleefully throwing them into my little green and yellow weed wagon, that I was actually having fun. Seeing the garden all tidied up and weed-free was pretty darn nice too. So in a way I suppose we made time for the garden and for fun at the same time.

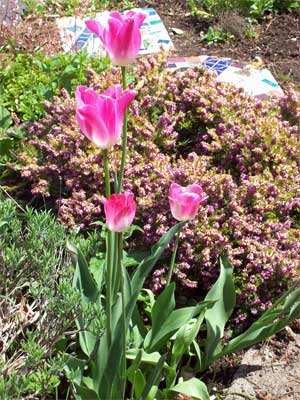
Happy tulips in the freshly weeded garden

Which brings me back to Charles Buxton of the Make Time philosophy. I am going to try to consciously think of things that are fun everyday as I get up and make time for them. Today, I’ll have a choice, either plant up the pots of flowers I’ve got waiting on the back deck or work on finishing my sculpture at last while listening to some good music. Which will I do, I wonder? Anyway, you have to admit it’s nice to have a choice.

Share

Making Space in the Garden

Last night it rained, a lot. I could hear it drumming on the greenhouse roof as I fell asleep. So, as every gardener knows the best time for weeding is right after a good rain. Those weeds just come out a lot easier. Well, ok, some of them did. Quite a few of them required a bit more effort having established themselves quite well. And for once, I made myself come in after an hour or so. It’s always easy to forget that you are not in shape yet and overdo it. Gotta get those weeding muscles in tune yet.

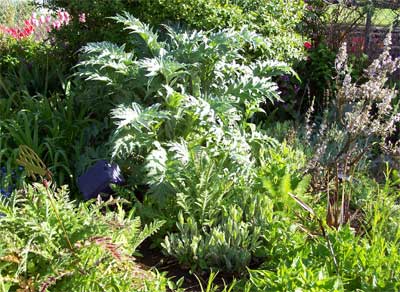
But first, even before I got started, I had to get some photos of the goodies that have come up and are doing great. I love our garden and am always in awe of the way it all seems to just pop up in the spring. We’ve got poppies already full of heavy buds. And the Cardoon is just motoring and will be a giant soon.

Our Cardoon (May 18)
Our Cardoon (May 14)
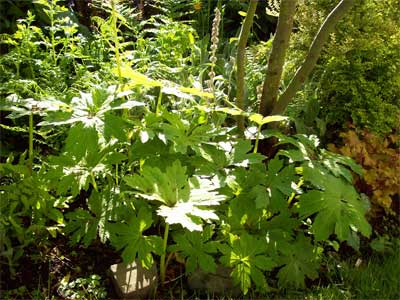
Mystery Plant?
Mystery Plant
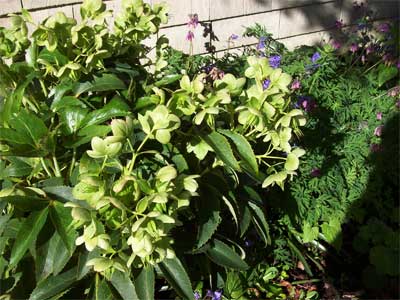
Hellebore (Peeking out from behind it, a Native Bleeding Heart)
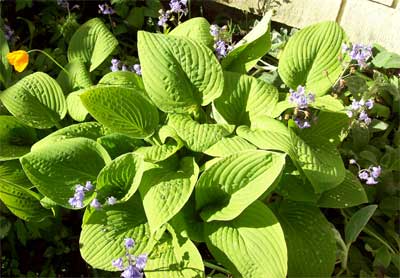
My fave Hosta, which later becomes a beautiful blue.
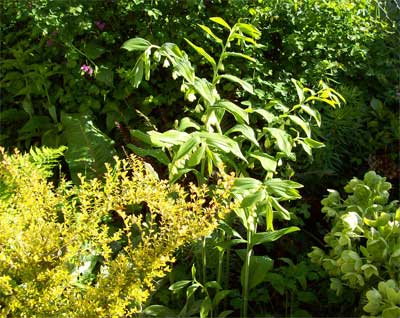
And suddenly, a Solomon's Seal
And suddenly, a Solomon’s Seal

The dirt here in Victoria is so wonderful. Such a change from our gardens in the past in Calgary. Dirt in Calgary is dryer and harder and requires a lot of work. Sometimes I felt,  when a tulip would struggle up in that hard dirt, like I should just stand back and cheer. Here you have to actually cut things back. Which reminds me that we’ll have to check on the compost we worked so hard on last fall. Hopefully, it’s at the stage we like to call “black gold”.

Besides weeding I was really looking over the garden to find spaces. I need spaces for all the things I have to plant. We went a little wild at the Seedy Saturday back in February and got some veggie seeds like beets, parsnips, chard  (the pretty rainbow variety of course, I am an artist after all) and dill. And to top it off, last weekend, out garage sailing, I brought home starters for Acorn and Butternut Squash and Zucchini. Now to find some spots for them. So having weeded out a few areas I’ve found a bit of space but I fear that this weekend there will have to be a lot of moving around going on.

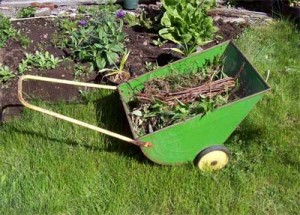
my handy Weed Wagon

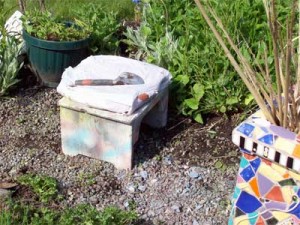
Knee saver weeding stool

You may be wondering why I have included this photo of my little green wheelbarrow. Now we’ve got a lot of wheelbarrows, we find them everywhere at garage sales and as giveaways. But this one is special. I just love this little thing. It’s got a wonderful shape and colour to it, sort of bright and friendly. It’s my favourite for weeding. It’s light and just is so easy to drag around after me as I weed. I found it, where else, garage sailing and snapped it up. And then there is the little stool, a freebie at a garage sale last summer. I’m finding it’s just right for sitting on as I weed, a real savior for my poor knees. Doesn’t take much to make me happy.

Share

The Show at Hatley Castle

You would think that with a craft show looming on the horizon that we would be responsible and get everything ready on the couple of days beforehand but no, not us.

Instead we decided to have a little party at our house to celebrate our good friend Hart’s birthday on Friday night with our usual compliment of fun loving friends and two of our sons in attendance. It was a Mexican theme with everyone bringing food and goodies with a Tex Mex flavour and even the music I found was Mexican. I love having these get togethers on a weekend night, nothing beats good conversation, laughter and good food with friends.

Then Saturday, instead of staying home and designing a new hand out card in the morning, the lure of garage sailing was just too strong to resist. One of our three sons, Dave, in his call to wish me Happy Mom’s Day late Sunday night, said he was pretty sure we are addicted to garage sailing to which I replied that it was not an addiction but our way of having fun. And we did have a wonderful morning buying plants, finding good free stuff and taking our usual ocean side coffee break in the beautiful sunshine. Lucky for us, Eric was at home while we were out galavanting preparing the sculptures and packing them up for Sunday and doing other little odd jobs like repairing our show table.

Finally by late Saturday night we did get everything done. The new card had been designed and printed just in time before Office Depot closed. The car had been packed with all the mosaics and pots and boxes of supplies. All that remained was for Hart to come over with his truck in the morning so we could load it up with table, chairs and sculptures. With me running around telling everyone to hurry because we have to get there before the end of load in time at 9, we finally were on our way. That is, until we realized about 4 blocks away that we had forgotten the tent. Now you cannot screech to a halt when you have vehicles loaded with artwork so we coasted to a stop and turned around to get the tent. Well at least we were only a few blocks from home. You may say you should have a list of things to check off. Well we do. But we’ve done shows so many times that we sort of gave it cursory attention. Actually I think we did pretty well. The only other things I forgot were plants for the mosaic pots display and that was soon solved by buying some more plants for the garden at the show. Or was that just an unconsciously cunning way for me to justify buying more plants?

A view of the Castle from the front lawn

The show itself was great. Sunny, breezy and beautiful. Lots of people stopping and signing up for classes and taking a real interest in our sculptures. Our spot was on the front lawn of Hatley Castle overlooking the ocean. We all managed to take time off from our booth duties at different times to take in the rest of the show. I even managed a guided tour of the castle with our good friend and writer, Lia, who is also a tour guide at Hatley, giving lots of little known info about the history of this now popular place for shooting movies like XMen 2 and 3. Lia has written three wonderful stories about the feline friends in her life. Watch for a special segment in our blog on these literary gems and how to get them.

Of course, I’m always on the look out for other artists who make art from recycling and I was not disappointed. I just have to share a few of my finds. Unfortunately the first two don’t have web sites yet. I loved the jewelry made by Joyce Bezusko made from bits and pieces of old jewelry she finds in thrift shops and wherever.

Joyce with her creations

Each one is different and unique and many are really playful. She has a bit of a following with some people collecting her one-of -a-kind pieces. She also sells in Hawaii, hence the name of her business Island Girl Originals. Or is that because she lives on our little island? Hmmm. You can reach her at 250-248-0637.

Bags reborn from scraps

The next was a wonderfully talented seamstress, Renee Morris, from up island in Courtney, who makes these perfect bags with big shoulder straps from scraps of great materials. Her latest designs are made from recycled men’s tweed suit jackets! Amazing bags. Her little business is called Hobo’s and you can reach her at buyhobos@yahoo.com.

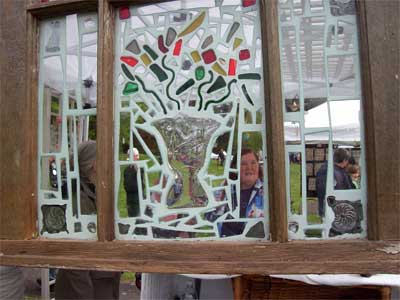
Amy's wonderful windows
Wonderful Windows

I loved Amy Houston’s booth with these awesome windows made with recycled glass and bottles and bits and pieces. She is part of a group called Two Glassy Ladies here in Victoria. I checked out their web site when we finally got home and it’s worth a visit for the blog and all the great glass beads they make.  The windows are created by Amy’s mom, Elizabeth.

The ladies of Wild Arc
The dedicated ladies at the Wild Arc booth

And I have to share with you the BC SPCA Wild Arc booth where they were selling baskets of flowers to raise money for Wild Arc. This is a great organization who takes care of wild animals injured or orphaned. You can find out more at www.wildarc.com.

Prospective students

So all in all it was a great day. I always get a kick out of the people who come into our booth and are smitten with mosaics. So many admit to saving broken dishes and wishing to make something with them. I just know I’ve met a future mosaic artist.

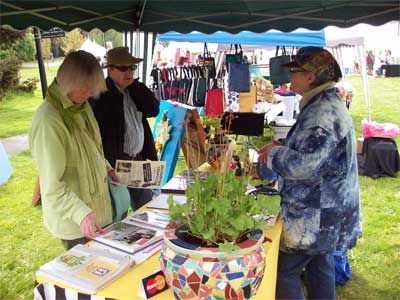
And now I really have to finish putting away all the stuff that we were too tired to do last night as we crashed with our supper in front of the TV and watched British murder mysteries. This week, I’m planning to do gardening and plant all the goodies I’ve been collecting that are waiting for a home in the garden. Where to grow it all? Ah well another little problem to get creative about.

My latest motto to live by is to have fun everyday. This last weekend, what with a birthday party, garage sailing and doing a craft show I think we managed it.

Share